How to Cook Without Burning Food: Master Simple Techniques for Perfect Results Every Time
You want to stop burning food while still cooking confidently and quickly. I’ll show simple, practical steps you can use at home so meals stay tasty instead of charred. Control heat, use the right pan, and watch your food closely to fix problems before they start.
I run this site—Emma Reed hosts the recipes and tips—and I teach easy habits that save time and cleanup. You’ll learn small changes that make big differences, from prep to the final flip, so you spend less time rescuing meals and more time eating them.
Key Takeways
- Know how to adjust heat and timing for steady, even cooking.
- Pick cookware and prep steps that reduce hot spots and sticking.
- Check food often and fix small problems early to avoid burning.
Understanding Heat Control
I explain how different heat sources behave, how to set and read temperatures, and where hot and cool spots form in pans. These details let you pick the right heat and avoid burning food.
Types of Heat Sources
I use gas, electric, and induction most often, and each heats food differently.
Gas gives quick, visible flame control. I can raise or lower heat instantly, which helps when I need a fast sear or a sudden cooldown. Flames can also heat pan sides, so watch for charring on thin cookware.
Electric coils hold heat longer after I turn them off. That lag means I lower heat earlier than I would on gas to avoid overcooking. Glass-top electric stoves spread heat unevenly with some hot spots.
Induction heats the pan directly with magnetic fields. It responds quickly like gas but stays cooler around the cooktop. Induction needs compatible cookware, usually magnetic stainless or cast iron.
Temperature Management
I set temperatures based on food type and cooking method. Use low (simmer), medium (gentle browning), and high (sear) as practical guides. Learn your stove’s behavior: what “medium” actually feels like on your range.
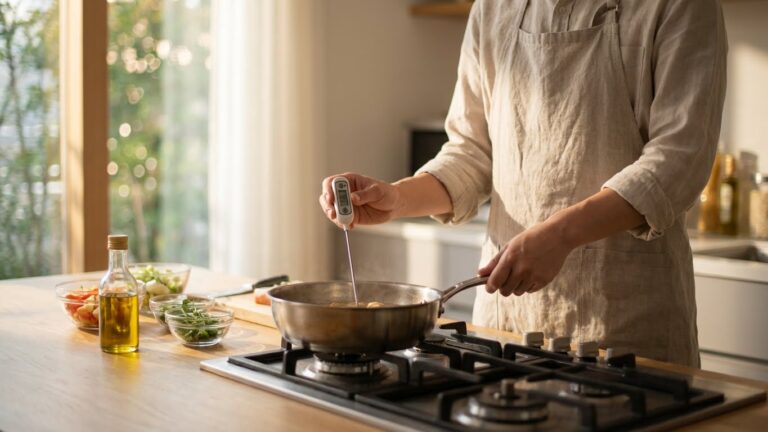
I preheat pans gently for even cooking, and I adjust heat during cooking rather than leaving it constant. I pull pans off heat a little early because residual heat keeps cooking. I use a thermometer for meats and candy; for other foods, I test a small piece to judge doneness.
Choose oils by smoke point: olive oil for low-medium, avocado or grapeseed for high heat. If oil smokes, lower the temperature or start over with a new pan.
Heat Zones in Cookware
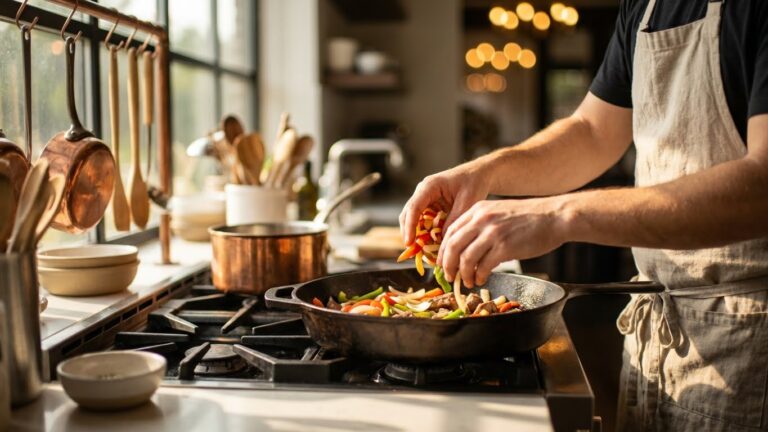
I treat a pan as having zones: center is hottest, edges are cooler. I move food between zones to control cooking speed without changing the burner. For example, I sear in the center then slide items to the edge to finish.
Pan material affects zones. Thin stainless pans get hot spots; heavy-duty stainless with a layered base or cast iron holds steady heat and spreads it more evenly. Nonstick pans heat quicker but can damage if overheated.
I tilt pans slightly or swirl oil to even heat when needed. I also rotate the pan on the burner for more uniform cooking when I notice uneven browning.
Choosing the Right Cookware
I pick cookware that matches the heat I use, the food I cook, and the time I want to spend cleaning. Good choices cut down on hot spots, stickiness, and burned meals.
Material Properties
Different metals change how food browns and how easy cleanup is. I use stainless steel for searing and sauces because it tolerates high heat and won’t react with acidic foods. I reach for cast iron for long, steady cooking; it holds heat well and creates even browning, though it takes longer to heat up. Nonstick pans work best for eggs and delicate fish at medium-low heat to avoid burning and sticking.
Copper heats very fast and offers precise temperature control, so I use it when I need quick changes. Carbon steel behaves like cast iron but is lighter and reaches high heat faster, useful for stir-fries. For guidance on safe cookware choices and reactions, I consult resources like the FDA and Cook’s Illustrated for tested advice.
Thickness and Conductivity
I judge a pan by how evenly it spreads heat. Thin pans heat quickly but develop hot spots that burn food. Thicker bases—multi-clad stainless or heavy-gauge aluminum—distribute heat across the surface, so food cooks uniformly. Look for terms like “fully clad” or “tri-ply” when shopping; those indicate layered metal construction that balances heat speed and evenness.
If you cook on gas, choose pans with good lateral conductivity so flames don’t over-concentrate heat. For electric or induction, flat bottoms and magnetic stainless or cast iron work best. A heavier pan also resists temperature swings when you add cold ingredients, which helps prevent burning during high-heat sears or deglazing.
Cookware Maintenance
Proper care keeps pans performing and prevents burning from residue or damage. I season cast iron and carbon steel and avoid soap when possible; this builds a natural nonstick layer. For stainless steel, I clean at moderate heat and deglaze with wine or stock to lift stuck bits without scrubbing hard or using metal scours that scratch the surface.
Nonstick pans need lower heat and silicone or wooden tools to protect the coating. Replace nonstick pans when the coating flakes or shows deep scratches. For more tips on safe cleaning and care, I sometimes check manufacturer guides or reliable kitchens sites like America’s Test Kitchen.
Monitoring Food While Cooking

I watch food closely and use simple cues to stop burning. I check color, timing, smell, and sound so I can adjust heat, stir, or move items before they scorch.
Visual Cues for Doneness
I look for color changes as the main sign of progress. For browned items, I wait until edges turn golden and bubbles slow. With meats, I watch juices—clear juices usually mean the surface is done; pink juices mean it needs more time.
I also pay attention to texture. Vegetables should be bright and slightly tender, not shriveled. Sauces will thicken and cling to a spoon when they are reduced enough.
I move food between hotter and cooler zones on the pan or oven rack. If one side darkens too fast, I lower the heat or shift the pan to finish cooking evenly.
Using Timers Effectively
I set a timer for expected cook times, then check early. Timers help prevent forgetting food, but I never rely on them alone.
I use short checks: set a timer for two-thirds of the suggested time, then inspect. For multi-item dishes, I stagger timers for each component so nothing waits too long on the stove.
For tasks like baking or simmering, I pair a timer with visual checks. That way I catch gradual changes—like browning or bubbling—before burning starts.
Smell and Sound Indicators
I use smell as an early warning. A toasted or nutty aroma is fine, but a sharp, acrid smell means burning. I stop cooking and lower the heat if the smell turns harsh.
Sound tells me about moisture and oil. Loud sizzling at very high heat signals risk of burning. Gentle, steady bubbling means simmering and safer cooking.
I pause when sounds or smells change suddenly. Small adjustments—stirring, adding a splash of liquid, or lowering heat—usually prevents further damage.
Proper Ingredient Preparation
I focus on three key practices that cut cooking mistakes: make pieces the same size, remove extra moisture, and heat pans correctly. These steps help food cook evenly, prevent sticking, and cut down on burning.
Even Sizing and Cutting
I cut ingredients to uniform sizes so they cook at the same rate. For example, I slice chicken breasts into 1/2-inch strips or dice potatoes into 3/4-inch cubes. This avoids small pieces overcooking while large ones stay raw.
When I need quick cooking, I choose thinner, smaller pieces. For slow roasting or braising, I cut larger, consistent chunks. I use a sharp knife and steady cuts to keep edges clean; dull knives tear and cause uneven surfaces that brown faster.
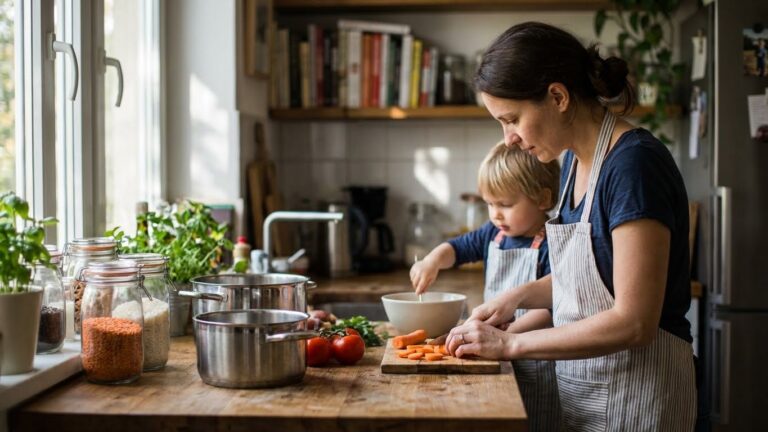
I group similar items together on the cutting board. Vegetables that release water, like zucchini, go in one pile. Denser items, like carrots, go in another. That way I add them to the pan at the right time.
Drying Ingredients Before Cooking
I pat proteins and vegetables dry with paper towels before they hit the hot pan. Surface moisture creates steam and prevents a proper sear, which leads to soggy, uneven browning and can make food stick and burn.
For leafy greens or washed herbs, I use a salad spinner or a clean towel to remove water. With marinated foods, I blot excess marinade if it would cause flare-ups in a hot pan or on the grill. I reserve thick marinades for finishing rather than initial searing.
When using flour or cornstarch coatings, I shake off the extra. A light, even dusting crisps better and lowers the risk of burning where clumps sit directly on the pan.
Preheating for Best Results
I always preheat my pan and oven to the right temperature before adding food. For stovetop searing, I heat the pan until a drop of water sizzles and evaporates quickly. That tells me the surface is hot enough for a good crust.
I match oil choice to heat level: use oils with high smoke points (like avocado or canola) for high-heat searing, and butter or olive oil for medium heat. I add oil after the pan is hot to reduce sticking and uneven browning.
For baked dishes, I preheat the oven and let the rack sit in the correct position. I avoid opening the oven door during initial cooking to keep temperature steady and prevent undercooked centers that force longer cooking and risk burning exteriors.
Techniques to Prevent Burning

I focus on three practical actions that cut burning risks: keep food moving, control how ingredients sit in the pan, and trap or release steam as needed. These techniques work together to give you more control over heat and timing.
Stirring and Flipping Methods
I stir or flip food to move it away from hot spots and stop browning from becoming burning. For thin items like diced vegetables or ground meat, I stir every 30–60 seconds at medium heat so each piece sees heat briefly. For thicker items, like chicken breasts or fish fillets, I flip once after a solid crust forms; frequent flipping can prevent a good sear but helps avoid black edges.
I use utensils that reach the pan bottom—silicone or metal spatulas—and push food from the very center to the edges. For stir-fries, I toss the pan or use a spoon to lift and fold ingredients so oil coats surfaces evenly. When cooking rice or custard, I scrape the bottom gently with a heatproof spatula to stop sticking.
Layering Ingredients
I layer ingredients by cooking items with longer times first and adding quicker-cooking ingredients later. For example, I start onions and carrots, let them soften, then add garlic and herbs during the last few minutes to prevent burning the delicate items. This method keeps small bits from overcooking while bigger pieces finish.
I also use ingredient order to protect sensitive foods: add liquids or tomatoes early to lower pan temperature, or add butter near the end so it doesn’t brown too fast. When using a pan with uneven heat, I arrange thicker pieces toward the hotter side and thin pieces on the cooler side, then rotate as needed.
Using Lids and Covers
I use lids to trap steam and cook food through without high direct heat. For simmering sauces, placing a lid on lowers the pan temperature and reduces evaporation, preventing scorch. For browning, I remove the lid to let moisture escape and get a crisp surface; then I may cover briefly to finish cooking inside.
I also use foil or splatter screens for shallow pans to control airflow while avoiding too-tight covers that cause sogginess. When baking, I tent a pan with foil partway through if edges brown too fast. For stovetop meals, a tight-fitting lid works well when cooking tougher cuts at low heat—see USDA guidance on safe internal temperatures for meats at https://www.fsis.usda.gov for proper doneness.
Adapting Recipes and Methods
I focus on small, practical changes that stop burning and keep food tasting right. I show how to time steps, lower heat, and tweak ingredients so meals finish evenly.
Adjusting Cooking Times
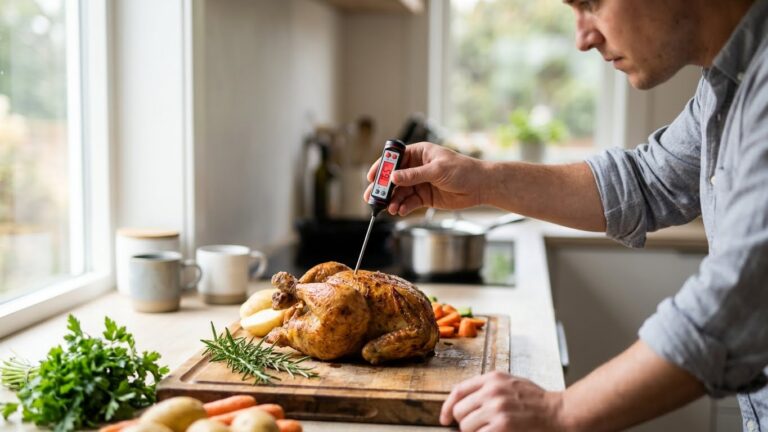
I cut cooking times by checking internal doneness, not just the clock. For meats I use a thermometer: 145–165°F for most cuts, lower for seafood. For vegetables I test with a fork and watch color — bright and just-tender means done.
I lower stove heat when pans get too hot. If a pan smokes within 30 seconds of oil, I drop the flame one notch and stir more often. When baking, I check 5–10 minutes early and rotate pans halfway through to avoid hot spots.
I use timers for each step and set a second alert 1–2 minutes before expected finish time. That gives me time to check and react. For multi-step recipes, I prep mise en place so nothing sits and burns while I search for an ingredient.
Modifying Recipes for Your Stove
I match recipes to my stove’s heat range. Gas gives quick, visible flame control; I cut listed heat by one level. Electric coils run hotter and slower, so I lower temperature by 25°F or shorten active cooking time and stir more.
I adapt pan sizes: use a wider pan for fast evaporation and a smaller one for slow simmering. I add a splash of liquid—broth, water, or wine—when things brown too fast to slow heat transfer without diluting flavor. I also swap oils: choose high-smoke-point oils (canola, avocado) for high heat and butter for low-heat finishing.
If my burner has uneven spots, I rotate pans every few minutes. For recipes calling for open flame, I use a diffuser or heavy-bottom pan to spread heat and prevent hot spots.
Troubleshooting Common Issues

I focus on practical fixes you can use right away. The next parts show how to spot uneven heat and how to save food that’s starting to overcook.
Identifying Hot Spots
I test pans for hot spots by heating the pan, adding a few drops of water, and watching where they sizzle and dance. If one area boils away first, that spot runs hotter. I also run a bread or tortilla test: light browning in some places and not others tells me the heat is uneven.
To fix hot spots I rotate the pan often and move food around while cooking. I lower the flame and let the pan heat more slowly to spread heat. For ovens, I mark hot zones with a rack of sliced potatoes; darker slices show hotter areas, so I rearrange racks or use an oven thermometer to set a correct temperature.
Tools help: a heavy-bottomed pan, heat-diffusing disk, or a cast-iron skillet reduces hot spots. I avoid very thin pans for long cooks and preheat at medium rather than high heat.
Rescuing Overcooked Food
If the outside is burned but the inside is okay, I trim and serve the good parts. For burned pans, I transfer food immediately to a clean pan or plate to stop the cooking and prevent bitter flavor transfer.
For sauces or soups that taste slightly scorched, I skim off any burnt bits and move the liquid to a new pot. I add a peeled potato or a slice of bread to absorb a bit of burnt taste, then remove them after a few minutes. A splash of acid (vinegar or lemon) or a small amount of sugar can help balance mild burnt notes.
When meat is dry, I slice thin and reheat briefly with a sauce or broth to add moisture. For vegetables that are overcooked but not charred, I toss them with a bright dressing or sauté quickly in butter to restore some texture.
Developing Cooking Intuition
I focus on how timing, heat control, and quick fixes keep food from burning. I show simple habits that help you read a pan, trust your senses, and learn fast from errors.
Practicing Patience
I slow down the cooking when a pan gets hot too fast. I preheat pans on medium instead of high and wait 1–2 minutes before adding oil. This lets the pan heat evenly and reduces hotspots that burn food.
I watch how oil shimmers and how ingredients sizzle. A gentle, steady sizzle means the heat is right. If oil smokes or food browns too quickly, I lower the heat immediately and move items to a cooler part of the pan.
I use timers and count quietly when I need exactness, like 30–45 seconds per side for thin cuts. I also give thicker pieces more time on lower heat. Patience helps me flip fewer times and prevents torn or charred food.
Learning from Mistakes
I treat burnt food as data, not failure. When something blackens, I note the pan type, heat level, oil used, and how long it was left unattended. I record quick fixes that worked, such as deglazing with stock or lowering heat and stirring.
I practice controlled retries: I cook the same dish again but change one variable. For example, I keep the same oil and recipe but drop the stove setting by one notch. This shows me which change prevented burning.
I also build a small checklist for problem spots: preheat time, oil choice, watch points (edges, sugar, garlic), and when to stir. Checking that list before I start saves time and keeps food from burning.
FAQs
I get asked which heat setting works best to avoid burning.
I usually start on medium and adjust as needed. Low works for slow cooking and sauces, while medium-high suits quick sears. Watch and nudge the heat; stovetops vary.
How do I tell when a pan is too hot?
A drop of water should sizzle gently, not vanish in a flash. If oil smokes, the pan is too hot and can burn food fast. I cool it slightly before adding ingredients.
What if food sticks or browns too quickly?
I add a small amount of liquid or lower the heat to stop immediate browning. A nonstick pan or a well-seasoned cast-iron skillet helps prevent sticking for many dishes.
Can I save slightly burned food?
I remove the unburned portion and deglaze the pan with water, stock, or wine to lift browned bits. Strong burnt flavors sometimes remain, so taste carefully before serving.
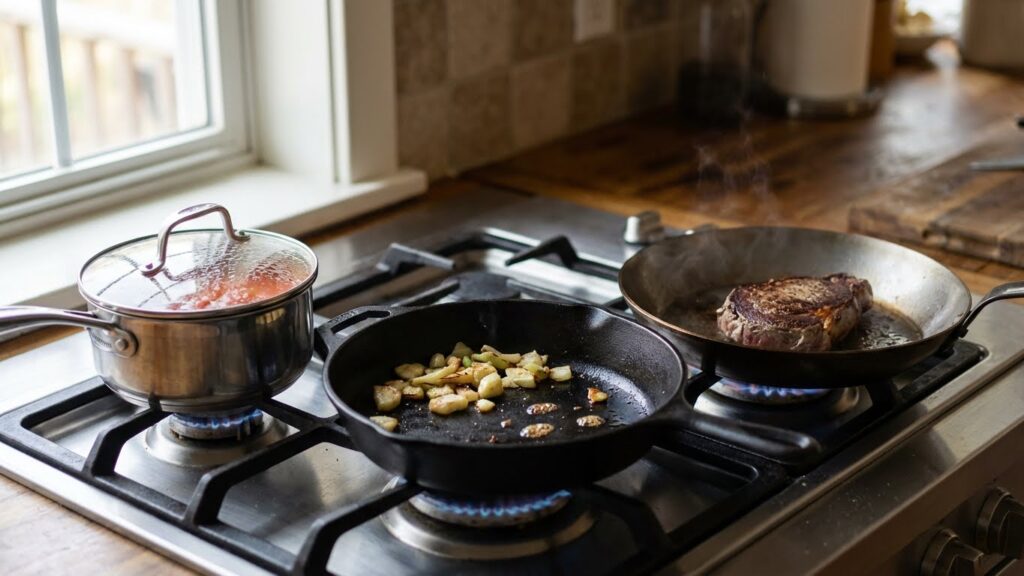
How many burners should I run at once?
I use only as many burners as I can manage safely—usually two to three. Juggling too many pans raises the chance of overheating and burning.
Do tools help prevent burning?
Yes. A good spatula, lid, and heat diffuser make control easier. I also set timers and stay nearby when cooking; most burns happen when food is left unattended.
Conclusion
I used simple steps and steady habits to keep food from burning. Small changes—like controlling heat, choosing the right pan, and staying present—make cooking easier and safer.
I prefer low to medium heat for most dishes. High heat works for quick sears, but I watch closely and move food or lower the flame when needed.
I rely on timers, good tools, and proper prep. A heavy-bottomed pan, a lid, and oil at the right temperature cut mistakes and help me cook evenly.
If something scorches, I stop cooking and assess quickly. I often deglaze the pan or remove the unburnt portions to salvage the dish.
Practice builds confidence. I keep recipes simple at first, learn how my stove behaves, and add complexity over time.
Tips I use:
- Adjust heat rather than rush cooking.
- Stir or flip on a schedule for even browning.
- Preheat pans, but don’t overheat them.
I want you to feel calm while cooking. Use these habits, and you will waste less food and enjoy better results.