Fix Your Rice Cooker Not Turning On Fast Simple Solutions
Is your rice cooker not turning on? This guide walks you through fast, simple solutions to diagnose and fix the problem. You’ll learn basic troubleshooting steps, safety precautions, and when to call a professional. Get your rice cooker working again in no time.
Key Takeaways
- Safety first: Always unplug your rice cooker before any inspection or repair attempts to prevent electric shock.
- Check the basics: Test your power outlet and inspect the cord for visible damage before assuming major component failure.
- Thermal fuse failure: This is the most common cause of rice cookers not turning on and is often easily replaceable.
- Know your limits: Some repairs require professional tools and expertise—don’t risk your safety for complex electrical issues.
- Preventive care: Regular cleaning and proper usage can extend your rice cooker’s life and prevent many common problems.
- Warranty matters: Check your warranty status before attempting any repairs to avoid voiding coverage.
Introduction: Don’t Panic When Your Rice Cooker Won’t Turn On
You’re ready to make dinner, press the button on your rice cooker, and nothing happens. No lights, no sounds, no cooking. When your rice cooker not turning on becomes a reality, it’s frustrating but rarely a death sentence for your appliance. Most issues are simple fixes you can handle yourself with basic tools and safety precautions.
This comprehensive guide will walk you through every step to diagnose and repair your rice cooker. We’ll start with the easiest checks and work through more complex solutions. By the end, you’ll know exactly what to do when your rice cooker won’t turn on. You’ll also learn preventive tips to keep it running smoothly for years. Let’s get your kitchen helper back in action.
Safety First: Critical Precautions Before You Begin
Before we dive into any troubleshooting, we must address safety. Electricity and water are a dangerous combination. Your rice cooker is an electrical appliance that heats water and food. This means you need to be extremely careful.

Visual guide about Fix Your Rice Cooker Not Turning On Fast Simple Solutions
Image source: sushiandrice.com
Unplug Everything Immediately
Never inspect or repair a rice cooker while it’s plugged in. Pull the plug from the wall outlet before you do anything else. This simple step prevents electric shock and protects you from serious injury.
Let the Appliance Cool Down
If your rice cooker was recently in use, give it at least 30 minutes to cool completely. The heating element stays hot long after cooking finishes. Touching hot components can cause burns.
Work in a Dry Environment
Make sure your hands are dry. Work on a dry surface. Keep any liquids away from your troubleshooting area. Moisture increases the risk of electric shock dramatically.
Gather Proper Tools
You’ll need a few basic tools: a multimeter (essential for testing components), a screwdriver set, and a well-lit workspace. Using the right tools makes the job safer and easier.
Quick Initial Checks: Start Here
Many rice cooker problems have simple causes. Don’t skip these basic checks—they solve most issues without any disassembly.

Visual guide about Fix Your Rice Cooker Not Turning On Fast Simple Solutions
Image source: i.ytimg.com
Test Your Power Outlet
Your rice cooker might be fine, but the outlet could be dead. Plug in another appliance like a lamp or phone charger to verify the outlet works. If it doesn’t, check your circuit breaker or try a different outlet.
Some outlets have built-in GFCI protection that trips. Press the “reset” button if you see one. Also, check if the outlet has a wall switch that might be turned off.
Inspect the Power Cord
Look closely at the entire power cord. Check for fraying, cuts, or kinks. These can break the internal wires and stop power flow. Gently bend the cord while watching for any intermittent connection.
Also examine the plug. Are the prongs bent or damaged? A damaged plug won’t make proper contact with the outlet.
Check the Rice Cooker’s Power Switch
Some models have a separate power switch on the back or side. Make sure it’s in the “on” position. These switches can get bumped and turned off accidentally.
Listen for a click when you toggle the switch. No click might mean the switch itself is faulty.
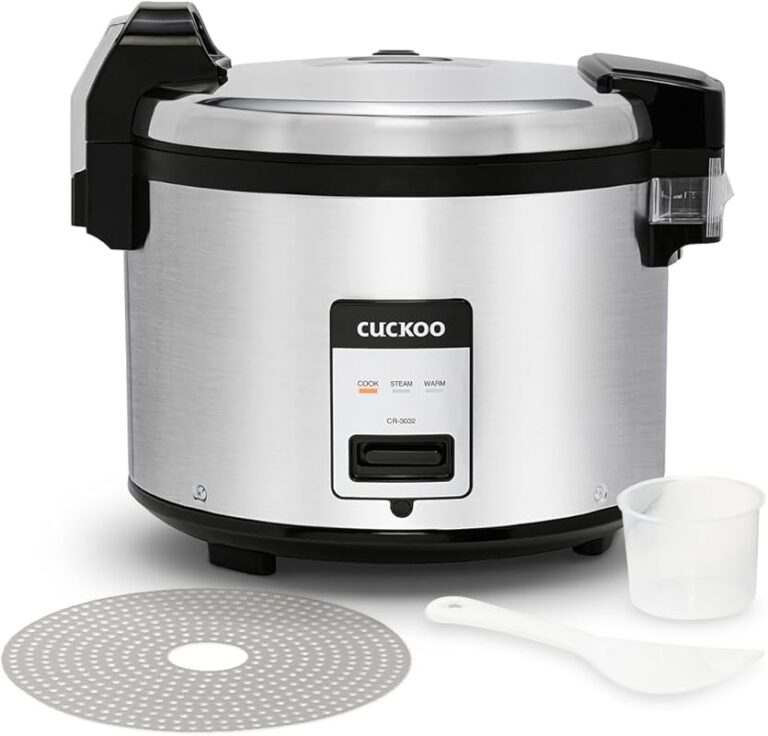
Understanding Your Rice Cooker’s Basic Components
To fix your rice cooker not turning on, you need to understand what makes it work. Rice cookers are simpler than most appliances, with fewer parts that can fail.

Visual guide about Fix Your Rice Cooker Not Turning On Fast Simple Solutions
Image source: ricearray.org
The Thermal Fuse: Your Cooker’s Safety Net
The thermal fuse is a small component that protects against overheating. When it fails, your rice cooker won’t turn on at all. It’s usually located near the heating plate. This is the most common failure point in rice cookers.
Thermal fuses are single-use. Once they blow, they must be replaced. They typically cost just a few dollars and are easy to install.
The Heating Element: The Heart of the Cooker
This metal coil or plate heats the cooking bowl. If it fails, your cooker might not heat properly, but it usually still turns on. Complete failure is less common than people think.
The heating element is usually visible when you remove the inner cooking bowl. Look for breaks or blisters in the metal surface.
The Control Panel: Your Command Center
Modern rice cookers have electronic control panels with buttons and lights. Older models use simple mechanical switches. A faulty control panel can prevent your rice cooker from turning on.
Look for visible damage like cracked circuit boards or burned components. These are harder to fix yourself.
Step-by-Step Troubleshooting: Fix Your Rice Cooker Not Turning On
Now we’ll work through specific tests to identify the exact problem. Follow these steps in order for the best results.
Step 1: Remove the Inner Cooking Bowl
Take out the removable inner bowl. Most rice cookers have a simple lift-out design. This gives you access to the heating plate and other components underneath.
Check the bowl for any visible damage. A warped bowl can cause improper contact with the heating element. Also, clean any rice debris from the bottom of the bowl and the heating plate.
Step 2: Locate and Test the Thermal Fuse
The thermal fuse is your prime suspect when a rice cooker won’t turn on. It’s usually a small cylindrical component about one inch long. You’ll find it mounted near the heating element.
To test it, you need a multimeter. Set it to continuity mode. Touch the probes to each end of the thermal fuse. If the multimeter shows no continuity (or infinite resistance), the fuse is blown and needs replacement.
Replacement is straightforward. Unscrew the old fuse, note how it’s wired, and install the new one with the same connections. Make sure to get the exact same temperature rating.
Step 3: Check the Thermostat
The thermostat regulates temperature during cooking. A stuck or failed thermostat can prevent the cooker from turning on. It’s usually a small disc-shaped component near the thermal fuse.
Test the thermostat with your multimeter in continuity mode. Heat the thermostat gently with a hairdryer while testing. It should show continuity when cold and open when hot. If it doesn’t change, replace it.
Step 4: Inspect the Heating Element
Look at the heating element for visible damage. Cracks, blisters, or breaks mean it’s failed. You can also test it with a multimeter.
Set your multimeter to ohms. Touch the probes to the element’s terminals. You should see a reading between 20-50 ohms. No reading means the element is broken and needs replacement.
Replacing a heating element is more involved. You’ll need to disassemble the cooker base. Take photos of each step and keep track of all screws.
Step 5: Test the Power Switch and Buttons
If your rice cooker has a mechanical switch, test it with your multimeter. Remove the switch from the circuit and check for continuity when pressed.
For electronic buttons, you might see visible damage on the circuit board. Look for burn marks, swollen capacitors, or broken traces. These are harder to repair without soldering skills.
Step 6: Examine the Circuit Board
Advanced rice cookers have complex circuit boards. Look for obvious signs of damage: burned components, melted plastic, or corrosion from spilled liquids.
If you see damage, the board likely needs replacement. This is often as expensive as buying a new rice cooker. Consider the cost before proceeding.
Advanced Testing for Persistent Problems
If you’ve completed the basic steps and your rice cooker still won’t turn on, you need more advanced diagnostics.
Testing Internal Wiring
Sometimes internal wires break, especially near hinges or moving parts. Remove the bottom cover of your rice cooker to access the wiring.
Look for loose connections, burned wires, or broken strands. Use your multimeter to test continuity through each wire. Pay special attention to wires that flex during use.
Checking the Motor (For Mechanical Models)
Older rice cookers use a small motor to switch between cook and warm modes. If the motor fails, the cooker might not turn on properly.
Test the motor with your multimeter. You should see low resistance (a few ohms). If it reads infinite, the motor is dead and must be replaced.
Verifying the Timer Mechanism
If your rice cooker has a delay timer, a faulty timer can prevent normal operation. Try bypassing the timer by setting it to immediate cooking.
If the cooker works with the timer bypassed, you’ve found the problem. Timer replacement is straightforward on most models—just match the part number.
When to Call a Professional Repair Service
Not all repairs are DIY-friendly. Know when to seek professional help to avoid injury or further damage.
Complex Circuit Board Issues
If your multimeter shows power reaching the circuit board but the cooker still won’t turn on, you likely have a complex electronic failure. Professional repair might cost $50-100, often close to a new cooker’s price.
Consider the age of your appliance. If it’s more than 5 years old, replacement is usually more economical than repair.
Major Component Replacement
Replacing the main heating element or control panel requires significant disassembly. If you’re not comfortable with electrical work, don’t attempt these repairs.
A professional technician has the tools and expertise to complete these jobs safely. They can also spot related issues you might miss.
Warranty Coverage
Check if your rice cooker is still under warranty. Most manufacturers void warranties if you attempt repairs yourself. Contact the manufacturer first for warranty service.
Even if the warranty has expired, the manufacturer might offer low-cost repair services or replacement advice.
Preventive Maintenance: Keep Your Rice Cooker Running
Regular care prevents most problems that cause rice cookers to stop working. A few simple habits can extend your appliance’s life for years.
Clean After Every Use
Always wash the removable cooking bowl after use. Food debris stuck to the heating plate can cause overheating and trigger the thermal fuse.
Wipe the heating plate gently with a damp cloth. Never use abrasive cleaners that could damage the non-stick coating. Let everything dry completely before reassembly.
Proper Rice Measurement
Using too much rice can cause overflow and electrical issues. Always follow the manufacturer’s guidelines for maximum capacity.
Different rice types cook differently. Brown rice and wild rice expand more than white rice. Overfilling with these types is a common mistake. Learn more about different rice varieties and their cooking requirements to avoid overfilling your cooker.
Store Correctly
Don’t store your rice cooker with the lid closed. Leave it slightly open to prevent moisture buildup and mold growth. Store it in a dry cabinet away from direct heat sources.
Wrap the power cord loosely. Tight wrapping can damage internal wires over time. Use the cord storage feature if your model has one.
Regular Inspection
Every month, inspect your power cord and plug for damage. Look at the heating plate for buildup. Check that all buttons and switches work smoothly.
Catching small issues early prevents major failures. If you notice anything unusual, address it immediately rather than waiting for complete failure.
Use Your Rice Cooker Properly
Always add water before turning on the cooker. Running a dry rice cooker can damage the heating element and trigger safety features.
Follow the correct rice-to-water ratios. Too little water causes burning and overheating. Too much water creates overflow. Mastering perfect rice cooking prevents these issues. Check our guide on how to cook rice perfectly every time to ensure you’re using your appliance correctly.
Conclusion: Your Rice Cooker Can Be Saved
When your rice cooker not turning on becomes a problem, don’t rush to replace it. Most issues are simple and inexpensive to fix. Start with safety, work through the basic checks, and use your multimeter to test components systematically.
Remember that the thermal fuse is the most common culprit. It’s a cheap part that’s easy to replace. Even if you need professional help, you now know what to look for and how to communicate the problem clearly.
With proper maintenance, your rice cooker can last 5-10 years or more. Regular cleaning, correct measurements, and careful storage prevent most problems. You’ve learned not just to fix today’s issue, but to prevent tomorrow’s.
Now you’re ready to tackle any rice cooker problem with confidence. Your perfectly cooked rice is just a repair away.