How to Cook Soft and Juicy Chicken: Proven Techniques for Tender, Flavorful Results
You want chicken that stays soft and juicy every time, and I’ll show you how to do it. I’m Emma Reed, and I’ve tested simple tricks that work in home kitchens. Brining or marinating, even heat, and precise timing are the main things that keep chicken moist and tender.
I’ll walk you through easy prep steps, the best cooking methods, and how to check temperature so you avoid dry meat. We’ll also cover quick flavor tips and how to rest and store leftovers so your chicken stays delicious.
Key Takeaways
- Use a short brine or marinade and even thickness to lock in moisture.
- Cook with steady, appropriate heat and use a thermometer to avoid overcooking.
- Rest before slicing and cool properly for better juiciness and safe storage.
Essential Ingredients for Soft and Juicy Chicken
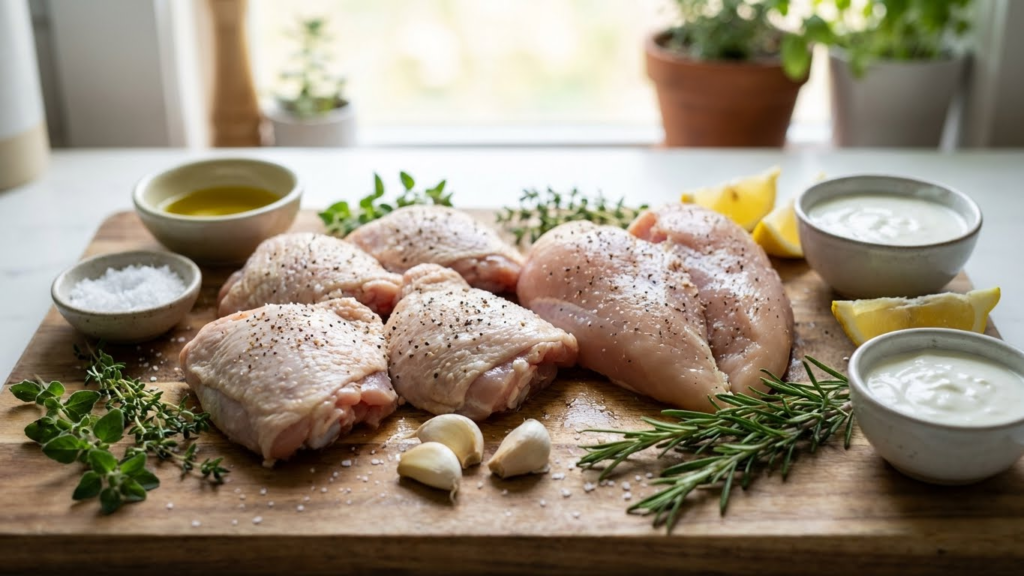
I focus on three things that change texture and flavor: pick a tender cut, use a wet marinade with salt and acid, and season with a balance of aromatics and heat. These choices control moisture, tenderness, and taste.
Choosing the Right Cut
I usually pick thighs or bone-in breasts when I want guaranteed juiciness. Thighs have more fat and connective tissue, which keeps meat moist during higher-heat cooking. Bone-in breasts hold moisture longer than thin, boneless breasts.
If I use boneless, skinless breasts, I pound them to an even thickness and brine or poach them to avoid drying out. For fast cooking, I slice breasts into cutlets so they cook quickly and evenly. For slow methods, bone-in pieces give better results.
I avoid very lean, thin cuts for recipes that require long cooking. Instead, I match the cut to the method: thighs or bone-in for roasting and grilling, pounded cutlets for pan-searing, and whole breasts for poaching.
Marinade Components
I always include three core elements in marinades: salt (or brine), an acid, and oil. Salt pulls water and then helps the meat hold onto it; I often use a simple brine of 4% salt by weight in water for 30–90 minutes. For quick marinades, I combine 1–2 teaspoons kosher salt per pound with other ingredients.
Acid (vinegar, lemon, or yogurt) tenderizes by loosening proteins, but I keep acid levels low for long marinades. I use citrus or yogurt for 30–60 minutes; for overnight, I prefer oil-based or salt-forward marinades. Oil carries fat-soluble flavors and helps heat transfer.
I add aromatics like garlic, ginger, or soy sauce for flavor depth. For Asian-style velveting, I add a tablespoon of cornstarch and a splash of rice wine to create a silky texture when cooked.
Recommended Seasonings
I build flavor with three layers: salt baseline, a primary herb or spice, and a finishing element. I start with kosher salt for consistent seasoning; use about 1 teaspoon per pound as a baseline, adjusting to taste.
For herbs and spices, I choose rosemary, thyme, paprika, cumin, or coriander depending on cuisine. Paprika and cayenne add color and mild heat; thyme and rosemary add savory notes. I rub spices directly on skin or meat 15–30 minutes before cooking.
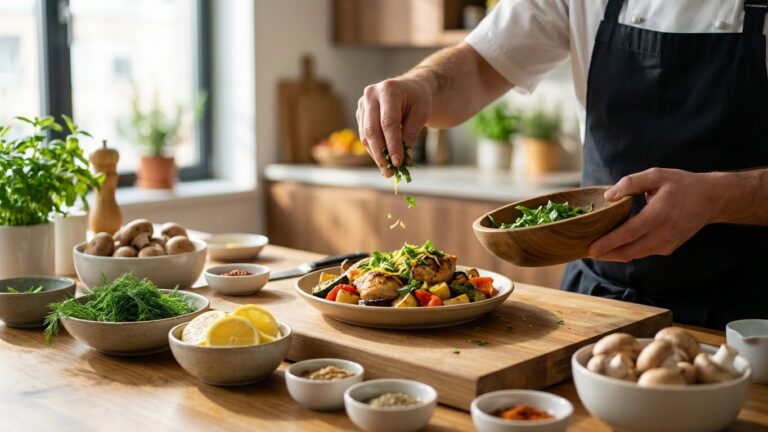
For finishing, I use acidic brighteners like lemon juice or a splash of vinegar, and fresh herbs chopped right before serving. A small pat of butter or a drizzle of olive oil right after cooking boosts mouthfeel and perceived juiciness.
Best Preparation Techniques
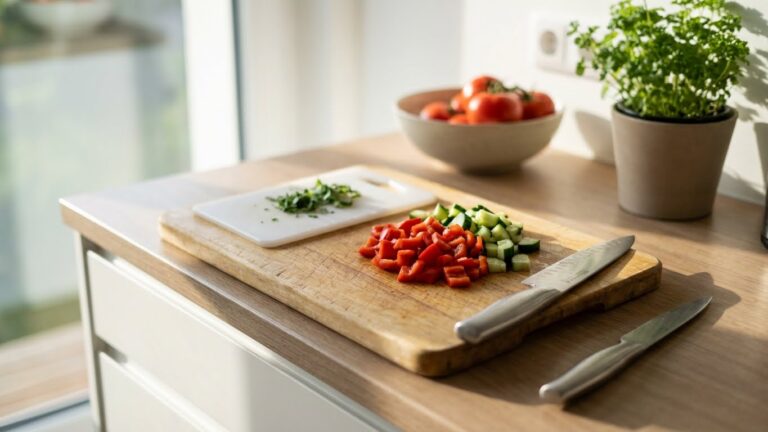
I focus on simple, proven steps that remove unwanted bits, loosen fibers, and let flavors soak in. These steps save time and help the chicken stay moist during cooking.
Proper Chicken Cleaning
I start by working on a clean surface and washing my hands before and after handling raw chicken. I do not rinse chicken under running water because that spreads bacteria; instead I pat each piece dry with paper towels to remove excess moisture that prevents proper browning.
I trim excess fat and remove visible cartilage or silver skin with a sharp knife. For whole birds, I check the cavity for giblets and remove them. I place trimmed pieces on a plate lined with paper towels and discard the towels right away to avoid cross-contamination.
I sanitize all surfaces and tools after prep. I use hot soapy water or a dishwasher for utensils and a bleach solution or commercial sanitizer for cutting boards. This keeps my kitchen safe and prevents flavors from being ruined by old residues.
Effective Tenderizing Methods
I choose mechanical, chemical, or slow-cooking methods depending on the cut and recipe. For breasts, I pound them to an even thickness with a flat side of a meat mallet or a heavy pan; this shortens cook time and prevents dry edges.
For chemical tenderizing, I brine or use an enzyme-based tenderizer. A simple brine is 4 cups water + 3 tablespoons salt + 2 tablespoons sugar; I soak breasts 30–60 minutes and thighs 1–2 hours. Enzymes like papaya or pineapple work fast but I use them briefly (15–30 minutes) to avoid mushy texture.
For dark meat or whole birds, I use low-and-slow methods like braising or slow roasting at 275–300°F. This breaks down collagen and keeps meat juicy. I monitor internal temperature with a probe to stop cooking as soon as the meat is done.
Optimal Marinade Times
I tailor marinade time to cut thickness, acid level, and ingredients. For thin chicken breasts, 20–40 minutes gives flavor without toughening from acid. For bone-in breasts and thighs, I marinate 2–6 hours for deeper flavor.
I avoid long marinades with high-acid ingredients (vinegar, lemon) for more than 6 hours because acids can firm proteins and create a mealy texture. For yogurt- or buttermilk-based marinades, I go longer; 4–12 hours is safe and adds tenderness.
I always refrigerate chicken while marinating in a covered container. I discard used marinade or boil it for several minutes before using as a sauce to kill bacteria.
Cooking Methods for Tender Chicken
I focus on simple techniques that keep chicken juicy and soft: correct temperature, even thickness, and minimal cooking time. Each method below shows exact steps, timing, and small tricks I use to get consistent results.
Baking for Moisture Retention
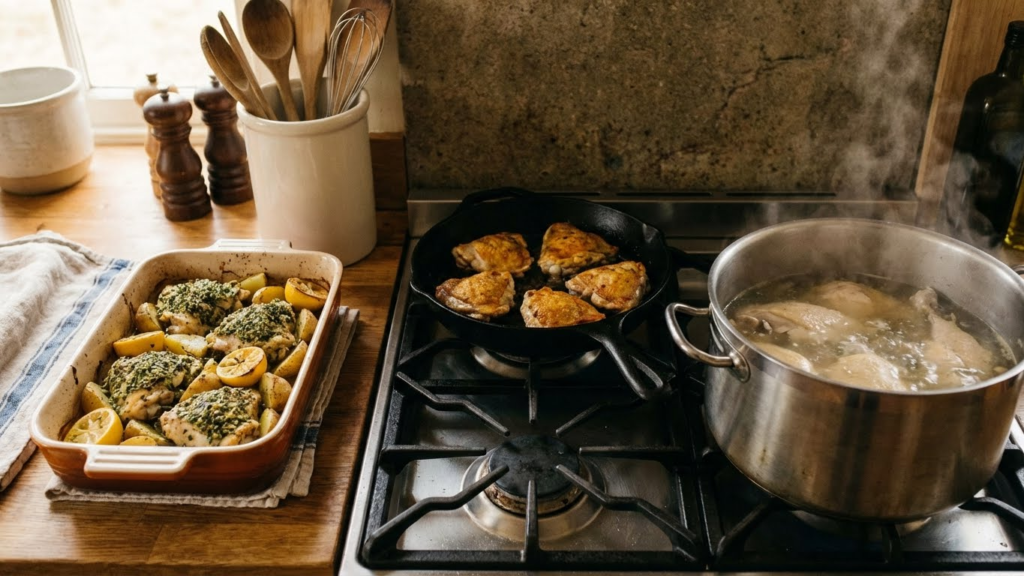
Baking at a moderate temperature helps the meat cook evenly without drying. I set the oven to 325–375°F (160–190°C). For boneless breasts, I bake at 350°F for about 18–22 minutes depending on thickness. Use a meat thermometer and remove chicken at 160°F, then rest 5–10 minutes; the carryover heat brings it to safe 165°F.
I season and add a light oil or butter to the surface to lock moisture. I also bake in a shallow dish with a splash of stock, lemon juice, or a pat of butter for extra juiciness. For even cooking, I pound thicker pieces to ¾-inch or slice them into cutlets.
Tips I follow: line the pan with foil for easy cleanup, tent with foil if the top browns too fast, and use bone-in pieces for longer bake times because bones add flavor and help retain moisture. For reference on safe temperatures and food handling, I often check USDA guidance.
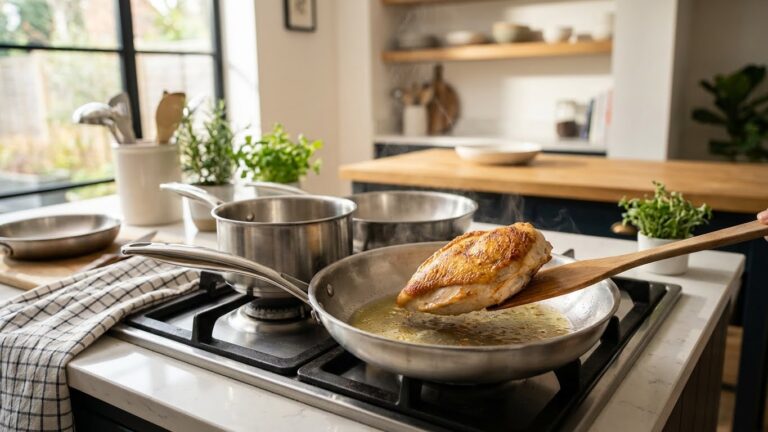
Pan Searing for Juiciness
Pan searing gives a quick, high-heat crust while keeping the inside tender. I heat a heavy skillet over medium-high heat until hot, then add a thin film of oil with a high smoke point (like avocado or canola). Sear boneless breasts or thighs for 2–4 minutes per side until golden, then lower heat and finish cooking for another 3–6 minutes, depending on thickness.
I use an instant-read thermometer to avoid overcooking; aim to pull the chicken at 160°F and let it rest. A quick baste with butter and aromatics (garlic, thyme) during the last minute adds flavor and helps the surface stay moist. If pieces are uneven, I pound them or slice them thin first for uniform cooking.
For extra control, I sometimes sear both sides then finish in a 375°F oven for 6–10 minutes. Serious cooks can find technique notes and timings at reliable sites like America’s Test Kitchen or Serious Eats.
Poaching for Soft Texture
Poaching cooks chicken gently in liquid for very soft, tender meat. I bring a pot of water, broth, or a mix with aromatics (onion, carrot, peppercorns, bay leaf) to a simmer — not a rolling boil. I add chicken breasts or thighs, keep the surface bubbling gently, and simmer until internal temperature reaches 160–165°F, usually 12–18 minutes for breasts.
I use low-sodium broth for more flavor and strain and cool the poaching liquid to use as a base for soups or sauces. Poached chicken stays moist and shreds easily, making it ideal for salads, tacos, or chicken salad.
To keep pieces tender, I avoid overcooking and remove them as soon as they reach temperature. For technique tips and poaching ratios, I consult cooking sources like USDA food safety pages and trusted culinary guides.
Ensuring Accurate Cooking Temperatures
I focus on using the right tools and exact temperatures to keep chicken juicy and safe. The details below show how I check doneness and which numbers I trust for different cuts.
Using a Meat Thermometer
I use a digital instant-read thermometer for fast, reliable readings. I insert the probe into the thickest part of the meat, avoiding bone and fat, because bones run hotter and give false highs.
For whole birds, I check the thigh near the bone. For breasts, I probe the center and slightly toward the thickest side. I let the thermometer sit until the number stabilizes—usually 2–5 seconds for modern digital models.
I also use an oven probe for long roasts. I set the probe at the start and let it monitor temperature so I don’t overcook while the oven runs. I clean and recalibrate my thermometer periodically to keep readings accurate.
Internal Temperature Guidelines
I cook chicken to a safe internal temperature of 165°F (74°C) for all parts to kill harmful bacteria. This is the temperature I aim for when using an instant-read probe in the thickest area.
I allow for carryover cooking: meat can rise 3–5°F after I remove it from heat. So I sometimes pull chicken at 160–162°F if I plan a short rest, then confirm it reaches 165°F while resting.
For slow-cooked, braised, or shredded chicken, I still check that the center reaches at least 165°F, but I often cook longer until connective tissue breaks down and the meat becomes tender.
Resting and Serving for Maximum Juiciness
I let cooked chicken rest so the juices move back into the meat and I slice it to keep those juices inside. The right rest time and a careful cut make the chicken taste juicier and feel more tender.
The Importance of Resting Meat
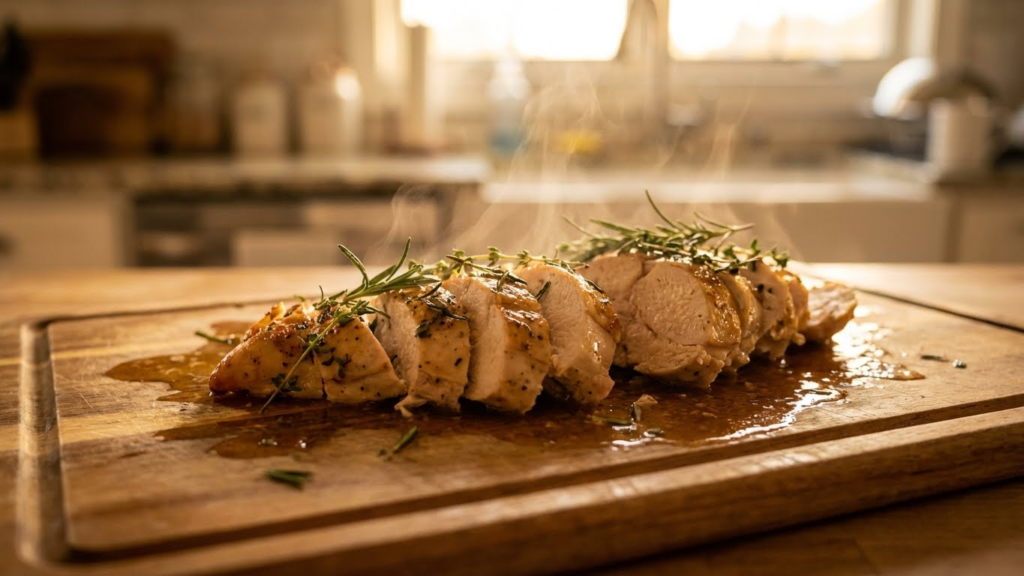
I remove chicken from heat and let it rest on a warm plate or cutting board for 5–15 minutes depending on size. A whole bird needs 15–20 minutes; breasts or thighs need about 5–10 minutes. Resting lets hot juices spread back into the muscle fibers instead of spilling out when I cut it.
I tent the chicken loosely with foil to keep heat without steaming the skin. I avoid wrapping tight foil because trapped steam can soften the skin and make it soggy. For bone-in pieces, I rest longer; bones hold heat and help redistribute juices.
Slicing Techniques That Preserve Juiciness
I slice chicken against the grain in thin, even slices to shorten muscle fibers and make each bite tender. I use a sharp knife and steady strokes; sawing tears the meat and forces out juices. For breasts, I hold the thicker end steady and slice at a slight angle.
I let the meat finish resting fully before cutting. If I cut too soon, juices run onto the board. I transfer slices to a warm plate and pour any collected juices back over the meat for extra moisture and flavor.
Common Mistakes to Avoid
I often see cooks overcook chicken by relying on time alone. Using a meat thermometer and removing chicken at 160–165°F (71–74°C) prevents dry, stringy meat. USDA guidance helps set safe targets and avoids guesswork (https://www.fsis.usda.gov).
Skipping salt or brine is another common error. I brine or season ahead to boost moisture and flavor. A simple salt brine for 30 minutes to a few hours can make a big difference.
Cooking straight from fridge to heat causes uneven cooking. I let thicker pieces rest at room temperature for 15–30 minutes so they cook more evenly. This reduces the chance of overcooking the outside while the center stays cold.
Crowding the pan or oven traps steam and prevents browning. I give pieces space so heat circulates and surfaces brown, which adds flavor and helps seal juices. Hot, dry heat at first then lower to finish works well.
Ignoring carryover cooking leads to overdone meat. I remove chicken a few degrees below the final target because it continues to rise in temperature while resting. Letting it rest for 5–10 minutes redistributes juices.
Wrong cut or method for the dish can ruin texture. I match cut to method — breasts for quick sears, thighs for braising or slow cooking. Serious cooks use resources like Cook’s Illustrated for tested methods and troubleshooting (https://www.cooksillustrated.com).
Flavor Enhancement Tips for Delicious Chicken
I focus on two key ways to boost flavor: controlled salt and liquid absorption, and fresh aromatics that finish the dish. These techniques work for breasts, thighs, and whole birds and help the meat stay juicy while adding clear, layered taste.
Using Brining Techniques
I brine to add moisture and a gentle salt seasoning throughout the meat. For a basic wet brine, I dissolve 1/4 cup kosher salt and 1/4 cup sugar per quart of water, then submerge the chicken. Small pieces need 30–60 minutes; bone-in or whole birds need 6–12 hours in the fridge.
I also use quick or dry brines when time is short. A dry brine means rubbing 1 teaspoon kosher salt per pound directly on the skin and storing uncovered in the fridge for 1–2 days. That firms skin and seasons the meat without added water.
I add flavor to brines with crushed garlic, bay leaves, peppercorns, or citrus peel. I avoid very strong flavors like raw ginger or too much soy in long brines, which can mask chicken’s natural taste. Rinse and pat dry before cooking to get brown, crispy skin.
Incorporating Fresh Herbs
I use fresh herbs to give chicken bright, immediate flavor. For roasting, I tuck whole sprigs of rosemary, thyme, and parsley under the skin or inside the cavity to infuse the meat during cooking. Those herbs stand up to heat and add an herbaceous backbone.
For quick-cooked chicken, I chop tender herbs like parsley, chives, and basil and mix them into a finishing butter or olive oil. I spoon the herb oil over the hot chicken just before serving to keep flavors fresh and green.
I also make simple herb blends: 1 tablespoon chopped rosemary + 1 tablespoon thyme + 2 cloves minced garlic + 2 tablespoons olive oil. I rub this under the skin for 30–60 minutes before roasting. This method gives even flavor and keeps the meat moist.
Storage and Reheating Advice for Leftover Chicken
I store cooked chicken quickly, keep it cold, and reheat it so it stays juicy and safe to eat. Follow strict timing, proper containers, and reheating methods to avoid dryness or foodborne illness.
Safe Storage Practices
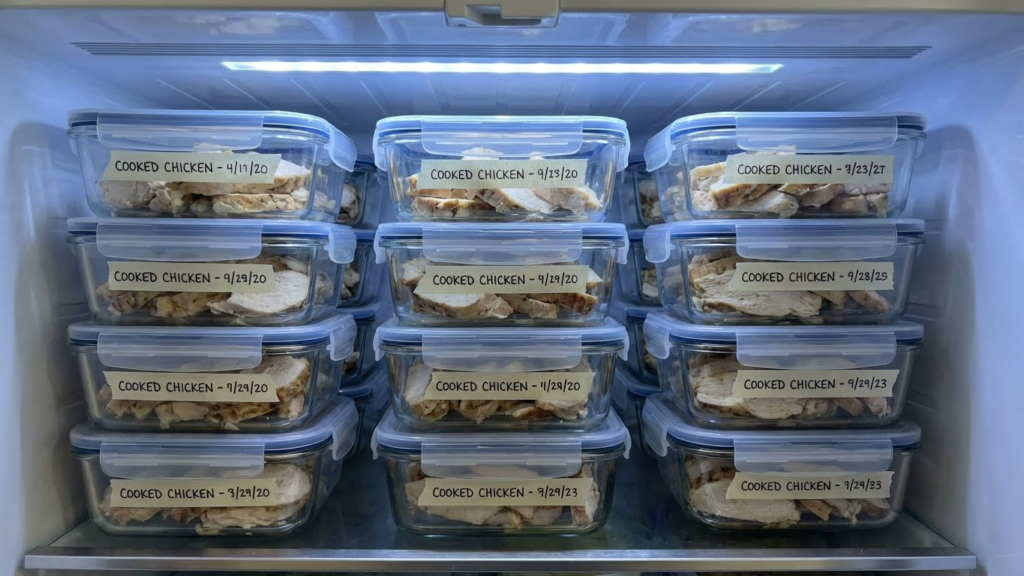
I cool chicken to room temperature no longer than 2 hours after cooking, then refrigerate it immediately. I slice or portion large pieces so they chill faster and fit into shallow airtight containers.
I label containers with the date. I keep chicken in the fridge for up to 4 days. For longer storage, I freeze portions in freezer bags with as much air removed as possible; frozen chicken stays best for up to 4 months.
I avoid stacking hot containers in the fridge. I never leave chicken out on the counter more than 2 hours (1 hour if above 90°F/32°C). If chicken smells off or shows slimy texture, I discard it.
Reheating Without Drying Out
I aim for an internal temperature of 165°F (74°C) to ensure safety while preventing overcooking. I use a food thermometer and check the thickest part of the meat.
For moist results, I reheat with added liquid. Oven: place chicken in a baking dish, add 2–4 tablespoons of broth or water per cup of chicken, cover tightly with foil, and heat at 300–325°F until warmed through. Microwave: cut into even pieces, sprinkle a little broth, cover with a microwave-safe lid or damp paper towel, and heat in short intervals, stirring or turning between bursts.
For crispy breaded chicken, I use an air fryer or a preheated oven at 350–375°F and check often to avoid drying. I never reheat chicken more than once.
FAQs
What temperature should I cook chicken to?
I cook poultry to an internal temperature of 165°F (74°C). I use a probe thermometer in the thickest part to avoid overcooking.
Can I tenderize with a marinade?
Yes. I use marinades with salt or acid for at least 30 minutes. For quicker results, I pound breasts to even thickness so they cook evenly.
Is velveting or coating necessary?
I use velveting (light cornstarch + egg white) for stir-fries to keep meat silky. It helps, but it’s optional for many home recipes.
What about slow cooking or braising?
I choose braising or slow cooking for tougher cuts or when I want fall-apart chicken. Low heat and added liquid break down connective tissue and keep meat moist.
How do I avoid dry chicken breast?
I stop cooking as soon as the thermometer reads 165°F. I also rest the meat 5–10 minutes so juices redistribute.
Quick checklist:
- Brine or marinate when possible.
- Use a thermometer.
- Pound uneven pieces.
- Choose low-and-slow for tough cuts.
If you want a specific method for a cut, tell me which one and I’ll give step-by-step tips.
Conclusion
I recommend using simple, reliable steps: brine or marinate for flavor and moisture, pick the right cooking method, and watch internal temperature closely. These actions give consistent soft, juicy results without extra fuss.
I urge patience with low-and-slow methods like braising or slow cooking when working with tougher cuts. For breasts, use quick, controlled heat or sous-vide to avoid drying them out.
I find a meat thermometer the most useful tool in the kitchen. It removes guesswork and helps me stop cooking at the exact moment the chicken is safe and tender.
I suggest experimenting with seasonings and textures once you master the basics. Small changes—acid in a marinade, a short rest after cooking, or a light velveting—can lift a simple dish into something more satisfying.
Bold steps to try:
- Brine for 30 minutes to a few hours.
- Cook to 165°F (74°C) for safety, or use lower temps with sous-vide.
- Rest 5–10 minutes before cutting.
I aim to make this approach practical and repeatable. Follow these techniques, and you’ll consistently produce chicken that is soft, juicy, and flavorful.