How to Measure Ingredients Correctly: Precise Techniques for Consistent Cooking and Baking
You want your recipes to turn out right every time. I’ll show you simple, clear steps that stop guessing and start measuring like a pro. Use the right tool and the right method for each ingredient, and your dish will match the recipe’s texture and flavor.
I’m Emma Reed, and I use practical tips that save time and prevent mistakes. I’ll guide you through the key tools, how to measure dry and liquid items, handle sticky ingredients, and fix common errors so your baking and cooking feel easier and more reliable.
Key Takeaways
- Use the correct measuring tool and technique for each ingredient.
- Measure dry and liquid items with methods that match their type.
- Small fixes and habits prevent common measuring mistakes.
Why Accurate Measurement Matters
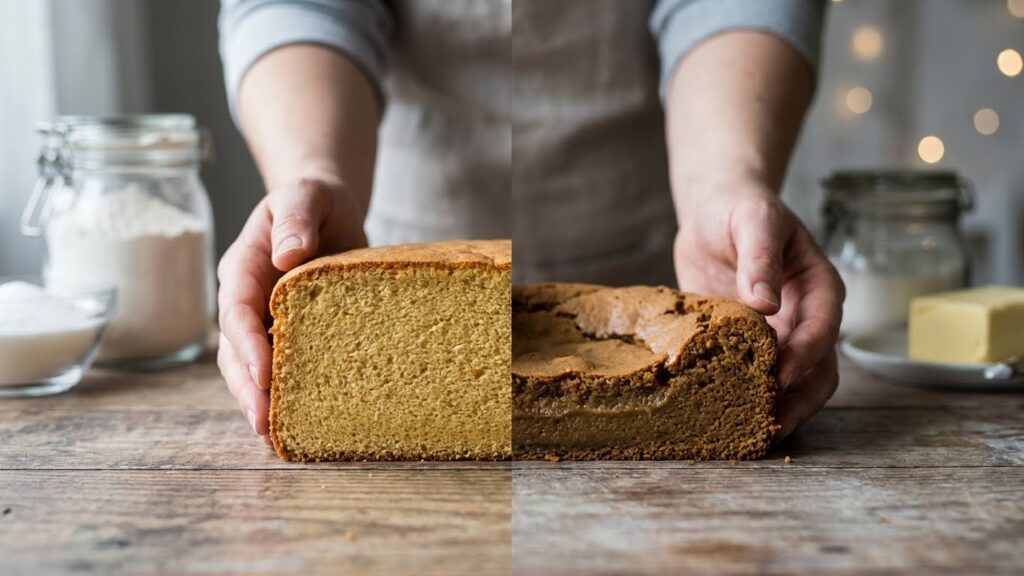
I measure carefully because small differences change how a dish behaves in the oven, on the stove, and on the plate. Precise amounts affect rise, texture, safety, and flavor in ways you can see, feel, and taste.
Effects of Incorrect Measurements
If I add too much flour, baked goods become dense and dry. Too little flour makes dough sticky and flat. A teaspoon too much baking powder can cause a cake to rise fast and then collapse.
Salt and sugar affect taste in tight ranges. Too little salt makes food bland; too much makes it inedible. Sugar does more than sweeten — it browns, holds moisture, and feeds yeast. Over-measuring liquids can thin batters and prevent proper structure. Under-measuring fats can make pastries tough.
Food safety can suffer. Undercooked breads or custards result from wrong ratios that stop proper heat transfer. I always aim for accuracy to avoid these problems.
Consistency in Recipes
I repeat a recipe only when ingredients and methods stay the same. When I weigh or measure the same way each time, results match: same crumb, same rise, same doneness.
Using weight instead of volume helps. For example, 120 g of all-purpose flour gives the same texture every time, while one cup can vary by how tightly it’s packed. Measuring spoons, scales, and level scrapes remove guesswork.
I note small habits that change outcomes, like spooning flour into a cup versus scooping directly. Keeping those habits consistent makes recipes reliable for me and anyone I teach.
Impact on Texture and Flavor
Precision controls texture. In cakes, the fat-to-flour ratio sets crumb tenderness. In cookies, sugar ratio determines chewiness versus crispness. I adjust sugar, fat, or liquid by grams to shape the final bite.
Flavor chemistry depends on balance. Acids, salts, and sweeteners interact. A lemon custard with the right sugar level tastes bright; too much acid makes it puckery. Yeast ferments sugars at specific levels; too much sugar can slow yeast and alter rise.
I test small changes and record results. That habit shows which adjustments improve texture and flavor and which break the recipe.
Essential Tools for Measuring Ingredients
I focus on tools that give consistent results: cups and spoons for everyday use, and a scale for the most accurate work. Each tool has a clear purpose and a best way to use it.
Types of Measuring Cups
I use two main kinds of cups: dry measuring cups and liquid measuring cups. Dry cups are usually metal or plastic sets (1 cup, 1/2, 1/3, 1/4). I scoop flour or sugar into them, then level with a straight edge for accuracy. Liquid cups are clear glass or plastic with a pouring spout and markings on the side. I place the cup on a flat surface and read at eye level to avoid parallax error.
For sticky or semi-solid ingredients like honey and peanut butter, I prefer an adjustable plunger-style cup. It pushes the ingredient out cleanly and measures accurately. For best practice with all cups, clean them between different ingredients to avoid cross-contamination.
Measuring Spoons
I keep a set of measuring spoons for small amounts: 1 tablespoon, 1 teaspoon, 1/2 teaspoon, 1/4 teaspoon, and sometimes 1/8 teaspoon. Metal sets stay stable; plastic sets work but can warp with heat. I level dry ingredients in a spoon with the edge of a knife. For liquids, I fill the spoon and check at eye level when possible.
Spoons are critical for spices, leaveners, and extracts where a small error changes the recipe. For sticky liquids like molasses, I coat the spoon with a little oil first to help release the ingredient. If precision matters, I weigh spooned amounts on a scale rather than relying on spoon volume.
Kitchen Scales
I recommend a digital kitchen scale for the most reliable results. Scales measure by weight, which removes inconsistency in how tightly ingredients are packed. I use grams for baking and ounces for recipes that list imperial units. Place a bowl on the scale, press tare to zero, and add each ingredient; that keeps measurements accurate and cuts down on dishes.
Choose a scale with a flat platform and a clear display. Look for one that switches units and has a tare function. For precision, select a scale that measures at least to 1 gram (0.1 ounce). For reference on weight vs. volume and conversion charts, I often check resources like the USDA FoodData Central or King Arthur Baking Company for reliable conversions.
How to Measure Dry Ingredients
I focus on using the right tool, removing air, and getting a flat, exact amount. Small differences in flour, sugar, or cocoa change texture and rise, so I measure carefully.
Scoop and Level Method
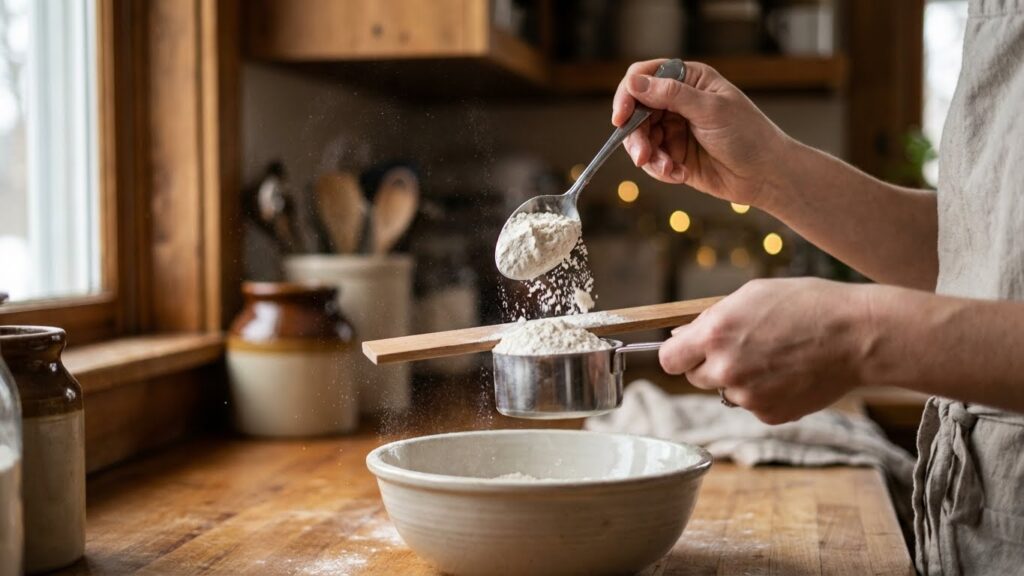
I use dry measuring cups for flour, sugar, and grains. For flour, I spoon it into the cup rather than digging the cup into the container. This prevents packing and keeps the flour light.
Once the cup is full, I drag a straight edge across the top to level it. I avoid tapping the cup to settle the flour because tapping can compress it and add extra grams. For sugar and cocoa, I can scoop directly and level, since they flow and pack less than flour.
If a recipe lists weight, I always weigh on a kitchen scale. A scale removes guesswork and gives consistent results across batches and ovens.
Sifting Dry Ingredients
I sift when a recipe says to, or when ingredients are lumpy. Sifting aerates flour and blends dry leaveners like baking powder or soda into the mixture evenly.
I sift into a bowl and then measure from that bowl if the recipe calls for sifted flour. If the recipe wants flour sifted after measuring, I measure first, then sift—this keeps the quantity accurate. For cocoa or powdered sugar, sifting before measuring helps avoid clumps that change volume.
Use a fine mesh sieve or a dedicated sifter. Tap gently or shake; don’t force ingredients through as that can compact them.
Measuring Brown Sugar
I treat brown sugar like a packable ingredient. I spoon it into the dry cup, pressing it down with the back of the spoon, then press firmly with my hand or a measuring tool until the cup holds its shape.
I level the top once packed. The goal is a dense cup, not a loose one; this keeps moisture and sweetness consistent. For recipes that say “lightly packed,” I press less firmly but still remove air gaps.
If a recipe gives weight, I weigh the packed sugar. That avoids confusion between packed and unpacked volumes, and gives me repeatable baking results.
How to Measure Liquid Ingredients
I show you simple, exact ways to pour liquids so recipes turn out the same every time. You will learn how to read the meniscus, pick the best cup, and avoid spills that change measurements.
Reading the Meniscus
I place the measuring cup on a flat surface and bend to eye level so I can see the curve of the liquid. The bottom of that curve—the meniscus—is where I line up the measurement mark. This works for water, milk, and most clear or thin liquids.
For thicker liquids like oil or syrup, the meniscus can stick to the cup walls. I still use the lowest visible point, but I watch for uneven edges and wipe drips off the inside before taking the final reading. If the cup has bold, clear graduations, I prefer those because small marks are easier to read.
Choosing the Right Cup
I use a clear, spouted liquid measuring cup for volumes over 1/4 cup. Glass or clear plastic lets me see the meniscus while the cup sits flat. For small amounts under 1/4 cup, I use a liquid measuring spoon or a small graduated cup to avoid big errors.
I avoid using dry measuring cups for liquids because they lack a pour spout and you can’t read the meniscus easily. If I need to measure hot liquid, I choose a heat-safe glass cup. For sticky liquids, I spray the cup lightly with nonstick spray or measure them with a spoon and level by eye.
Avoiding Spillage Errors
I set the cup on the counter before I pour and hold the container close to the spout to control flow. Pour slowly, stopping to check the meniscus at eye level. A steady hand prevents overpouring and reduces the need to transfer or clean up.
If I do overpour, I use a clean spoon to remove excess rather than tilting the cup and risking a mess. For thin liquids, I pour into the cup’s center; for thick liquids, I pour along the side to reduce splashing. I always dry the outside of the cup before measuring if it has condensation or residue.
Measuring Sticky and Unusual Ingredients
I focus on practical tricks that cut mess and keep measurements accurate. Small steps—like weighing or using the right tool—give consistent results every time.
Handling Honey and Syrups
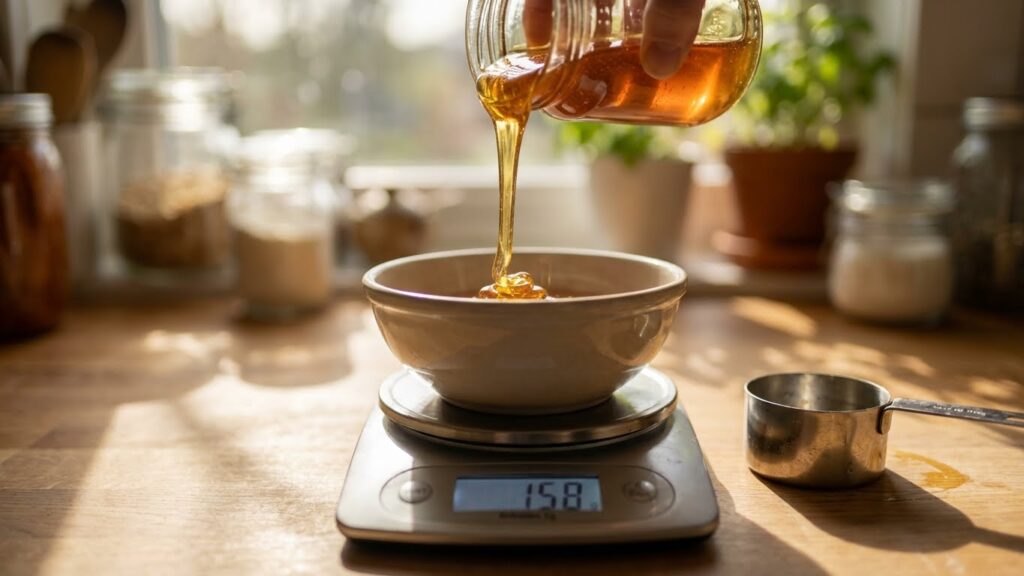
I weigh honey and syrups when precision matters. Place a bowl on a kitchen scale, tare it to zero, and pour until you hit the exact grams or ounces called for. This avoids the air pockets and meniscus errors you get with cups.
When I must use measuring cups or spoons, I lightly spray the cup with nonstick cooking spray or rub a small amount of neutral oil on the inside first. The coating creates a thin barrier so the syrup slides out. For very small amounts, I warm the container slightly under hot tap water so the syrup thins and pours cleanly.
A simple alternative is to use a squeeze bottle or a graduated pourer for common amounts. For more on liquid measuring and scales, I often refer to the USDA Kitchen tools guidance and reliable scale-buying tips at Consumer Reports.
Measuring Nut Butters
I treat nut butters like semi-solid spreads. For weight accuracy, spoon the nut butter into a bowl on the scale and tare between additions. This method keeps sticky residues out of your measuring cups and ensures consistent results.
If a recipe asks for volume, I put the measuring cup in the freezer for a few minutes or coat it with a thin layer of oil or nonstick spray. Then I pack the nut butter in, level it, and tap the cup to settle air pockets. To release, I run the outside of the cup under warm water or use a spatula to push the butter out cleanly.
For sticky work, I recommend an adjustable measuring cup with a plunger. It costs more up front but makes portioning and unloading nut butters quick and tidy.
Converting Between Measurement Units
I focus on clear, exact conversions so your recipes turn out the same no matter the unit system. I explain common cup-to-gram swaps and how to scale a recipe without losing texture or taste.
Imperial to Metric Conversions
I use weight when I can, because grams are more reliable than cups. Common conversions I rely on:
- Flour: 1 cup ≈ 120 g
- Granulated sugar: 1 cup ≈ 200 g
- Butter: 1 stick = ½ cup = 113 g
For liquids, I convert volume directly:
- 1 cup = 240 mL
- 1 tablespoon = 15 mL
- 1 teaspoon = 5 mL
I weigh dry ingredients with a digital scale and note that density matters. For example, sifted flour weighs less than packed flour, so grams avoid that problem. When a recipe lists ounces, I convert: 1 ounce (oz) ≈ 28 g.
Adjusting for Recipe Scaling
I scale by weight to keep ratios exact. To double a recipe, I double each ingredient’s grams. To halve a recipe, I cut grams in half. This keeps texture and rise consistent in baked goods.
I watch leavening agents closely. Baking powder and yeast don’t always scale linearly; for small batches I reduce slightly to avoid overproofing. For liquids, I use milliliters and keep the same units across ingredients to avoid error.
Quick checklist I use:
- Convert all to grams or mL first.
- Multiply by the scale factor.
- Re-check leavening and salt amounts for very large or small changes.
Common Mistakes and How to Avoid Them
I often see cooks use the wrong cup or spoon for the job. Use liquid measuring cups for liquids and dry cups for flour, sugar, and other dry ingredients. Read liquid levels at eye level to avoid over- or under-pouring.
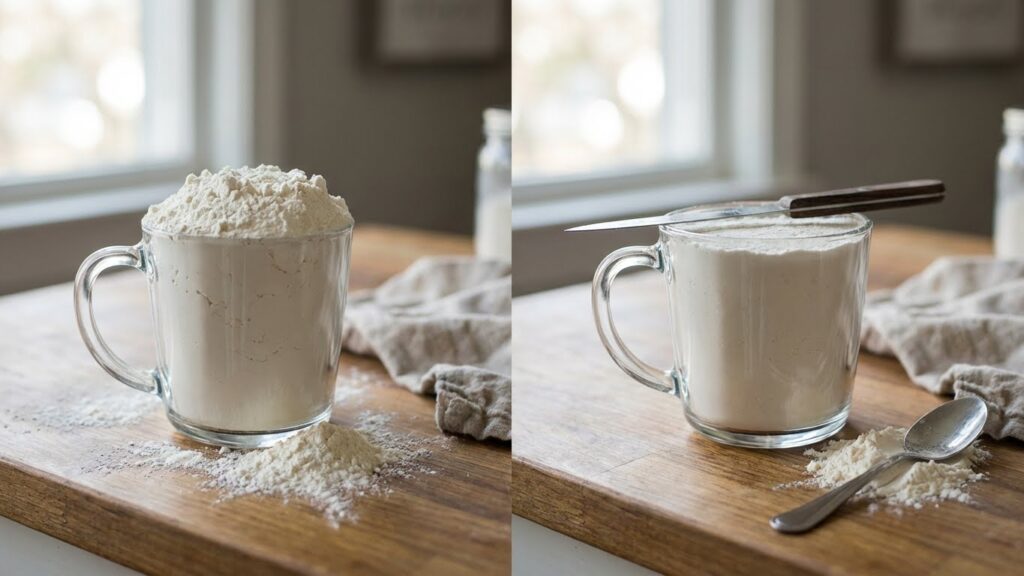
I catch people packing flour into the cup. Instead, spoon flour into the measuring cup and level it with a straight edge. Don’t tap or press; that compacts the ingredient and gives too much.
I notice measuring spoons used inconsistently. Always fill to the brim and level off for dry ingredients, and pour slowly for small liquid amounts. A tiny change in a spoonful can change the outcome in baking.
I sometimes find scales ignored in recipes that list cups. I prefer a kitchen scale for accuracy. Weighing removes guesswork, especially for flour and chopped ingredients.
I see temperature and settling cause problems too. Measure sticky syrups and honey with a light coating of oil in the cup, and let sifted ingredients settle before measuring again. Also, measure ingredients at room temperature when the recipe calls for it.
Common fixes I use are simple:
- Use the right tool for dry vs. liquid.
- Spoon, level, and avoid packing dry ingredients.
- Use a scale for best accuracy.
- Read measurements at eye level and account for temperature.
These steps cut down mistakes and make results more consistent.
Tips for Precise Measurement
I always use the right tool for the job. For liquids I use a clear liquid measuring cup and read at eye level on a flat surface. For dry ingredients I use dry cups or a kitchen scale, depending on the recipe.
I weigh ingredients when precision matters, especially in baking. A scale gives repeatable results and avoids packing errors with flour or sugar. I set the scale to zero with the container on it before adding each ingredient.
I spoon flour into the cup and level with a straight edge instead of scooping. That prevents compression and keeps the amount consistent. For brown sugar, I pack it only when the recipe says to.
I check my measurements twice. I read the measurement marks at eye level and confirm amounts for small units like teaspoons. Small mistakes add up fast.
I keep tools clean and dry. Moisture clumps dry ingredients and skews volume. Wiped cups and spoons help me get the true amount.
Helpful quick rules:
- Use a scale for accuracy.
- Measure liquids in a liquid cup; read at eye level.
- Spoon and level dry ingredients unless packing is required.
- Tare the scale between ingredients.
I follow these habits every time I cook or bake. They save time and improve results.
FAQs
How do I measure flour without packing it down?
I spoon flour into the measuring cup, then level it with a straight edge. I do not tap or shake the cup, which would compress the flour and add too much.
What about sticky or thick ingredients like honey or peanut butter?
I use a spoon to fill the measuring cup and then scrape it out with a rubber spatula. I often spray the cup lightly with oil first so the ingredient releases more easily.
Can I swap tablespoons for teaspoons or cups?
Yes, use these quick conversions: 1 tablespoon = 3 teaspoons, 1 cup = 16 tablespoons. I still double-check when scaling recipes to avoid mistakes.
Do I need special tools?
A basic set of dry cups, a liquid measuring cup, measuring spoons, and a kitchen scale cover most needs. I keep a digital scale for recipes where accuracy matters most.
How do I measure small amounts of spices accurately?
I level measuring spoons and measure over a small bowl or directly into the pan. I add less at first, then adjust to taste.
What if a recipe lists only cups but I want to use weight?
I look up a reliable conversion chart or weigh a known amount to create my own conversion for that ingredient.
Conclusion
I recommend using the right tools for each ingredient and following the steps I showed. A dry cup, liquid cup, and kitchen scale each have clear uses. I rely on the scale most for repeatable results.
When I measure, I level dry ingredients, pour liquids at eye level, and spoon flour into a cup instead of scooping. These small habits cut errors and make recipes turn out as expected. They save time and reduce waste.
I keep common conversions written near my prep area. A simple list helps when a recipe uses different units. I also clean and zero my scale between ingredients to keep measurements accurate.
Use this quick checklist before you start:
- Choose the right tool.
- Measure at eye level for liquids.
- Level or spoon dry ingredients.
- Use a scale when precision matters.
I test new recipes by measuring carefully the first time. That gives me a baseline to adjust flavor or texture later. Consistent measuring builds confidence and makes cooking and baking more enjoyable.