You hold the power to pick vegetables that taste better and last longer at home. I’ll show simple, practical signs to look for—color, firmness, smell, and vendor cues—so you can leave the market with the best produce every time. Look for bright, even color, firm texture, and a fresh, mild scent to identify truly fresh vegetables quickly.
I’m Emma Reed and I run this site. I’ll guide you through clear steps to check greens, roots, and melons, what to ask vendors, and quick storage tips to keep produce crisp. Together we’ll make market trips faster, smarter, and more rewarding.
Key Takeaways
- Use sight, touch, and smell to judge freshness before buying.
- Ask vendors short questions about harvest date and storage.
- Store produce properly to extend flavor and shelf life.
Contents
- 1 Understanding Vegetable Freshness
- 2 Preparation Before Shopping
- 3 Examining Color and Appearance
- 4 Assessing Texture and Firmness
- 5 Smell and Aroma Indicators
- 6 Assessing Specific Vegetable Types
- 7 Questions to Ask Market Vendors
- 8 Avoiding Common Pitfalls
- 9 Prioritizing Organic and Local Options
- 10 Storing Fresh Vegetables After Purchase
- 11 FAQs
- 12 Conclusion
Understanding Vegetable Freshness
I focus on visible signs, feel, smell, and timing to judge produce. I look for color, firmness, scent, and how recently the item was harvested.
What Constitutes Freshness
Freshness means the vegetable still has its natural color, firm texture, and a clean smell. I check leaves and stems first: they should be bright and not wilted. For root veg, I press gently—firmness shows good moisture and crispness. Soft spots, shriveling, or slimy areas tell me the produce has started to break down.
I also inspect cuts and bruises. Small nicks can lead to fast decay. I avoid vegetables with dark, sunken spots or strong, off odors. Packaging date labels or farmer tags help when I shop at stores or markets.
Seasonal Considerations
Season tells me which vegetables taste best and last longer. I buy tomatoes, corn, and zucchini in summer, and root vegetables like carrots and beets in fall and winter. Local, in-season produce moves from field to market faster, so it keeps more flavor and texture.
I ask vendors when the item was harvested if it isn’t labeled. If you see a high turnover at a stall, that usually means fresher stock. Out-of-season items shipped long distances often arrive older and softer.
Nutritional Impact of Freshness
Nutrients drop after harvest, especially vitamin C and some B vitamins. I choose vegetables that look recently picked to get more vitamins and antioxidants. For instance, leafy greens lose vitamin C quickly if left wilting, so crisp leaves are a better choice.
Storage matters too. I store vegetables promptly in the right conditions—cool, dry, or refrigerated—to slow nutrient loss. Buying fresher produce reduces waste and keeps more of the food’s original nutrients on my plate.
Preparation Before Shopping
I plan my market trips so I buy the best vegetables, avoid waste, and stick to a budget. I check what’s in season, list what I need, and find nearby farms or markets before I go.
Researching Peak Seasons
I use a simple season chart to know when each vegetable tastes best and costs less. For example, tomatoes peak in July–September, while carrots are sweetest in late fall. I consult reliable sources like the USDA seasonal produce guide and my state extension website to confirm local timing.
Knowing peak months helps me choose produce that’s ripe, flavorful, and likely harvested recently. I also note regional differences—spring greens in the South arrive earlier than in northern markets.
When I see something marked as “in season,” I buy a bit more and plan meals or freezing to avoid spoilage.
Making a Shopping List
I write a list that groups items by shelf life and recipe use. I put quick-use items (like leafy greens) at the top and long-storage items (like winter squash) at the bottom.
I add quantities beside each item—“2 bell peppers,” “1 lb green beans”—to prevent impulse buys. I include storage notes, such as “refrigerate” or “store in cool, dark place.”
Before leaving, I check my fridge and pantry to avoid duplicates. This saves money and stops me from buying vegetables I won’t use.
Identifying Local Sources
I look for farmers markets, CSA programs, and farm stands within 30 miles to get fresher produce and support local growers. I use my city’s farmers market directory and apps like LocalHarvest to find times and vendor lists.
At markets, I check signs for harvest date or talk to farmers about when crops were picked. I prefer vendors who harvest the same day or within 24–48 hours.
If a farm offers a CSA, I consider a short trial share to sample seasonality and quality before committing long-term.
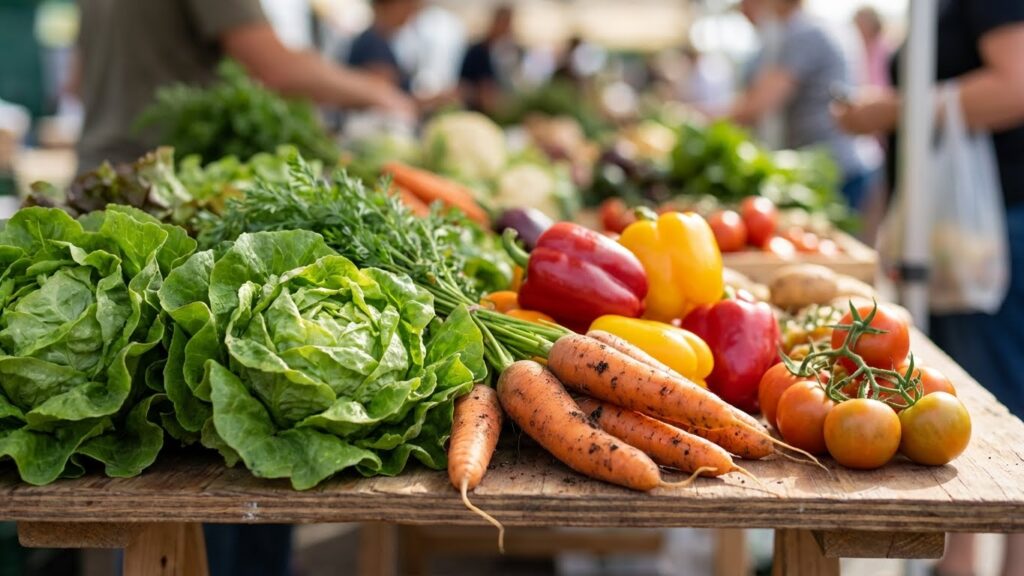
Examining Color and Appearance
I focus on clear visual signs that tell me a vegetable is fresh. Color, surface marks, and how leaves or skin feel show me whether to buy it or leave it on the shelf.
Vibrancy of Color
I look for bright, even color that matches the vegetable type. For example, bell peppers should be glossy and rich red, yellow, or green without dull patches. Darker green on broccoli or kale usually means more recent harvest and higher nutrients.
If color looks washed out or brownish, the vegetable may be old or stored improperly. With tomatoes, I avoid ones with uneven ripening—large green shoulders mean they were picked too early. For root vegetables, deep, consistent color (like orange in carrots or deep purple in beets) signals good taste and texture.
When shopping, I compare pieces in the bin. Choose items with the most uniform, vivid color and skip those with faded or spotted areas. For more on color cues and seasonality, I check resources like the USDA’s produce quality tips and university extension sites to confirm signs of ripeness and freshness.
Absence of Blemishes
I avoid vegetables with cuts, bruises, soft spots, or mold. Small scars on roots or skins can be normal, but any soft or leaking area suggests decay. For example, soft spots on eggplant and zucchini mean internal breakdown and short shelf life.
I inspect stems and bases for rot or dark rings. Mushrooms that look slimy or have dark gills are past their peak. For leafy heads such as cabbage or lettuce, I peel back outer leaves to check for hidden brown spots or pests.
If I see holes from insects on peppers or cucumbers, I pass unless the rest of the vegetable looks uncompromised. When shopping at farmers markets, I ask vendors about recent harvest dates; fresher stock usually shows fewer blemishes.
Healthy Leaf and Skin Texture
I check leaves and skin by touch as well as sight. Crisp, firm leaves on greens mean they stayed hydrated. Lettuce and spinach should snap when folded; limp, floppy leaves indicate age.
Root and fruit skins must feel taut and firm. Cucumbers should be firm from end to end. Potatoes with shriveled skin or wrinkling have lost moisture and flavor. For items with a protective rind, like squash or melon, the rind should be hard and free of soft patches.
I avoid glossy shine caused by sprays or wax if it masks damage. Light pressure helps me find firmness without bruising. The combination of firm texture and intact skin or leaves usually predicts a longer fridge life.
Assessing Texture and Firmness
I focus on texture and firmness to judge freshness. I check crispness, soft spots, and how heavy a vegetable feels in my hand.
Feeling for Crispness
I gently squeeze leafy greens and stalks to test crispness. For lettuces and kale, I lift a leaf and bend it; a crisp leaf snaps or resists folding. Wilted leaves fold limp and often have dark edges.
For celery, cucumbers, and bell peppers, I press along the length. A crisp vegetable feels tense and makes a slight sound when tapped. Avoid stems or stalks that feel rubbery or floppy; that means they lost moisture.
I use my fingernail lightly on root vegetables like carrots to check surface firmness. A fresh carrot will resist indentation. If it gives under small pressure, it may be old or pithy.
Checking for Soft Spots
I scan surfaces visually, then press with my fingertips to find soft spots. Soft areas feel spongy or sticky and often hide internal rot. Check around stems and blossom ends—those spots show decay first.
For tomatoes and peaches, I use a gentle twist-and-press motion near the stem. A slightly yielding feel indicates ripeness; a mushy spot means overripeness. For squash and potatoes, firm skin is key—any indentations or dark patches are warning signs.
If I find small soft spots on otherwise good produce, I select a different piece. A single soft spot can spread quickly once stored at home.
Evaluating Weight and Density
I compare similar items by weight in my hand. A dense, heavy cucumber or bell pepper holds more juice and likely tastes fresher. Lightness often means dehydration or hollowing inside.
For root vegetables, weight tells me if they retained moisture. A heavy beet or carrot feels solid down to the tip. With melons, I lift several to find the one that feels heavy for its size—that usually means better texture inside.
I balance weight with other checks. A heavy but soft vegetable is a problem, while a firm, moderately heavy one usually signals good quality.
Smell and Aroma Indicators

Smell tells me a lot about a vegetable’s condition. I focus on scents that match the vegetable’s fresh, natural profile and watch for any sour, fermented, or chemical smells that signal problems.
Recognizing Fresh Vegetable Scents
I sniff leafy greens near the stem or base; they should smell clean, slightly sweet, or herb-like. Herbs like basil and cilantro give strong, characteristic aromas when fresh. Root vegetables such as carrots and beets often have a mild earthy scent that feels natural, not sharp.
Tomatoes and peppers give a clear ripe scent at the stem end. Melons and squash emit a light, pleasant fragrance when ripe. If I can’t detect a typical aroma where I expect one, the produce may be under-ripe or old. For more on how aroma signals ripeness, I check guidance from reliable sources like the USDA or America’s Test Kitchen for practical tips.
Detecting Off or Stale Odors
I immediately avoid items with sour, fermented, or musty smells. These odors usually mean bacterial or fungal growth. A chemical or bleach-like scent can indicate pesticide residue or improper storage.
For leafy greens, a slimy texture plus a sour smell confirms spoilage. For roots, a strong rotten or putrid odor shows decay. When shopping, I gently open packaged produce if allowed. If the bag traps a foul smell, I skip it. The FDA provides useful food-safety info if I need to confirm signs of spoilage: FDA food safety.
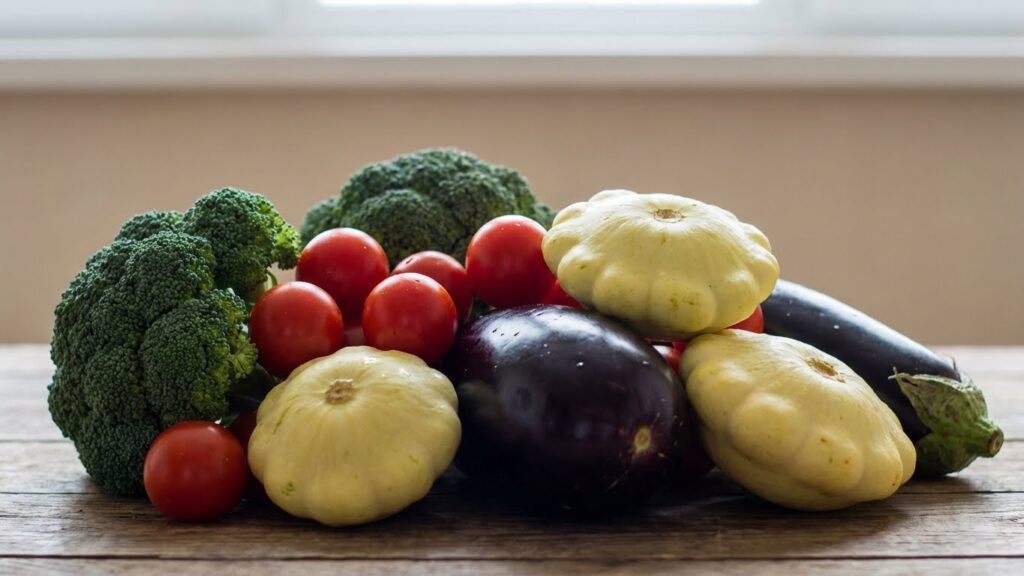
Assessing Specific Vegetable Types
I focus on the main signs that show freshness: color, texture, scent, and weight. I check for firmness, moisture level, and any soft spots or blemishes that signal age or damage.
Leafy Greens
I look for bright, even color and crisp stems. Leaves should snap when bent, not fold or wilt. Avoid slimy edges, yellowing, or brown spots. For bunches, check the cut ends—fresh cuts look moist and white, not dry or brown.
I smell the greens near the stem. They should smell clean or slightly earthy, not sour. For packaged salad mixes, I squeeze the bag lightly; excess moisture inside means quicker spoilage.
If buying spinach or kale, I lift the bunch to feel weight. Heavier bunches usually mean fresher leaves. For baby greens, prefer smaller, tender leaves over large, limp ones.
Root Vegetables
I check firmness first—roots like carrots, beets, and turnips should feel dense and solid. Soft spots, cracks, or wrinkled skin show age or dehydration. For carrots, look for deep orange color and smooth skin.
I inspect the tops if attached. Fresh greens on roots (like beets or carrots) should look lively; wilted tops indicate older produce. For potatoes, I avoid green patches and many eyes, which mean sun exposure or sprouting.
For sweet potatoes and radishes, I judge by weight to size ratio. Heavy pieces hold more moisture and taste fresher. Smell is useful for beets and cooked-root candidates; raw roots should not smell fermented.
Fruiting Vegetables
I test tomatoes for a slight give when gently pressed; firm but not rock hard is best. Color should be uniform with no green shoulders for ripe varieties. Avoid cracks, large blemishes, or mushy spots.
For peppers, I check for glossy skin and tight, smooth flesh. Wrinkling or soft spots mean age. Cucumbers should be firm with even color and no spongy areas. For eggplants, I press the skin lightly; it should spring back quickly.
When buying squash, I look at the stem area—dry, intact stems suggest slow ripening and better storage. For melons sold whole, I lift and smell the blossom end; a sweet, fruity scent indicates ripeness.
Alliums and Herbs
I examine onions and garlic for dry, papery skins and no soft centers. Bulbs should feel heavy and solid. Avoid any with green shoots unless you plan to use them immediately.
I check herbs by scent and leaf condition. Fresh herbs smell strong when rubbed; they should have vibrant color and no slimy stems. For basil, look for glossy leaves and avoid brown edges. For cilantro and parsley, choose bunches with crisp stems and no yellowing.
I store some herbs loosely wrapped in damp paper towel if they seem slightly limp. For chives and green onions, bend the stalks; they should be flexible and spring back.
Questions to Ask Market Vendors
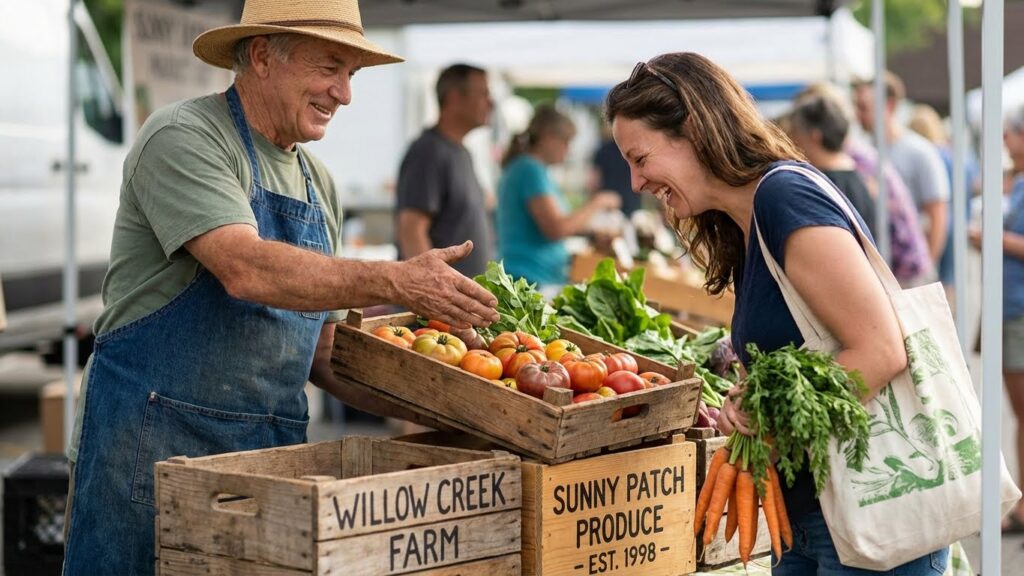
I focus on two key details when I talk to vendors: when the vegetables were harvested and exactly where they came from. Those facts tell me how fresh the produce is and whether it fits my needs for taste, storage, or food safety.
Harvest Date Inquiry
I ask, “When did you pick these?” to learn freshness. A clear harvest date helps me choose vegetables that will last longer at home. For leafy greens, I prefer items picked within the last two days. Root vegetables can be fine if picked within a week, depending on how they were stored.
If a vendor does not know the date, I ask about their typical harvest schedule. I also check for clues: crisp leaves, firm stems, and little surface moisture suggest recent picking. I quietly note vendors who track dates or label bins — that shows care and makes future shopping easier.
Origin of Vegetables
I ask, “Where did these grow?” to learn about growing practices and climate. I want to know the farm name, town, or region. Vegetables from a nearby farm often arrive sooner after harvest, which improves flavor and shelf life.
I also ask if they rotate fields or use hoop houses, since those methods affect season length and possible pesticide use. If I worry about sprays, I ask directly about organic or integrated pest management practices. Vendors who answer clearly and specifically earn my trust and repeat business.
Avoiding Common Pitfalls
I focus on the small, telltale details that show freshness or problems. Look, touch, and smell each item before you buy.
Identifying Signs of Spoilage
I check for soft spots and mold first. Press gently—firmness matters. Soft, mushy areas or dark, wet patches mean decay inside even if the skin looks okay.
I smell the produce. A sour or fermented odor shows spoilage. Fresh vegetables often have a mild, green scent or no strong smell at all.
I scan stems and leaves for browning or sliminess. Wilted greens with slimy stems spoil fast. For items like peppers or cucumbers, wrinkled skin means they’ve lost moisture and texture.
I examine color and texture closely. Discolored blotches, sunken areas, or a dusty film suggest age or poor storage. I avoid anything with visible mold or leakage.
Overripe and Underripe Issues
I pick fruits and vegetables at the right stage for how I’ll use them. If I need something to last a week, I choose firmer, less ripe items. For immediate cooking or eating, I go for riper, softer pieces.
I test ripeness with gentle pressure and scent. A ripe avocado yields slightly; an underripe one feels hard. Ripe tomatoes give a little and smell sweet at the stem end.
I watch for off textures. Overripe vegetables often become mealy or soggy and cook into an unappealing mush. Underripe produce can be tough, astringent, or lack flavor, so plan use accordingly.
I consider color cues by type. Deep, even color often means ripeness; pale or greenish tones can mean underripe. When in doubt, ask the seller about harvest date or storage history.
Prioritizing Organic and Local Options
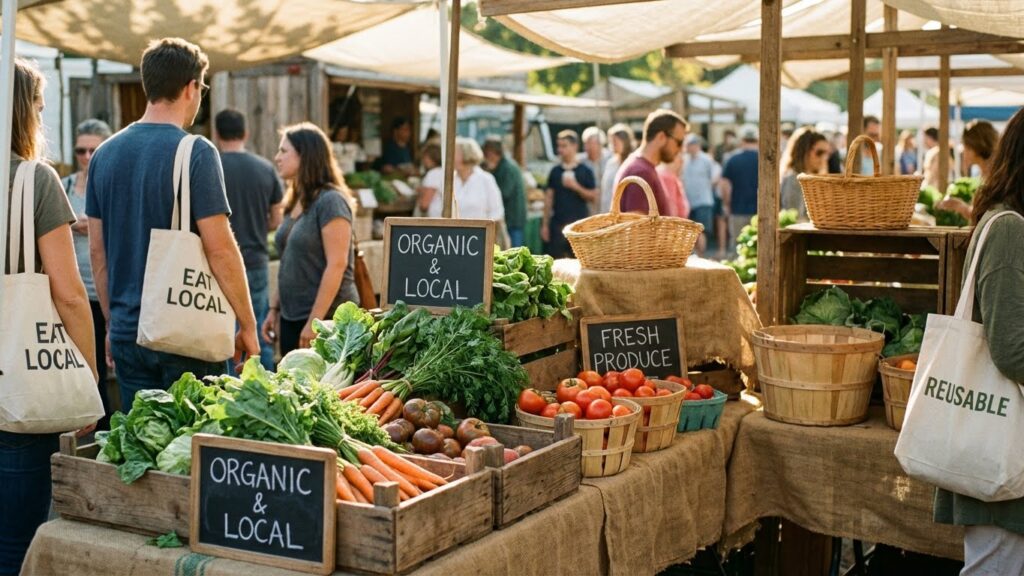
I choose organic and local produce when I can because they often offer clearer benefits for the environment and my community. These choices affect soil health, pesticide use, food miles, and who gets paid for the work.
Environmental Benefits
Buying organic usually means less synthetic pesticide and fertilizer runoff near fields. That helps protect nearby streams, insects, and soil life. I look for USDA Organic or comparable labels to be sure of the standards.
Local produce cuts food miles. Shorter transport lowers fuel use and keeps more of the crop fresh. I prefer seasonal vegetables from nearby farms to reduce refrigeration and transport needs.
Both choices can encourage better land practices. Organic farms often use crop rotation, cover crops, and compost to build soil. For more on organic standards and soil practices, I check the USDA Organic site and resources from my state extension service.
Community Impact
Shopping local supports farmers directly. When I buy at farmers’ markets or CSA programs, more of my dollar goes to the grower instead of middlemen. That helps small farms stay viable and invest in better practices.
Local markets also strengthen food access in neighborhoods. I look for vendors who accept SNAP benefits or run sliding-scale produce boxes. This keeps fresh vegetables within reach for more families.
Choosing organic and local can boost regional food systems. It encourages diverse crop rotations and specialty crops that fit local soils and markets. To find trusted local sources, I use directories like LocalHarvest or my county extension listings.
Storing Fresh Vegetables After Purchase
I focus on keeping vegetables cold, humid, and separated when needed. That keeps texture, flavor, and safety longer.
Proper Storage Techniques
I put most vegetables in the refrigerator crisper to keep them cold and humid. I use perforated plastic bags or the crisper drawer set to high humidity for leafy greens, broccoli, and carrots. I leave a little airflow so moisture doesn’t build up and cause rot.
I store tomatoes, onions, and potatoes outside the fridge. I keep tomatoes at room temperature stem-side down until ripe, then move them to the fridge only if they will spoil soon. I keep onions and potatoes in a cool, dark place separated from each other.
I avoid washing produce before storage unless I will eat it right away. I wash just before use to reduce mold and bacteria growth. I also wrap herbs in a damp paper towel inside a plastic bag to keep them fresh without sogginess.
Maximizing Shelf Life
I check vegetables daily and remove any pieces that show softness, dark spots, or mold. One bad item can speed spoilage of the rest, so I act fast. I use older produce first by placing newer items behind older ones.
I blanch and freeze vegetables I won’t eat within a week. Blanching brightens color and stops enzymes. For longer storage, I use canning for high-acid items or fermenting for cabbage and cucumbers.
I keep strong-smelling produce like garlic and cabbage in sealed containers to prevent odor transfer. I label storage bags with the date so I know what to use first.
FAQs
How long will vegetables stay fresh at home?
It depends on the type. Leafy greens last 3–7 days in the fridge, while root vegetables can keep for weeks if stored cool and dry.
Should I buy organic or conventional?
I recommend choosing what fits your budget and values. For produce you eat with the skin, consider organic for lower pesticide risk; for others, washing well often works fine.
What if a vegetable has small blemishes?
Small, firm blemishes are usually OK; trim them away before cooking. Avoid soft spots, large cuts, or mold, since those can mean spoilage.
Do I need to sniff produce?
Yes. A mild, fresh scent usually means ripeness. Strong fermented or sour smells signal that the item is overripe or spoiled.
Can I trust appearances alone?
No. I check texture and weight too. Heavy feel for size often means juiciness. Light, soft, or wrinkled items likely lack freshness.
How should I store vegetables after buying?
I separate ethylene producers (like tomatoes) from sensitive greens. I use perforated bags or a crisper drawer to control moisture and extend shelf life.
Conclusion
I want you to feel confident at the market. Use sight, touch, and smell to judge color, firmness, and aroma. Trust seasonal patterns to find the best flavor and value.
I pick produce that looks fresh, feels firm, and smells ripe. I avoid soft spots, bruises, and odd odors. Small defects can be okay if I plan to use the item quickly.
I store items correctly to keep them fresh longer. Leafy greens go in the fridge with a damp towel; tomatoes stay at room temperature. I separate fruits that give off ethylene, like apples, from sensitive vegetables.
I balance quality and price. Local markets often give fresher choices, while stores may offer variety and convenience. I compare by feel and smell, not just by appearance.
Quick checklist:
- Look: bright color, no mold.
- Feel: firm, not mushy.
- Smell: fresh, not fermented.
I bring reusable bags and plan meals around what I buy. That reduces waste and saves money.