Stop guessing and start cooking perfect rice every single time. This complete rice cooker cooking time chart takes the mystery out of rice preparation. You’ll learn exact times for every rice type, essential water ratios, and pro tips that transform your rice from mushy to magnificent in minutes.
Contents
- 1 Key Takeaways
- 2 Stop Guessing Use This Rice Cooker Cooking Time Chart
- 3 Why Rice Cooker Cooking Times Matter
- 4 Understanding Your Rice Cooker
- 5 The Complete Rice Cooker Cooking Time Chart
- 6 Step-by-Step Perfect Rice in Your Cooker
- 7 Factors That Affect Cooking Time
- 8 Troubleshooting Common Problems
- 9 Tips for Perfect Rice Every Time
- 10 Beyond Rice: Other Foods Your Cooker Can Make
- 11 Conclusion
- 12 Final Rice Cooker Cooking Time Chart
Key Takeaways
- Perfect rice starts with timing: Different rice varieties need different cooking times. White rice cooks in 15-20 minutes while brown rice needs 30-40 minutes.
- Water ratios matter more than you think: The standard ratio is 1:1.5 (rice to water) for white rice, but brown rice needs 1:2. Always measure carefully.
- Let it rest: Always let rice sit for 10-15 minutes after cooking. This step is crucial for fluffy, separate grains.
- Rinse your rice: Rushing this step leads to gummy rice. Rinse until water runs clear to remove excess starch.
- Adjust for altitude: High altitude cooking requires more water and longer times. Increase water by 1-2 tablespoons per cup.
- Your chart is your friend: Print our rice cooker cooking time chart and keep it on your fridge for instant reference.
Stop Guessing Use This Rice Cooker Cooking Time Chart
You stand in your kitchen, staring at the rice cooker. The clock ticks. You have no idea how long to cook that fancy jasmine rice your friend gave you. Sound familiar? You’re not alone. Thousands of home cooks guess rice times daily. And most end up with mushy, hard, or burnt results.
That ends today. This rice cooker cooking time chart is your ticket to perfect rice every single time. No more guesswork. No more kitchen disasters. Just fluffy, delicious rice that tastes like a restaurant made it.
By the end of this guide, you’ll master every rice variety. You’ll understand water ratios. You’ll know the exact steps from start to finish. Let’s get cooking.
Why Rice Cooker Cooking Times Matter
Rice seems simple. Just rice and water, right? Wrong. Rice is like a tiny sponge. It absorbs water at specific rates. Cook too long, and it turns to paste. Cook too little, and it’s crunchy and raw.
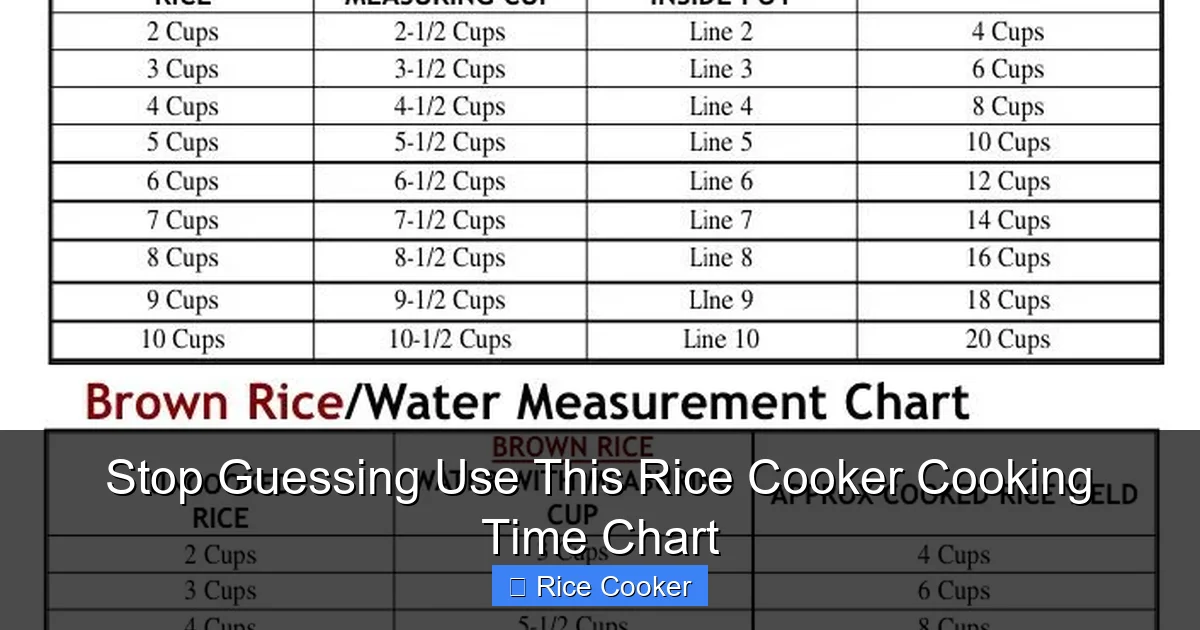
Visual guide about Stop Guessing Use This Rice Cooker Cooking Time Chart
Image source: i.pinimg.com
Different rice types have different needs. White rice is processed and cooks fast. Brown rice has tough outer layers and needs more time. Jasmine and basmati are aromatic varieties with their own rules. Your rice cooker cooking time chart removes all the mystery.
Using the right time also saves energy. You’re not running your cooker longer than needed. It keeps grains separate and fluffy. And most importantly? It tastes better. Way better.
Understanding Your Rice Cooker
Before we dive into times, let’s talk about your machine. Not all rice cookers are created equal. Most have simple “on” and “off” switches. Some have fancy fuzzy logic or induction heating. But the basics remain the same.
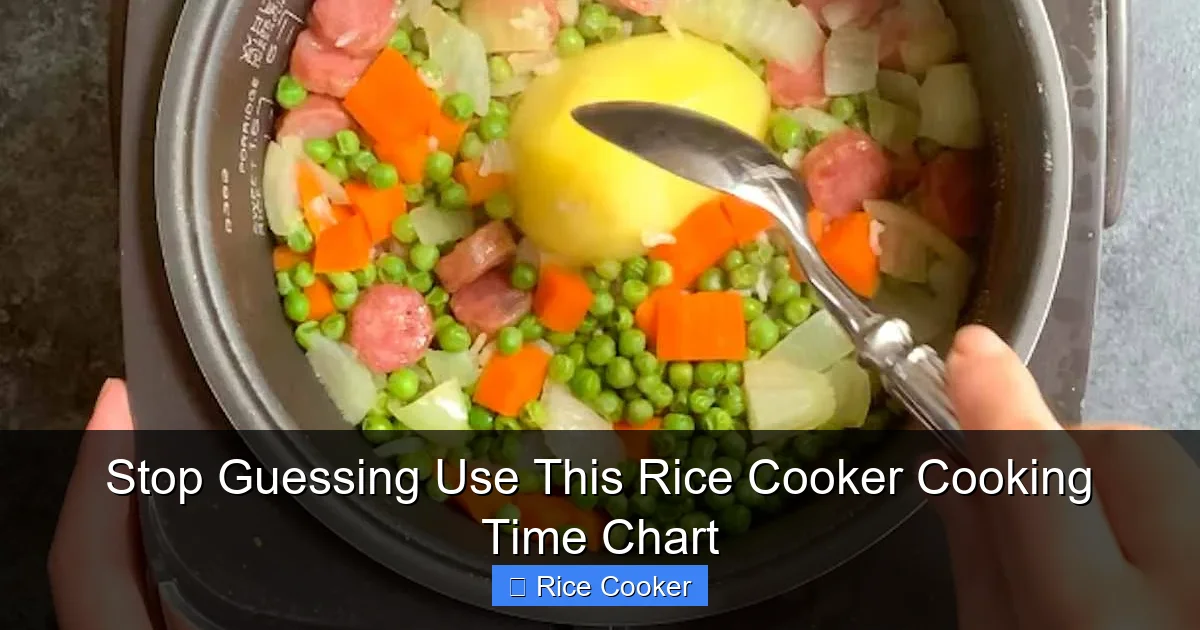
Visual guide about Stop Guessing Use This Rice Cooker Cooking Time Chart
Image source: izzycooking.com
How Rice Cookers Work
Rice cookers use a simple science principle. They boil water until it evaporates. Then they switch to warm mode. The magic happens in the thermostat. It detects when water is gone and shuts off. This prevents burning and keeps rice warm for hours.
Most standard cookers have one button. Press it down to cook. It pops up when done. Fancy models have settings for different rice types. But even those need the right water ratio and timing.
Types of Rice Cookers
Standard rice cookers work for most home kitchens. They’re affordable and simple. They use a heating plate and a thermal sensor.
Fuzzy logic cookers are smarter. They adjust time and temperature automatically. Perfect for brown rice, porridge, or steaming veggies.
Induction rice cookers are top-of-the-line. They heat the bowl evenly from all sides. Results are restaurant-quality. But they’re expensive.
No matter which you own, this rice cooker cooking time chart works for all. Just follow the guidelines below.
The Complete Rice Cooker Cooking Time Chart
Here it is. Your ultimate reference. Print this and stick it on your fridge. These times work for standard 3-10 cup rice cookers. For larger commercial models, increase times by 5 minutes.
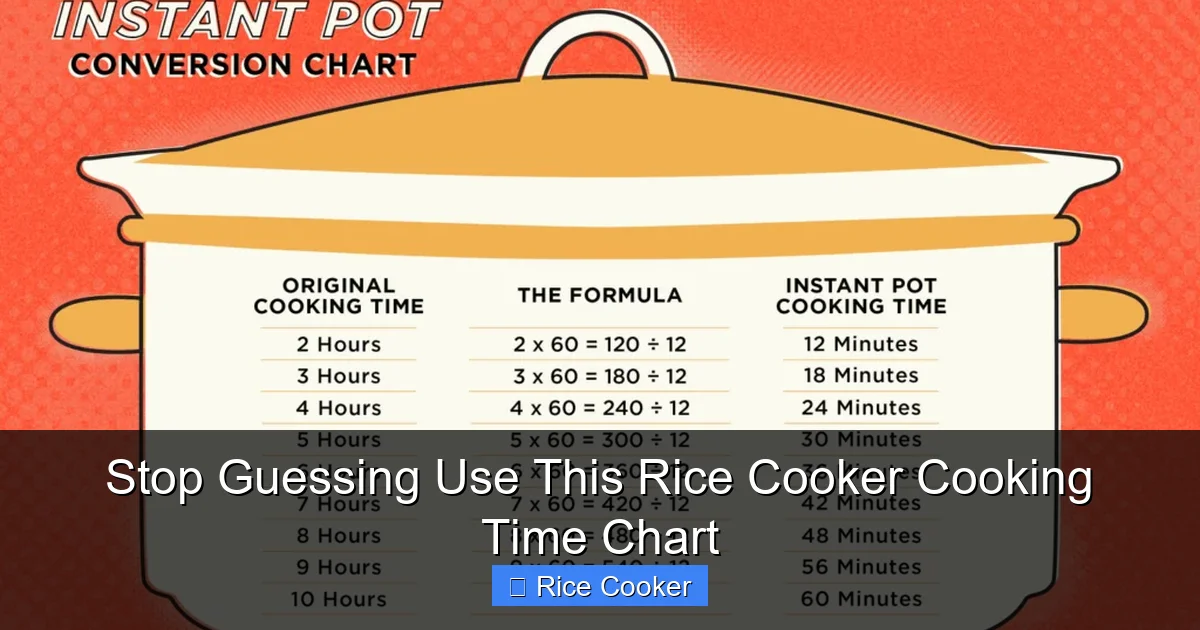
Visual guide about Stop Guessing Use This Rice Cooker Cooking Time Chart
Image source: cookingtimechart.com
White Rice: The Basics
White rice is the most common type. It cooks fast and fluffy. Perfect for beginners.
Standard white rice: 15-20 minutes cooking time. Use 1:1.5 rice to water ratio. Let rest 10 minutes after cooking.
Long grain white rice: 18-22 minutes. Same ratio as standard. Great for side dishes.
Short grain white rice: 15-18 minutes. Slightly stickier. Perfect for sushi or risotto.
Parboiled rice: 20-25 minutes. Takes longer because it’s partially pre-cooked.
Brown Rice: The Healthy Choice
Brown rice is whole grain. It has more fiber and nutrients. But it needs more water and time.
Standard brown rice: 30-40 minutes cooking time. Use 1:2 rice to water ratio. Let rest 15 minutes.
Long grain brown rice: 35-45 minutes. Fluffier texture. Needs extra water.
Short grain brown rice: 30-35 minutes. Creamier when cooked. Perfect for rice bowls.
Quick-cook brown rice: 20-25 minutes. Pre-steamed for faster results.
Jasmine Rice: The Fragrant Star
Jasmine rice is aromatic and slightly sticky. Popular in Thai and Vietnamese cooking.
White jasmine rice: 15-18 minutes. Use 1:1.5 ratio. Rinse well to remove starch.
Brown jasmine rice: 35-40 minutes. Use 1:2 ratio. Has a nutty flavor.
Jasmine rice expands beautifully. It’s perfect for curries and stir-fries. The aroma fills your kitchen.
Basmati Rice: The Indian Classic
Basmati rice is long and fragrant. It’s essential for Indian and Middle Eastern dishes.
White basmati rice: 15-20 minutes. Use 1:1.75 ratio. Soak for 30 minutes first for best results.
Brown basmati rice: 35-45 minutes. Use 1:2.25 ratio. Soaking helps too.
Basmati grains stay separate when cooked right. It’s perfect for biryani and pilaf.
Wild Rice: The Nutty Powerhouse
Wild rice isn’t technically rice. It’s a grass seed. But we cook it like rice.
Wild rice: 40-50 minutes. Use 1:3 ratio. It needs lots of water.
Wild rice blend: 30-40 minutes. Mix with white or brown rice. Adjust water accordingly.
Wild rice has a chewy texture. It’s packed with protein and fiber. Great for salads.
Sushi Rice: The Sticky Perfection
Sushi rice is short grain and very sticky. It holds together for rolls and sashimi.
Sushi rice: 15-20 minutes. Use 1:1.25 ratio. Add rice vinegar after cooking.
Rinse sushi rice until water runs crystal clear. This removes starch and creates stickiness.
Other Grains: Expand Your Horizons
Your rice cooker isn’t just for rice. It handles many grains beautifully.
Quinoa: 15-20 minutes. Use 1:2 ratio. Fluff with fork after resting.
Couscous: 5-10 minutes. Use 1:1.5 ratio. Let steam off heat.
Bulgur wheat: 15-20 minutes. Use 1:2 ratio. Perfect for tabbouleh.
Steel cut oats: 20-30 minutes. Use 1:3 ratio. Creamy breakfast in minutes.
Step-by-Step Perfect Rice in Your Cooker
Now that you have the chart, let’s walk through the process. These steps work for any rice type.
Step 1: Measure Correctly
Use the measuring cup that came with your rice cooker. It’s designed for the right proportions. Don’t use a regular kitchen cup. Scoop rice into the cup. Level it off with a knife.
For most white rice, use 1 cup rice to 1.5 cups water. For brown rice, use 1 cup rice to 2 cups water. Adjust based on your chart.
Write down your favorite ratios on a sticky note. Keep it with your rice cooker.
Step 2: Rinse the Rice
Rinsing is non-negotiable. It removes excess starch that causes gumminess. Place rice in a fine mesh strainer. Run cold water over it. Gently stir with your fingers.
Rinse for 30-60 seconds. Stop when water runs mostly clear. Some varieties like sushi rice need extra rinsing. Brown rice needs less rinsing to keep nutrients.
Skipping this step is the #1 mistake. Don’t do it. Your rice will thank you.
Step 3: Use the Right Water Ratio
Water is the secret weapon. Too little? Hard rice. Too much? Mushy mess. Use the ratios on your rice cooker cooking time chart.
Use room temperature water. Cold water can shock the grains. Measure in a liquid measuring cup. Check at eye level.
Some recipes call for broth instead of water. That’s fine. Keep the same ratio. Add salt if desired.
Step 4: Add Flavor Boosters (Optional)
Plain rice is fine. But why not make it amazing? Add a pinch of salt to the water. It seasons from within.
Try a teaspoon of butter or oil. It prevents sticking and adds richness. For Indian rice, add a bay leaf or cardamom pod.
For Mexican rice, add tomato sauce to the water. The possibilities are endless. Experiment!
Step 5: Start the Cooker
Place the inner pot in your rice cooker. Close the lid. Press the cook button. That’s it. Don’t peek. The steam is essential.
Your cooker will switch to warm when done. This is automatic. Trust the machine. It knows when rice is ready.
Step 6: Let It Rest
This is the most important step. Seriously. When the cooker switches to warm, don’t open it. Let rice rest for 10-15 minutes. This lets steam finish cooking. Grains become fluffy and separate.
Set a timer. Walk away. Check your email. Do the dishes. Just don’t rush this step.
Step 7: Fluff and Serve
After resting, open the lid. Use a rice paddle or fork. Gently fluff from bottom to top. Don’t stir vigorously. You’ll break the grains.
Serve immediately. Rice stays warm in the cooker for hours. But best flavor is right after cooking.
Factors That Affect Cooking Time
Your rice cooker cooking time chart is a great start. But real life has variables. Learn to adjust for perfect results every time.
Altitude Matters
Living in the mountains? You need more water. Water boils at lower temperatures at high altitude. This means longer cooking times.
For every 1,000 feet above sea level, add 1-2 tablespoons water per cup of rice. Increase cooking time by 2-3 minutes.
If your rice is consistently undercooked, altitude might be the culprit. Adjust accordingly.
Age of Your Rice
Old rice is drier. It needs more water. New rice has more moisture. It needs less water.
If your rice is more than a year old, add an extra 2-3 tablespoons water per cup. For rice less than 3 months old, reduce water slightly.
Store rice in an airtight container. Keep it in a cool, dark place. This extends freshness.
Desired Texture
Some like it firm. Some like it soft. Your preference matters. For firmer rice, reduce water by 2 tablespoons. For softer rice, add 2 tablespoons.
For risotto-style rice, add more water. Stir occasionally. This releases starch and creates creaminess.
For fried rice, use less water. Rice should be slightly firm. It fries better the next day.
Your Cooker’s Personality
Every rice cooker is unique. Some run hot. Some run cool. Know your machine.
Test your cooker with 1 cup rice and standard water. Time how long it takes. Adjust future cooking based on results.
Older cookers may need replacement. Thermostats wear out. If your rice is always burnt, consider a new model.
Troubleshooting Common Problems
Even with the perfect rice cooker cooking time chart, problems happen. Let’s fix them.
Mushy, Gummy Rice
Problem: Rice is overcooked and pasty.
Solution: You used too much water or cooked too long. Reduce water by 2 tablespoons next time. Check your chart for correct times.
Quick fix: Spread rice on a baking sheet. Let it sit 5 minutes. This evaporates extra moisture. Or use it for rice pudding. No waste!
Prevention is key. Measure water carefully. Don’t skip the resting time. Rinsing helps too.
Hard, Undercooked Rice
Problem: Rice is crunchy in the middle.
Solution: Not enough water or time. Add 1/4 cup water. Close lid. Cook 5 more minutes. Let rest 10 minutes.
Quick fix: Poke holes in the rice with a fork. Add water. This helps steam penetrate. Use the “quick cook” function if available.
Prevention: Check your altitude. Old rice needs more water. Soak long grain rice 15 minutes before cooking.
Burnt Rice on the Bottom
Problem: Black, crispy layer stuck to pot.
Solution: Your cooker ran too hot. Or you used too little water. Scrape out good rice. Discard burnt part.
Quick fix: Place a damp kitchen towel under the pot. This stops cooking. Or transfer rice to a new container immediately.
Prevention: Clean the heating plate. Food debris causes hot spots. Use correct water ratios. Don’t use the “keep warm” function too long.
Rice Stuck to Bottom
Problem: Rice won’t release from pot.
Solution: Let it cool completely. Then soak in warm water 10 minutes. The rice will release easily.
Quick fix: Use a plastic rice paddle. Gently work around edges. Don’t use metal utensils. They scratch non-stick coating.
Prevention: Add 1 teaspoon oil to water. It prevents sticking. Use a quality non-stick pot. Clean immediately after use.
Tips for Perfect Rice Every Time
These pro tips will make you a rice master. Add them to your routine.
Use the soaking trick: Soak white rice 15 minutes before cooking. Soak brown rice 30 minutes. This reduces cooking time and improves texture.
Season the water: Add salt, herbs, or spices to the cooking water. Flavor infuses throughout. Try garlic powder for Mexican rice.
Don’t lift the lid: Peeking releases steam. It extends cooking time. Trust your rice cooker. It knows what it’s doing.
Fluff immediately: Use a fork to separate grains right after resting. This prevents clumping. Work from bottom to top gently.
Batch cook: Make extra rice. Freeze in portion bags. Reheat in microwave 2 minutes. Perfect for busy weekdays.
Clean your cooker: Wipe the lid and steam vent after each use. Food buildup affects performance. Check manufacturer instructions.
Try different liquids: Use chicken broth, coconut milk, or vegetable stock instead of water. It adds incredible flavor. Keep the same ratio.
Invest in a quality cooker: A good rice cooker makes all the difference. Check out our guide to essential kitchen tools for recommendations.
Beyond Rice: Other Foods Your Cooker Can Make
Your rice cooker is a multitasking marvel. Don’t limit it to rice alone.
Hard boiled eggs: Place eggs in pot. Add 1 cup water. Cook 12 minutes. Cool in ice water. Peels come off easily.
Steamed vegetables: Use the steamer basket. Broccoli, carrots, and green beans cook in 10-15 minutes. Perfect side dish.
Risotto: Yes, risotto in a rice cooker! Add rice, liquid, and cheese. Use the “porridge” setting. Stir occasionally.
Oatmeal: Steel cut oats cook perfectly. Add fruit and nuts. Breakfast ready when you wake up.
Soup: Some cookers have soup settings. Make chicken rice soup in 30 minutes. Great for cold days.
These ideas save time and energy. One pot means easy cleanup too. Your rice cooker is your busy weekday hero.
Conclusion
You now have the complete rice cooker cooking time chart. You know the steps. You understand the troubleshooting. You’re ready to cook perfect rice every single time.
Print this guide. Keep it handy. Refer to it often. Practice with different rice types. Find your favorites. Experiment with flavors.
Perfect rice is a skill. And like any skill, practice makes perfect. In a few weeks, you won’t need the chart. You’ll know by heart.
Stop guessing. Start cooking. Your perfect rice awaits.
Final Rice Cooker Cooking Time Chart
Here’s your at-a-glance reference. Copy this exactly:
- White Rice: 15-20 minutes (1:1.5 ratio)
- Brown Rice: 30-40 minutes (1:2 ratio)
- Jasmine Rice: 15-18 minutes (1:1.5 ratio)
- Basmati Rice: 15-20 minutes (1:1.75 ratio, soak first)
- Wild Rice: 40-50 minutes (1:3 ratio)
- Sushi Rice: 15-20 minutes (1:1.25 ratio)
- Quinoa: 15-20 minutes (1:2 ratio)
- Steel Cut Oats: 20-30 minutes (1:3 ratio)
Always let rice rest 10-15 minutes after cooking. Always rinse before starting. Always measure carefully.
Now go make some rice!