How Cast Iron Skillets Are Made From Molten Metal To Kitchen
Ever wondered how your favorite cast iron skillet transforms from raw metal to kitchen essential? This guide walks you through the fascinating six-step manufacturing process, from melting pig iron to the final seasoning. You’ll discover what makes these durable pans last for generations. (48 words)
Key Takeaways
- Raw Materials: Cast iron skillets are made from pig iron, scrap metal, and additives melted together.
- Melting Process: Metal reaches over 2,000°F in a furnace to become molten.
- Mold Creation: Sand molds are pressed with a pattern to create the skillet cavity.
- Pouring: Molten iron is carefully poured into molds to form the skillet shape.
- Cooling Time: Skillets cool for hours before removal from molds.
- Seasoning: A protective oil coating is baked on to prevent rust and create non-stick surface.
- Quality Check: Each skillet is inspected for defects before packaging.
Introduction: The Journey From Foundry to Your Stovetop
You probably love your cast iron skillet. It sears steak perfectly. It bakes cornbread like a dream. It might even be your grandmother’s old pan. But have you ever wondered how this kitchen workhorse is actually made? The journey from molten metal to your kitchen is fascinating, involving intense heat, precise molds, and careful craftsmanship.
In this guide, we’ll walk through each step of the manufacturing process. You’ll learn about the raw materials, the extreme temperatures involved, and why seasoning is the final secret ingredient. By the end, you’ll understand exactly what makes your cast iron skillet so special and durable. Plus, you’ll appreciate the skill that goes into every pan.
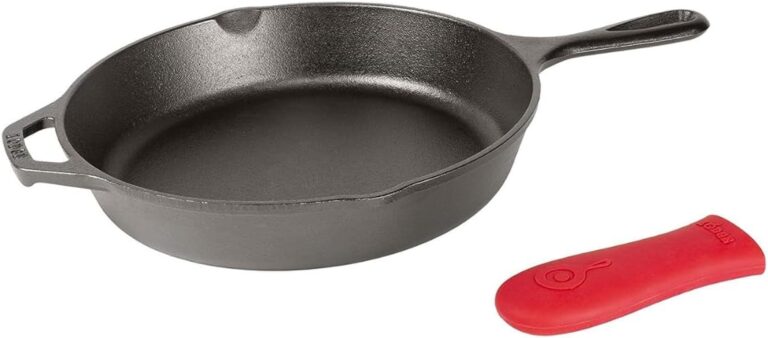
The Raw Materials: What Makes Cast Iron Special
Before the magic happens, we need the right ingredients. A cast iron skillet isn’t made from pure iron. Instead, it’s an alloy with specific properties.

Visual guide about How Cast Iron Skillets Are Made From Molten Metal To Kitchen
Image source: as1.ftcdn.net
The Perfect Recipe for Cast Iron
Manufacturers start with pig iron. This is raw iron from blast furnaces. It contains high carbon content. Then they add scrap metal. This might include old castings, machine parts, or other iron waste. The scrap helps control quality and cost.
Next come additives. These include silicon, manganese, and sometimes magnesium. These elements improve the metal’s fluidity when molten. They also affect how the iron solidifies and its final strength. The exact recipe varies by manufacturer and skillet type.
The carbon content is crucial. It typically runs between 2% and 4%. This high carbon makes the iron brittle enough to hold its shape but strong enough to withstand thermal shock. That’s why your skillet can go from stove to oven without cracking.
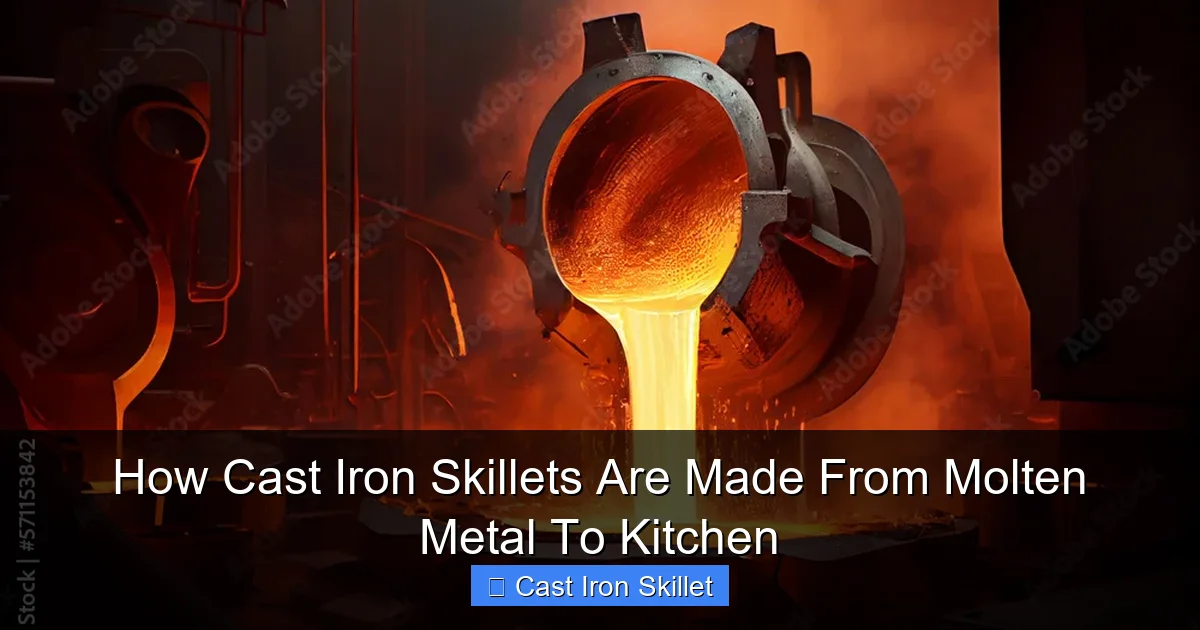
Step 1: Melting the Metal
This is where things get hot. Really hot. The raw materials go into a furnace. Most modern foundries use electric induction furnaces. These are efficient and provide precise temperature control.
Visual guide about How Cast Iron Skillets Are Made From Molten Metal To Kitchen
Image source: urbanvegan.net
Reaching Extreme Temperatures
The furnace heats to over 2,000°F (1,093°C). That’s more than twice as hot as your oven at home. At these temperatures, the iron and scrap metal melt completely. The mixture becomes a glowing, liquid pool.
Workers monitor the temperature constantly. They also take samples to check the chemical composition. If something’s off, they adjust it before proceeding. This quality control step prevents defects later.
The molten iron looks like liquid light. It’s bright orange-yellow and gives off intense heat. Foundry workers wear special protective gear. This includes face shields, heavy gloves, and heat-resistant suits. Safety is paramount in this environment.
Step 2: Creating the Mold
While the metal melts, the mold is prepared. Most cast iron skillets use green sand molds. Don’t let the name fool you—this isn’t regular sand from the beach.
Visual guide about How Cast Iron Skillets Are Made From Molten Metal To Kitchen
Image source: as1.ftcdn.net
The Sand Mixture
Green sand is a mixture of silica sand, clay, and water. The clay acts as a binder. It holds the sand grains together. The water activates the clay. The mixture feels damp, like beach sand packed for a castle.
Workers pack this sand tightly around a pattern. The pattern is an exact replica of the skillet, usually made from wood or metal. It includes the handle, the cooking surface, and even the pour spout.
Pressing the Mold
The pattern presses into the sand. It creates a perfect negative impression. This is called the mold cavity. The sand is packed so tightly that it holds its shape when the pattern is removed.
Next, workers add channels to the mold. These are called gates and risers. The gates let molten iron flow into the cavity. The risers allow air to escape and extra metal to flow out. This prevents bubbles and ensures the mold fills completely.
The mold is then closed. Two halves fit together precisely. The seam where they meet becomes the flashing line you might see on a new pan. It’s a slight ridge that gets cleaned up later.
Step 3: Pouring the Molten Iron
Now comes the dramatic moment. Workers ladle the molten iron from the furnace. They carry it to the mold station. This is skilled work. The ladle is heavy, and the metal is dangerous.
The Perfect Pour
The iron must be poured at just the right speed. Too fast, and it splashes, creating defects. Too slow, and the metal might cool before filling the mold. Experienced workers know the rhythm by feel.
They pour through the gates. The metal fills the cavity from bottom to top. The risers bubble as air escapes. When metal flows steadily from the risers, the mold is full.
This whole process takes just seconds. A skillet mold might hold 10-15 pounds of iron. The worker must be steady and sure. One wrong move can ruin the casting or cause a dangerous accident.
Step 4: Cooling and Solidification
After pouring, the real waiting game begins. The iron needs time to cool and harden. This isn’t a quick process.
Patience is Key
The mold sits for several hours. Small skillets might cool in 2-3 hours. Larger ones can take 6-8 hours or more. The cooling time depends on the skillet’s thickness and size.
During this time, the iron undergoes changes. It solidifies from the outside in. The metal contracts slightly as it cools. This is normal and expected. The mold is designed to allow this shrinkage.
Workers monitor the temperature. They use infrared cameras to check that cooling is even. Uneven cooling can cause warping or cracks. If the skillet cracks, it’s a total loss.
Step 5: Shakeout and Cleaning
Once cooled, it’s time to free the skillet from its sandy prison. This step is called shakeout. The mold is literally shaken apart.
Breaking the Mold
The sand mold is broken apart. Workers use vibration tables or simple hammers. The sand falls away from the new casting. It’s recycled and used again for the next mold. Foundries reuse sand many times.
Now the raw casting appears. It’s gray and rough. The handle is still attached to the sprue—the main channel where metal entered. The gates and risers are also attached. These will be removed.
Initial Cleaning
Workers cut off the sprue, gates, and risers. They use abrasive wheels or plasma cutters. The edges are rough at this stage.
Next comes sandblasting. The skillet is blasted with fine abrasive material. This removes any remaining sand and scale. It also smooths the surface slightly. The skillet starts to look more like the pan you’d recognize.
Step 6: Seasoning and Finishing
This is the final step that makes a cast iron skillet truly ready for your kitchen. Seasoning creates the non-stick surface and prevents rust.
The Seasoning Process
Workers wash the skillet thoroughly. They remove all dust and oils from manufacturing. Then they dry it completely. Any moisture would cause rust.
Next, they apply a thin layer of oil. Most manufacturers use soybean oil or flaxseed oil. The oil must be food-safe and pure. They wipe off any excess. The surface should look barely oiled.
Baking the Seasoning
The skillet goes into a large oven. The temperature climbs to around 400-500°F (204-260°C). The oil polymerizes. This means it hardens into a protective coating. This process takes about an hour.
Some manufacturers repeat this process. They apply a second coat and bake again. Multiple layers create a more durable seasoning. This is what gives new skillets that black, non-stick finish.
Final Inspection
Each skillet gets a final check. Workers look for cracks, warping, or surface defects. They test the cooking surface for smoothness. Any flawed skillets are rejected and melted down again.
Approved skillets get packaged. They’re wrapped in protective material and boxed. Some come with care instructions. Others include recipes to get you started.
Troubleshooting Common Casting Issues
Even with perfect processes, things can go wrong. Here are common issues and how manufacturers fix them.
Porosity and Bubbles
If the mold wasn’t vented properly, air gets trapped. This creates bubbles in the metal. The result is a porous skillet that leaks. To prevent this, workers ensure all risers are clear. They also pour at the right speed to avoid turbulence.
Shrinkage Cracks
Sometimes the metal shrinks too much. This causes cracks, especially in thick areas. The solution is better mold design. Chills—metal inserts that cool faster—can be added to control cooling rates.
Surface Defects
Rough surfaces happen when the sand is too coarse. Fine sand gives a smoother finish. If the metal cooled too slowly, the grain structure grows large. This makes the surface rough. Proper temperature control prevents this.
When these issues occur, the skillet is often salvageable. Workers can grind down rough spots. Small cracks can be welded. But major defects mean the casting goes back to the furnace.
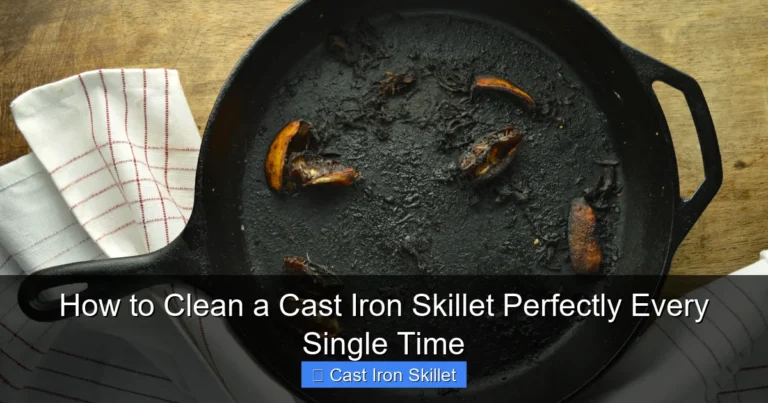
Caring for Your New Cast Iron Skillet
Your skillet is ready to use, but proper care makes it last generations. Think of it as a pet that needs attention.
First Use
Before cooking, wash your skillet with warm water and mild soap. Dry it immediately and thoroughly. Apply a thin coat of oil. Heat it on the stove for a few minutes. This activates the seasoning.
Regular Cleaning
After cooking, avoid soaking your skillet. Scrub with a brush and hot water. Never put it in the dishwasher. Dishwasher detergent strips seasoning. Dry the pan completely after washing. A few drops of oil rubbed in keeps it protected.
Preventing Sticking
Food sticking is the number one complaint. Proper preheating prevents this. Heat your skillet on medium for 5-10 minutes before adding oil. The oil should shimmer but not smoke. Then add your food. For more tips, check out our guide on how to prevent food from sticking to pans.
Storing Your Skillet
Store your skillet in a dry place. Moisture causes rust. If stacking pans, place a paper towel between them. This absorbs any trapped moisture. Never store food in your cast iron skillet. Acids in food break down the seasoning.
Why Cast Iron Lasts So Long
Your cast iron skillet can outlive you. Here’s why these pans are so incredibly durable.
Material Strength
Cast iron is thick and dense. It doesn’t warp under high heat. The material is the same throughout. Unlike non-stick pans that wear out, cast iron just gets better with age.
Thermal Mass
The heavy weight means high thermal mass. Your skillet holds heat evenly. This prevents hot spots that burn food. It also means steady cooking temperatures. This is why learning to cook without burning food is easier with cast iron.
The Living Seasoning
Seasoning isn’t static. It improves with use. Each time you cook fatty foods, you add another polymer layer. This creates a natural non-stick surface. With proper care, the seasoning becomes nearly permanent.
Environmental Impact and Sustainability
Cast iron is one of the most sustainable cookware options. Let’s look at why.
Recycled Content
Most cast iron contains 70-80% recycled material. Foundries melt down old castings and scrap. This reduces the need for new iron ore. Recycling iron uses far less energy than mining and refining new iron.
Longevity
Because these skillets last decades, they reduce waste. You won’t need to replace your pan every few years. This cuts down on landfill waste and the demand for new products.
End of Life
When your skillet finally gives out, it’s 100% recyclable. Scrap yards accept cast iron. It gets melted down and made into new products. Nothing goes to waste.
Conclusion: Appreciating the Craft
Now you know the journey your cast iron skillet takes from raw metal to your kitchen. It’s a process that combines ancient techniques with modern precision. Every step matters—from the careful selection of raw materials to the final seasoning bake.
The next time you heat your skillet, remember the 2,000°F furnace that made it. Think about the workers who poured the molten metal. Consider the science behind the seasoning that makes your eggs slide right out. This knowledge makes using your pan even more special.
Your cast iron skillet is more than cookware. It’s a piece of industrial art. With proper care, it will serve you and your family for generations. Happy cooking!
🎥 Related Video: How Cast Iron Pans Are Made — How to Make It
📺 Eater
On today’s episode of HTMI, chef Katie Pickens is at Roloff Manufacturing Company, learning the whole process of making cast …