Can I Make Roti on Frying Pan
Making roti on a frying pan is not only possible but also simple and effective. With the right technique and a few handy tips, you can enjoy fresh, soft rotis anytime without needing specialized cookware. This guide walks you through every step to master roti on your frying pan.
Key Takeaways
- Roti can be made easily on a frying pan: No need for a traditional tawa or griddle, a regular frying pan works well.
- Proper heat control is essential: Medium-high heat helps cook the roti evenly without burning.
- Dough preparation matters: Soft but not sticky dough yields the best roti texture.
- Use a lid for puffing: Covering the roti while cooking traps steam and helps it puff up nicely.
- Practice rolling evenly: Even thickness ensures uniform cooking and softness.
- Timing and flipping: Knowing when to flip keeps the roti from drying out or burning.
- Frying pan material impacts results: Non-stick or cast iron pans work great for making rotis.
📑 Table of Contents
- Introduction: Can I Make Roti on Frying Pan?
- Why Use a Frying Pan for Making Roti?
- Preparing the Perfect Dough for Frying Pan Roti
- How to Cook Roti on a Frying Pan: Step-by-Step Guide
- Choosing the Best Frying Pan for Making Roti
- Common Mistakes to Avoid When Making Roti on a Frying Pan
- Tips and Tricks for Perfect Frying Pan Rotis Every Time
- Conclusion: Yes, You Can Make Roti on a Frying Pan!
Introduction: Can I Make Roti on Frying Pan?
If you love Indian cuisine, you know that roti is a staple in many households. Traditionally, rotis are cooked on a flat, round griddle called a tawa. But what if you don’t have one handy? Can I make roti on a frying pan? The answer is a big yes! A frying pan can do the job just fine with a little know-how.
Whether you are a beginner or someone trying to simplify your kitchen tools, using a frying pan to make roti can be a game changer. It’s convenient, quick, and yields delicious results. This article will guide you through the process step-by-step and share tips to get soft, fluffy rotis right from your frying pan.
Why Use a Frying Pan for Making Roti?
Accessibility and Convenience
Not everyone owns a tawa or a traditional griddle. A frying pan is a common kitchen tool found in almost every household. Using it to make roti saves you from buying extra cookware. Plus, it’s perfect for small kitchens or when cooking for one or two people.

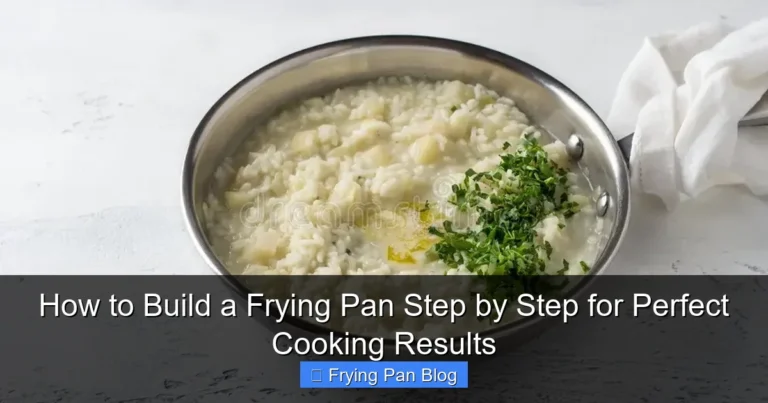
Visual guide about Can I Make Roti on Frying Pan
Image source: thumbs.dreamstime.com
Versatility of Frying Pans
Frying pans come in various materials such as non-stick, cast iron, and stainless steel. Each type offers benefits for cooking roti. For example, cast iron retains heat well and gives a nice char, while non-stick pans make flipping easy and reduce sticking.
Speed and Efficiency
Frying pans heat up quickly and distribute heat evenly. This means your rotis cook faster, making meal preparation quicker. If you’re in a hurry, a frying pan is a fantastic choice.
Preparing the Perfect Dough for Frying Pan Roti
Ingredients You’ll Need
- Whole wheat flour (atta) – 2 cups
- Water – approximately ¾ cup
- Salt – ½ teaspoon (optional)
- Oil or ghee – 1 teaspoon (optional)
Step-by-Step Dough Preparation
Start by mixing the whole wheat flour and salt in a large bowl. Gradually add water little by little and knead the dough. The goal is to get a soft, pliable dough that is not too sticky or too dry.
Knead for about 8-10 minutes until smooth. Cover the dough with a damp cloth and let it rest for at least 20 minutes. Resting helps the gluten develop, making the dough easier to roll and the rotis softer.
Tips for Perfect Dough
- Use lukewarm water to help bind the flour better.
- Add a teaspoon of oil to make the rotis softer.
- If the dough feels sticky, sprinkle some flour while kneading.
How to Cook Roti on a Frying Pan: Step-by-Step Guide
Preheat the Pan Correctly
Place your frying pan on medium-high heat. Let it become hot before you place the roti. You can test by sprinkling a few drops of water; if they sizzle and evaporate quickly, the pan is ready.
Rolling the Roti
Divide the dough into small balls, about the size of a golf ball. Dust your rolling surface and rolling pin with flour. Roll the dough ball evenly into a thin circle, about 6-7 inches in diameter. Avoid pressing too hard to maintain air pockets.
Cooking the Roti
Place the rolled roti on the hot frying pan. You will notice bubbles forming in a few seconds. After about 30 seconds, flip it over.
Cook the other side for 30-40 seconds, then flip again. This time, cover the pan with a lid for about 20 seconds. The trapped steam helps the roti puff up beautifully.
Final Flips and Serving
Remove the lid and flip the roti once more to get brown spots on both sides. If it doesn’t puff, don’t worry; it will still taste great. Remove from the pan and place it in a container lined with a clean kitchen towel to keep warm.
Choosing the Best Frying Pan for Making Roti
Non-Stick Pans
Non-stick frying pans are beginner-friendly. They prevent sticking and make flipping easier. However, they may not provide the same charred spots as cast iron pans.
Cast Iron Pans
Cast iron retains heat evenly and can give your roti that authentic smoky flavor. They require seasoning but are durable and versatile for many cooking styles.
Stainless Steel Pans
These pans can be used, but they require more attention to heat control and oiling to prevent sticking. They heat quickly but sometimes unevenly.
Common Mistakes to Avoid When Making Roti on a Frying Pan
Using Too Much or Too Little Heat
Too high heat burns the roti; too low heat makes it dry and hard. Medium-high heat is ideal for even cooking.
Not Letting the Dough Rest
Skipping the rest time can make the dough tough and difficult to roll, resulting in hard rotis.
Rolling Uneven Rotis
Uneven thickness causes some parts to burn while others remain undercooked. Roll gently and evenly.
Not Using a Lid for Puffing
The lid traps steam and helps the roti puff. Without it, rotis may be flat and less soft.
Tips and Tricks for Perfect Frying Pan Rotis Every Time
- Use fresh flour: Older flour may affect dough consistency.
- Keep a damp cloth nearby: Cover dough balls so they don’t dry out before rolling.
- Practice rolling: The more you roll, the better you get at even shapes.
- Brush with ghee or butter: Adds flavor and softness after cooking.
- Serve immediately: Rotis taste best hot and fresh.
Conclusion: Yes, You Can Make Roti on a Frying Pan!
Making roti on a frying pan is a practical and effective approach, especially if you don’t have a traditional tawa. With the right dough, heat control, and a few simple techniques, you can enjoy soft, delicious rotis anytime. Don’t be afraid to experiment with different pans to find what works best for you.
Next time you crave homemade roti, grab your frying pan and try these tips. You’ll be surprised at how easy and rewarding it is to make roti right on your stovetop without any special equipment!
🎥 Related Video: First time fri pan me banaye phoole phoole roti #shorts
📺 Shabnam kitchen
Frequently Asked Questions
Can I use any frying pan to make roti?
Yes, you can use most frying pans, but non-stick or cast iron pans are preferred for even heating and ease of flipping. Avoid pans with uneven surfaces for best results.
How hot should the frying pan be to cook roti?
Medium-high heat is ideal. The pan should be hot enough so that water droplets sizzle and evaporate quickly but not so hot that the roti burns immediately.
Why isn’t my roti puffing up on the frying pan?
Puffing happens due to steam trapped inside the roti. Make sure to cover the roti with a lid while cooking and roll the dough evenly. Also, the dough should be soft but not sticky.
Can I make stuffed rotis on a frying pan?
Absolutely! Stuffed rotis like parathas cook well on frying pans. Just cook them on medium heat and flip carefully to avoid burning the filling.
Should I apply oil or ghee while cooking roti on a frying pan?
While traditional rotis are cooked dry, you can lightly brush oil or ghee after cooking for added flavor and softness. Avoid adding oil while cooking on the pan unless making parathas.
How do I store leftover roti made on a frying pan?
Store leftover rotis in an airtight container at room temperature for a few hours. For longer storage, refrigerate and reheat on the frying pan or microwave before serving.