
What Is the Best Way to Clean a Dish Rack?

Quick Answer
The best way to clean a dish rack is to remove every detachable part, wash it with warm water and mild dish soap, scrub corners and joints with a soft brush, rinse well, and let everything dry completely before reassembly. This follows the basic clean-first approach recommended in USDA kitchen-cleaning guidance.
Quick cleaning steps
- Take it apart: Remove the tray, utensil cup, feet, and other detachable pieces.
- Wash with soap: Use warm water and a small amount of mild dish soap.
- Scrub tight areas: Use a soft brush around joints, grooves, feet, and wire intersections.
- Rinse thoroughly: Remove soap, loosened dirt, and food residue.
- Dry completely: Let all parts air-dry before putting the rack back together.
- Check the tray: Never leave standing water underneath the rack.
One important warning
- Never mix bleach with vinegar, ammonia, or another household cleaner.
A dish rack looks clean most of the time, so it is easy to forget about it. Water spots, soap film, food crumbs, grease, and grime can still collect around the tray and joints.
My rule is simple. If water can sit in a spot, that area deserves extra attention when I clean the rack.
What Is the Best Way to Clean a Dish Rack Step by Step?
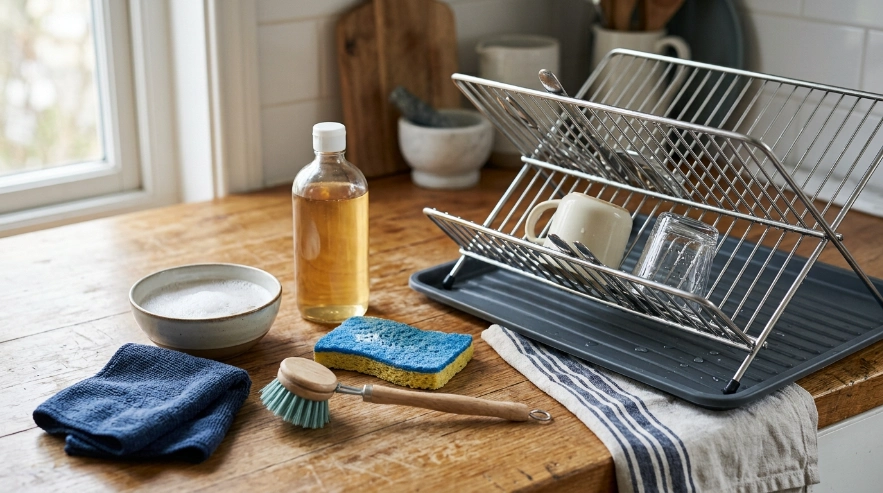
The safest general method is a full hand wash with warm soapy water, gentle scrubbing, a thorough rinse, and complete drying. You usually do not need harsh chemicals for routine cleaning.
As of 2026, this is still the method I recommend for most stainless steel, plastic, and coated dish racks.
1. Empty the rack completely
Remove every plate, glass, bowl, utensil, cutting board, and lid. You need access to the entire rack.
Take off any removable pieces before you start washing.
- Drain board or drip tray
- Utensil holder
- Glass holders
- Rubber feet
- Removable side racks
- Detachable covers or caps
Small removable parts often hide the worst buildup. That is why I clean them separately rather than wiping around them.
2. Rinse away loose debris
Use warm running water to remove crumbs and loose residue. This makes the real scrubbing much easier.
Pay close attention to the bottom tray. It often catches food particles that fall from freshly washed dishes.
3. Wash with mild dish soap
Add a small amount of dish soap to warm water. Use a soft sponge, microfiber cloth, or nylon brush.
Scrub the whole rack instead of cleaning only the visible top surface.
- Wire intersections: Grease and mineral film can settle around crossed wires.
- Tray corners: Standing water often collects here.
- Utensil cup: Clean the bottom and drainage holes.
- Feet: Wipe underneath rubber or silicone contact points.
- Joints: Use a narrow brush to reach crevices.
A toothbrush-sized cleaning brush works especially well for these areas. I prefer nylon bristles because they reach tight spaces without aggressive scraping.
4. Rinse until no soap remains
Rinse each piece under clean water. Check corners because thick soap can remain trapped there.
The rack should feel clean rather than slippery when you finish.
5. Let the rack dry completely
Complete drying matters because a constantly wet rack can develop odor, slime, mineral buildup, or mold in trapped areas. Good airflow helps moisture disappear faster.
I shake off excess water first. Then I leave the pieces separated until they are fully dry.
6. Clean the counter before replacing it
Do not put a clean rack onto a dirty or wet counter. Wipe the area underneath with warm soapy water and dry it.
This small step prevents you from putting fresh grime straight back underneath the rack.
How Often Should You Clean a Dish Rack?
There is no single cleaning interval that fits every kitchen. Usage, humidity, ventilation, rack design, and standing water all affect how quickly dirt builds up.
For a normal home kitchen, this is the practical schedule I use as a starting point.
| When | What I Clean | Main Goal |
|---|---|---|
| Daily or as needed | Empty standing water and remove visible crumbs | Prevent wet buildup |
| About once a week | Rack, tray, utensil cup, and removable pieces | Remove soap film and routine grime |
| About once a month | Joints, feet, drainage holes, underside, and hidden areas | Deep cleaning |
| Immediately | Any area with slime, odor, mold, food, or dirty water | Correct contamination quickly |
A busy household may need more frequent washing. A rack that stays wet all day also deserves extra attention.
How Do You Clean a Stainless Steel Dish Rack?
Wash stainless steel with mild soap, warm water, and a non-abrasive sponge or nylon brush. Dry it afterward to reduce water spots and long-term moisture exposure.
Avoid steel wool unless the rack manufacturer specifically allows it. Rough metal scrubbers can scratch polished surfaces.
- Wash in the direction of the visible grain when possible.
- Use a soft brush around welded joints.
- Rinse away all cleaner residue.
- Dry areas where water tends to sit.
The same gentle approach matters when cleaning stainless steel without scratching it.
How Do You Clean a Plastic Dish Rack?
Plastic racks are usually easy to wash with warm water, dish soap, and a soft brush. Their biggest trouble spots are narrow grooves, drainage holes, and textured surfaces.
Do not assume every plastic rack is dishwasher-safe. High heat can warp some plastics.
Can I put a plastic dish rack in the dishwasher?
Only do this when the manufacturer says the rack or removable part is dishwasher-safe. Size also matters because a large rack can interfere with spray arms.
Dishwasher compatibility varies widely among kitchen products. Our guide to deciding whether kitchen items can go in the dishwasher explains why manufacturer instructions should come first.
How Do You Remove White Buildup From a Dish Rack?
White or chalky marks are often mineral deposits left behind as water evaporates. Hard-water areas tend to show them faster.
Start with dish soap and gentle scrubbing. If the marks remain, check the rack manufacturer’s care instructions before using an acidic cleaner such as vinegar.
My method for mineral spots
- Wash the rack normally with warm soapy water.
- Rinse it completely.
- Check the manufacturer’s cleaning instructions.
- If vinegar is permitted, apply a small amount to the affected area.
- Let it work briefly rather than soaking coated metal for a long period.
- Scrub gently with a soft brush.
- Rinse well and dry completely.
Test any cleaner on a small hidden area first. Acid can damage certain finishes and natural materials.
How Do You Remove Rust From a Dish Rack?
Small rust spots need different treatment from ordinary dirt. First determine whether the rack is bare stainless steel, chrome-plated, painted, or vinyl-coated.
Do not scrub aggressively before identifying the finish.
For light surface rust
- Wash away grease and dirt first.
- Use only a cleaner suitable for that rack material.
- Work on the rust spot gently.
- Rinse away all residue.
- Dry the rack immediately.
If a coating is peeling and rust keeps returning underneath it, replacement may make more sense than repeated scrubbing. Damaged coating can expose more metal each time you clean it.
For a deeper look at corrosion treatment on kitchen metal, see our guide to removing rust from cookware.
Should You Sanitize a Dish Rack?
Routine dish-rack care usually starts with thorough cleaning. Sanitizing becomes more useful when contamination risk is higher or when the manufacturer specifically recommends it.
Cleaning and sanitizing are not the same thing.
| Method | What It Does | When I Use It |
|---|---|---|
| Cleaning | Removes dirt, food, grease, and residue | Routine dish-rack maintenance |
| Sanitizing | Reduces germs after the surface has already been cleaned | Higher-risk contamination or manufacturer-directed care |
If you use a commercial sanitizer, make sure it is suitable for the rack material and any relevant food-contact surfaces. Follow the label for concentration, contact time, rinsing, and ventilation.
USDA guidance also stresses that cleaning should come before sanitizing. You can review broader USDA food-safety cleaning guidance for kitchen surfaces and utensils.
Never mix cleaning chemicals
Never combine chlorine bleach with vinegar, ammonia, or other household cleaners. Dangerous gases can form.
Use one product at a time and follow its label.
What About Mold on a Dish Rack?
Visible mold usually means moisture has remained in one area for too long. Clean the rack promptly and inspect every joint, tray, foot, and hollow section.
Pay special attention to areas you cannot easily reach.
- Remove and wash detachable components.
- Clean visible residue with warm soapy water.
- Use only a manufacturer-approved sanitizer if needed.
- Rinse when the product instructions require it.
- Allow every part to dry completely.
If mold is trapped inside a sealed cavity that cannot be cleaned, replacing the rack may be the better option. The same applies to cracked plastic or badly peeling coatings.
Is Air-Drying the Dish Rack Important?
Yes. A clean rack should be allowed to dry thoroughly before it returns to constant use.
The CDC’s cleaning and drying guidance also emphasizes thorough air-drying after sanitizing appropriate household items.
Help the rack dry faster
- Empty the drip tray instead of letting water sit.
- Keep drainage openings clear.
- Leave space around the rack for airflow.
- Separate removable parts after washing.
- Do not place the rack on a permanently wet towel.
This is one of the simplest habits you can change. It also reduces the amount of scrubbing needed later.
Common Dish Rack Cleaning Mistakes
Most dish-rack problems come from moisture, missed crevices, or cleaners that are too aggressive. These mistakes are easy to prevent.
- Only wiping the top: The tray and underside often hold more grime.
- Leaving standing water: Empty the tray whenever water collects.
- Using steel wool: It can scratch stainless steel and damage coatings.
- Ignoring removable parts: Dirt hides underneath cups, feet, and trays.
- Putting everything back wet: Dry the rack before reassembly.
- Mixing cleaners: Never combine bleach, vinegar, ammonia, or unknown chemicals.
- Assuming dishwasher safety: Check the manufacturer first.
One original rule guides almost every rack I assess: clean the places that stay wet longest first. Those are usually the areas that create trouble.
What Should You Use to Clean a Dish Rack?
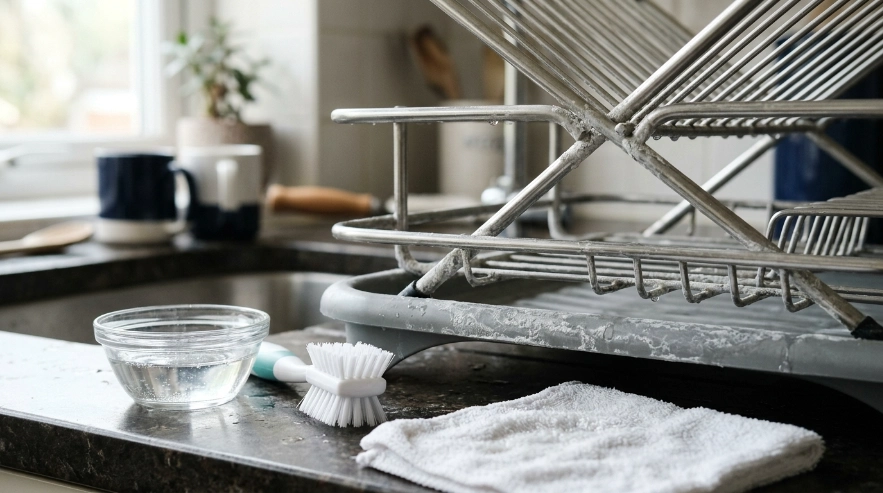
You do not need a large cleaning kit. Mild soap and a few non-abrasive tools handle most jobs.
If you want dedicated tools, these are the types I would choose.
🏆 Best for crevices
OXO Good Grips Deep Clean Brush Set
My fit rating: ★★★★★
The set uses nylon-bristle brushes in two useful sizes. I like this style for tray corners, wire joints, drainage holes, and narrow gaps that a sponge misses.
🧽 Best gentle scrubber
Scotch-Brite Zero Scratch Scrub Sponge
My fit rating: ★★★★☆
Its non-scratch scrubbing side makes it more suitable than aggressive scouring pads for many finished kitchen surfaces. I would still test a hidden spot on delicate coatings first.
💧 Best simple soap option
Dawn Free & Clear EZ-Squeeze Dish Soap, Unscented
My fit rating: ★★★★☆
This unscented option has no added dyes or chlorine. For routine cleaning, I prefer a normal dish detergent over jumping straight to harsh cleaners.
Frequently Asked Questions
Can I clean a dish rack with vinegar?
Vinegar may help with mineral deposits on some dish racks, but it is not suitable for every finish. Check the manufacturer’s instructions first, test a hidden area, rinse afterward, and never combine vinegar with chlorine bleach.
Can I use bleach to clean a dish rack?
Use bleach only when the rack material and product instructions allow it. Clean the rack first, follow the bleach label exactly, provide good ventilation, rinse when directed, and never mix bleach with vinegar, ammonia, or another cleaner.
How do I stop my dish rack from getting moldy?
Keep the drip tray empty, remove trapped food, clean the rack regularly, and allow all parts to dry completely. Improve airflow around the rack and pay special attention to joints, rubber feet, drainage holes, and other spots where water remains.
Why does my dish rack get dirty so quickly?
Dish racks collect water, detergent residue, minerals, food particles, and grease from dishes and nearby cooking. Slow drainage and poor airflow make buildup worse, so an often-wet rack usually needs cleaning more frequently.
Should I replace a rusty dish rack?
A tiny removable surface spot does not always mean replacement is necessary. However, I would replace a rack when rust keeps spreading, metal becomes deeply pitted, protective coating flakes away, plastic cracks, or inaccessible areas can no longer be cleaned properly.
Final Takeaway
The best way to clean a dish rack is also the simplest: take it apart, use warm soapy water, scrub every hidden area, rinse thoroughly, and let it dry completely. You rarely need aggressive cleaning chemicals for normal maintenance.
Keep the tray dry between washes and deal with slime, odor, rust, or mold as soon as you see it. Those two habits make dish-rack cleaning much easier over time.
