Cooking Temperature Guide for Beginners: Essential Temps and Simple Tips
I teach simple, safe ways to cook food at the right heat so you get great taste and avoid foodborne illness. I’m Emma Reed and I’ll walk you through the exact temperatures to use for meats, fish, vegetables, and baking so you stop guessing and start cooking with confidence. Use a food thermometer and follow the right target temperatures to keep meals safe and perfectly cooked every time.
I explain common cooking methods and the temperatures they need, show typical mistakes, and list easy fixes you can try tonight. You’ll learn which numbers matter most, which tools to trust, and how small temperature changes affect taste and texture.
Key Takeaways
- Know the target temperatures for different foods to cook safely and well.
- Use a reliable thermometer and adjust for cooking method to get consistent results.
- Small temperature mistakes change doneness, so learn quick fixes and checks.
Essential Cooking Temperatures
I focus on exact temperatures you will use, how to check them, and why they matter for safety and taste. Below I list safe internal targets, explain their importance, and show how to read thermometers correctly.
Safe Internal Temperatures for Common Foods
I follow these safe internal temperatures to prevent foodborne illness and keep texture right. Use an instant-read thermometer and insert it into the thickest part without touching bone or fat.
- Poultry (whole or ground): 165°F (74°C). This kills Salmonella and gives moist white meat when rested.
- Ground meats (beef, pork, lamb): 160°F (71°C). Grinding spreads bacteria; cook thoroughly.
- Steaks, roasts, chops (beef, pork, lamb): 145°F (63°C) then 3-minute rest. Rest lets temperature even out and finishes cooking.
- Fish and shellfish: 145°F (63°C) or opaque and flakes easily. Oysters and clams should open during cooking.
- Egg dishes: 160°F (71°C). Soft-cooked eggs for immediate eating are lower risk but avoid for vulnerable people.
- Leftovers & casseroles: 165°F (74°C). Reheat to steaming hot throughout.
I recommend printing or keeping a small chart near your stove for quick reference.
Why Cooking Temperatures Matter
I use correct temperatures to destroy harmful bacteria like Salmonella and E. coli. These microbes can survive at low or uneven heat, so hitting the right internal temperature matters more than time alone.
Temperature also affects texture and moisture. For example, 145°F on pork keeps it juicy, while 160°F on ground beef removes risk from the surface mixed through the meat. Undercooking risks illness; overcooking wastes flavor and makes meat tough.
I always rest meats after removing them from heat because carryover cooking raises the internal temp a few degrees and evens juices. That small step improves both safety and taste.
How to Read Food Thermometers
I use an instant-read digital thermometer for most tasks for speed and accuracy. Insert the probe into the thickest part, avoiding bone, fat, or pan contact.
For thin foods like burgers or fish, insert sideways to reach the center. For whole birds or roasts, test the thigh, breast, and thickest part of the roast. Wait for the reading to stabilize—usually 2–5 seconds for a digital probe and up to 15 seconds for dial thermometers.
Calibrate your thermometer monthly by testing in ice water (should read 32°F / 0°C) and boiling water (should read 212°F / 100°C at sea level). Clean the probe with hot, soapy water between uses to avoid cross-contamination.
Understanding Types of Cooking Methods

I explain how heat moves and what that means for timing, texture, and safety. You’ll learn when to use high dry heat, gentle moist heat, or direct flame to get the results you want.
Oven and Roasting Temperature Basics
I use the oven for steady, even cooking. Roasting at 325–375°F (160–190°C) works well for whole meats and large vegetables because the slower, moderate heat cooks evenly without burning the outside. For a browned crust, I raise the oven to 400–450°F (200–230°C) for the last 10–15 minutes.
I rely on internal temperature, not time, to decide doneness. A meat thermometer set to the target (for example, 165°F/74°C for poultry) tells me when it is safe to eat. For baked goods, follow the recipe’s temperature closely; exact heat matters for rise and texture.
Tips:
- Preheat the oven fully before putting food in.
- Use an oven thermometer if your oven’s gauge is unreliable.
- Arrange pans with space between them for air flow.
Grilling and Broiling Temperature Tips
I use direct high heat (450–600°F / 230–315°C) for quick sears and grill marks. Thicker cuts need two-zone cooking: hot direct heat to sear, then cooler indirect heat to finish.
Broiling uses intense top heat like a grill inside an oven. Keep food 3–6 inches from the element and watch closely; sugar and marinades burn fast. Use an instant-read thermometer to check thicker pieces, aiming for safe internal temps (e.g., 145°F/63°C for pork chops, 165°F/74°C for chicken).
Safety and flavor tips:
- Oil grates lightly to prevent sticking.
- Let steaks rest 5–10 minutes after grilling to redistribute juices.
- Trim excess fat to reduce flare-ups.
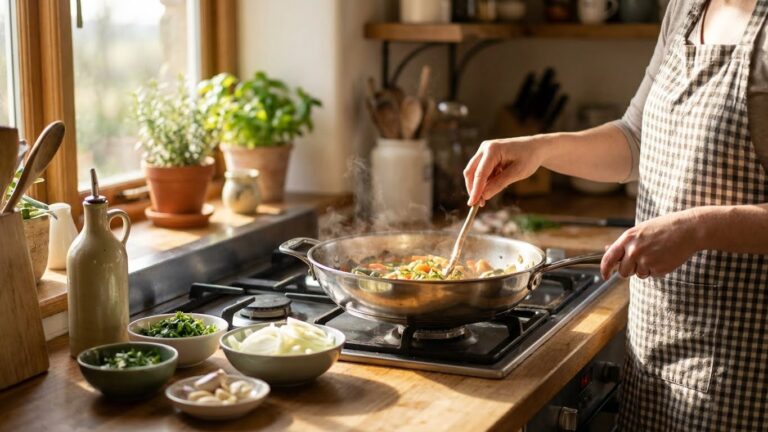
Stovetop Cooking Heat Levels
I match pan heat to the method: low for simmering and gentle sauces, medium for sautéing, and medium-high to high for stir-frying and searing. Cast iron and stainless steel hold heat well; use lower settings to avoid burning.
Use visual cues: a gentle simmer shows small, steady bubbles; a boil has large rolling bubbles. For sauté, oil should shimmer but not smoke. If oil smokes, lower the heat and start again to avoid off-flavors.
Practical controls:
- Preheat the pan for 1–2 minutes before adding oil.
- Adjust heat quickly; gas responds faster than electric.
- Use lids to trap heat and speed cooking for stews and beans.
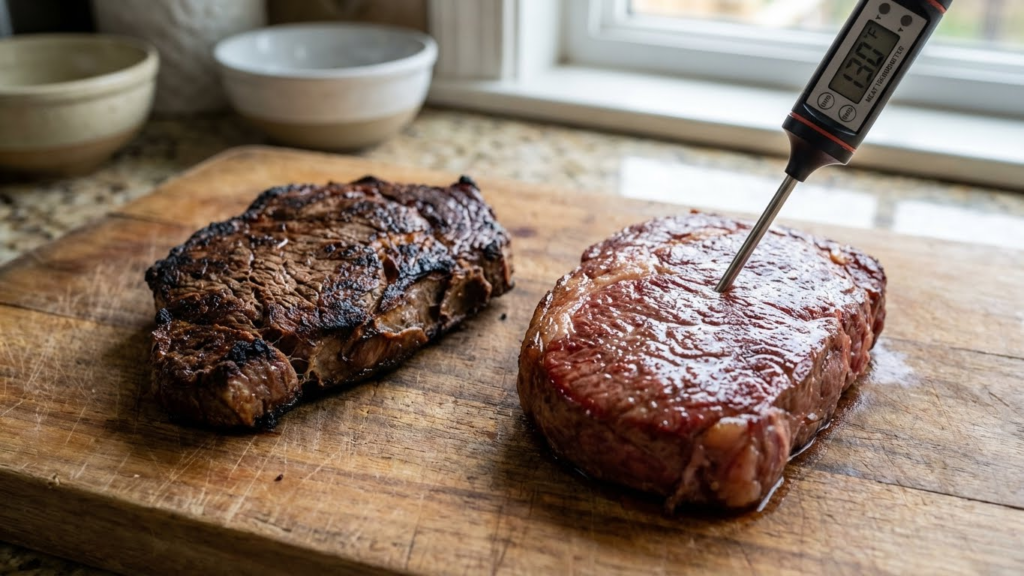
Meat and Seafood Temperature Guidelines
I focus on safe internal temperatures and brief rest times that kill harmful bacteria and keep meat juicy. Use a calibrated instant-read thermometer and check the thickest part of the cut away from bone.
Beef, Pork, and Lamb Temperature Chart
I aim for the right balance of safety and doneness. For whole cuts of beef, lamb, and pork, I follow these internal targets:
- Rare (beef, lamb): 120–125°F (49–52°C) — warm red center; not safe for ground meat.
- Medium-rare (beef, lamb): 130–135°F (54–57°C) — pink center, common for steaks.
- Medium (beef, lamb): 140–145°F (60–63°C) — light pink center.
- Medium-well to well (beef, lamb): 150–160°F (66–71°C) — little or no pink.
For pork chops and roasts, I cook to 145°F (63°C) and then rest 3 minutes to allow temperature to even out and destroy pathogens. For ground beef or pork, cook to 160°F (71°C) because grinding spreads bacteria through the meat. For whole cuts, always insert the thermometer into the center and avoid touching bone.
Poultry Temperature Essentials
I always cook poultry to a safe temperature to prevent Salmonella. Whole chicken and turkey require 165°F (74°C) in the thickest part of the thigh and breast. For ground poultry, aim for 165°F (74°C) throughout.
Rest time matters: let whole birds rest 3–5 minutes before carving so juices redistribute. If you stuff a bird, check the center of the stuffing too — it must reach 165°F (74°C). Use a probe thermometer for roasts and a quick-read for smaller pieces. For food safety guidance, I often consult the USDA food safety pages for the latest recommendations (https://www.usda.gov).
Seafood and Fish Cooking Ranges
I treat seafood differently depending on thickness and species. For fish fillets and steaks, cook until the flesh reaches 145°F (63°C) or until it flakes easily and is opaque. Thinner fish like sole or tilapia often cook faster; check for flakiness and a firm texture.
Shellfish rules vary: cook shrimp, lobster, and scallops until flesh is pearly and opaque. Clams, mussels, and oysters should open during cooking; discard any that stay closed. For safety tips and handling, I refer to FDA guidance on seafood (https://www.fda.gov).
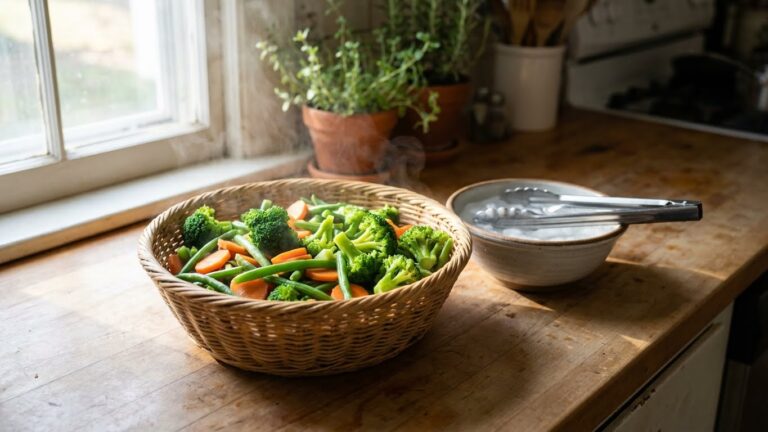
Vegetable and Plant-Based Cooking Temperatures

I focus on temperatures that give vegetables good texture and keep plant-based proteins safe and tasty. Roast or sauté most vegetables at high heat for browning, and cook tofu or meat alternatives long enough to reach safe reheating temps and firm texture.
Roasting and Sautéing Vegetables
I roast vegetables at 400–425°F (200–220°C) for best browning and caramelization. Denser veggies like carrots, potatoes, and beets need 30–45 minutes; cut them into even pieces so they cook through. Tender vegetables such as zucchini, asparagus, and bell peppers take 10–20 minutes at the same oven temp.
On the stovetop, I sauté vegetables over medium-high heat. Start with a hot pan and a thin oil coating. Cook in a single layer and stir or toss every few minutes so edges brown without steaming. Use a thermometer only for specific food-safety needs; texture and color guide doneness.
- Oven roasting: 400–425°F (200–220°C)
- Root veg: 30–45 min
- Tender veg: 10–20 min
- Sauté: medium-high heat, quick browning
For more on food safety and handling, I consult USDA guidance on safe cooking and storage.
Cooking Tofu and Meat Alternatives
I press firm tofu before cooking to remove water, then cook it at medium-high heat to get a crisp exterior. Pan-fry or bake tofu at 400°F (200°C) for 20–30 minutes, flipping once for even browning. Tempeh and seitan also crisp at similar temps and times; marinate first for flavor.
If reheating packaged plant-based products, follow the package temps, but aim for 165°F (74°C) internal temperature to ensure safety—this is the common safe reheating target used in food-service guidance. Use an instant-read thermometer in the thickest part. For ground-style plant proteins, cook until steaming hot and firm, about 7–10 minutes in a skillet.
- Tofu (baked): 400°F / 20–30 min
- Reheat target: 165°F (74°C)
- Use an instant-read thermometer for packaged or dense products
I reference FoodSafety.gov and USDA resources when I need exact safe-temp rules for reheating and storage.
Baking and Dessert Temperature Tips
I focus on oven settings for different baked goods and the exact sugar temperatures you need for candy. These help you get the right texture, color, and doneness.
Optimal Oven Settings for Baking
I set my oven by both temperature and mode. For cakes and cupcakes I use 325–350°F (160–175°C) and the center rack. This gives even rise and a fine crumb. For cookies I choose 350–375°F (175–190°C); higher heat browns edges while keeping centers soft.
For bread I bake at 375–475°F (190–246°C) depending on crust needs; steam or a water tray in the oven makes a crisp crust. Pastries and puff pastry do best at 400–425°F (200–220°C) to get fast lift and flaky layers.
I always preheat fully and use an oven thermometer to check true temperature. I rotate pans halfway when baking multiple trays and avoid opening the door during the first two-thirds of the bake.
Sugar and Candy Temperature Stages
I rely on exact temperatures when cooking sugar. Use a candy thermometer and a heavy saucepan to avoid hot spots.
Key temperature stages:
- Thread: 230–235°F (110–113°C) — thin syrup for light sauces.
- Soft-ball: 235–245°F (113–118°C) — fudge and pralines.
- Firm-ball: 245–250°F (118–121°C) — caramels.
- Hard-ball: 250–266°F (121–130°C) — marshmallows.
- Soft-crack: 270–290°F (132–143°C) — taffy.
- Hard-crack: 300–310°F (149–154°C) — brittle and hard candy.
I cool a small drop on a spoon to test if the thermometer fails. I remove from heat at the right stage, then stir or pour quickly before the sugar sets.
Common Temperature Mistakes to Avoid
I focus on clear signs and timing errors that harm food quality and safety. You will learn how to spot wrong doneness and how resting changes final temperature.
Overcooking and Undercooking Signs
I check color, texture, and internal temperature to judge doneness. For meats, I use an instant-read thermometer: poultry should reach 165°F (74°C), ground beef 160°F (71°C), and steaks 125–160°F (52–71°C) depending on desired doneness. Relying on touch or color alone often leads to mistakes.
Undercooked food feels too soft and may look glossy or pink inside when it should not. Overcooked food becomes dry, tough, or stringy and may pull apart easily. For baked goods, a clean toothpick or a gentle spring back test helps me avoid underbaking or overbaking.
Quick checklist I use:
- Thermometer reading first, then visual checks.
- Cut only once to verify (minimize juices lost).
- Note carryover heat when pulling food from heat.
Resting and Carryover Cooking Explained
I always allow thicker cuts and whole birds to rest 5–20 minutes after cooking. During this time, internal temperature can rise 5–10°F (3–6°C). Ignoring resting makes meat seem underdone when it is actually still cooking.
Resting keeps juices inside, so slices stay moist. I tent meat loosely with foil to keep it warm without steaming the crust. For small cuts, short rest times (3–5 minutes) work; for roasts, plan for longer rests.
Quick tips I follow:
- Remove from heat 5–10°F below target for thick cuts.
- Use a thermometer to confirm final temperature after resting.
- Transfer juices into a pan or gravy to preserve flavor.
Kitchen Tools for Accurate Temperatures
I’ll focus on the actual tools you need, how to pick the best thermometer for each job, and how to keep those thermometers accurate and safe.
Choosing the Right Thermometer
I recommend three main types: probe (instant-read), oven probe, and infrared. I use an instant-read digital probe for checking meats and thin items because it gives fast, accurate internal temperatures. Look for a probe with a fast response (2–5 seconds) and ±0.5°F (±0.3°C) accuracy when possible.
For roasts and whole poultry, I use a leave-in oven probe that connects to a display or app. It tracks temp over time and warns if the oven gets too hot. For surface temps—like griddle or pan—I use an infrared thermometer to measure hot metal quickly, but I avoid it for internal food checks.
Helpful features to compare:
- Display brightness and backlight
- Probe length and heat rating (for oven use)
- Response time and accuracy specs
- Waterproofing and dust resistance
For trusted guides on safe internal temps, I check the USDA food safety pages and ThermoWorks for product specs and testing.
Calibration and Care of Thermometers
I calibrate my thermometers regularly using ice-point and boiling-point tests. For the ice test: fill a glass with crushed ice and water, insert the probe to the sensing area, and wait 30 seconds; it should read 32°F (0°C). For the boiling test, place the probe in rolling boiling water; adjust for altitude if needed.
I clean probes after every use with hot soapy water and sanitize with a food-safe sanitizer or 70% isopropyl alcohol. I never immerse digital displays in water. I store probes with protective sheaths and avoid bending or kinking cords.
If a thermometer reads outside its stated accuracy after calibration, I replace it. Recalibrate after drops, heavy use, or battery changes. Following these steps keeps my readings reliable and food safe.
Temperature Troubleshooting and Adjustments
I cover real fixes that help food cook evenly, stay safe, and taste right. I focus on altitude effects and switching equipment so you can adjust time and temperature with confidence.
High-Altitude Cooking Adjustments
At high altitude, water boils at lower temperatures, so I raise oven and liquid temperatures to compensate. For every 3,000 feet (about 900 m) above sea level, I typically add 5–10°F (3–6°C) to oven temperatures for baked goods and increase simmering liquids by a small amount so they stay at a steady boil.
I reduce baking powder by about 1/8 teaspoon per 1,000 feet to avoid collapse, and I add extra liquid—usually 1 to 2 tablespoons per cup—to keep batters and doughs moist. Yeast breads may need slightly longer rising times; I shorten rise temperature or punch down earlier to prevent overproofing.
Use an instant-read thermometer for meats; target internal temps don’t change with altitude. For water-based processes (pasta, boiling eggs), plan for longer cook times and test doneness earlier with a fork or thermometer.
Alternative Cooking Equipment
Different tools change how heat hits food. I lower oven temps by 25°F when switching from a conventional oven to a convection oven because the fan speeds cooking and browning. When I move from gas to electric, I watch for slower initial heat-up in electric and adjust preheat time.
On grills, I use a thermometer in the thickest part of the food and set zones: high for sear (450–550°F) and medium (350–400°F) for finish. For air fryers, I drop recipe temps by 20–25°F and shorten time by about 20% because of intense circulating heat.
If I switch to a slow cooker, I cut oven temperature-based times roughly in half for high vs. low settings, and I add extra liquid for long, closed cooking. When uncertain, I test with an instant-read thermometer or cut into food to confirm doneness.
FAQs
What temperature should I use for different meats?
I recommend using a food thermometer for accuracy. Cook chicken to 165°F (74°C), ground meats to 160°F (71°C), and steaks or roasts to at least 145°F (63°C) with a short rest.
How do I check doneness without a thermometer?
I prefer a thermometer, but you can use touch and sight for some foods. Fish flakes easily and looks opaque. Steak firmness can hint doneness, yet this method is less reliable.
Does oven temperature equal internal temperature?
No. Oven or pan temperature is the heat source. I always aim for the correct internal temperature to ensure safety and the desired texture.
Can I cook at lower temperatures to keep food juicy?
Yes. Lower and slower cooking can keep meat tender. I balance lower temps with time and always check internal temperature to avoid unsafe cooking.
How long should I let meat rest?
Resting helps juices redistribute. I usually rest steaks 5–10 minutes and larger roasts 10–20 minutes before slicing.
Are there safe cooling and storage tips?
Cool food quickly and refrigerate within two hours. I store leftovers in shallow containers to speed cooling and reduce bacteria risk.
Which cooking method works best for beginners?
Baking and pan-searing are easy to control. I suggest practicing with a thermometer and simple recipes to build confidence.
Conclusion
I want you to feel confident using temperature as a tool in the kitchen. Practice with a thermometer, watch how heat changes food, and trust what you learn from hands-on cooking.
I recommend memorizing a few key temperatures for safety and doneness. Keep a small chart or note near your stove so you can check quickly while cooking.
Use low and slow for tender roasts, medium heat for most pan cooking, and high heat for quick sears. Adjust times and temps as you gain experience and as your equipment behaves.
My tip: always test the thickest part of meat with an instant-read thermometer. Rest meats after cooking to let juices redistribute and final temperature rise a few degrees.
Quick reference (common safe temps):
- Poultry: 165°F (74°C)
- Ground meats: 160°F (71°C)
- Steaks/roasts: 130–160°F (54–71°C) depending on doneness
Keep learning and stay curious. Small steps build reliable skills, and good temperature control will make your meals safer and more delicious.