If you want a simple way to cook tri tip in the oven, you’ve come to the right place. I’m Emma Red, and I’ll help you get it right every time. For a tri tip roast, cooking it at 425°F for about 20 to 25 minutes per pound will give you a tender, juicy result. This timing works well for medium-rare, but it can be adjusted depending on how you like your meat.
There are a few key steps to make sure your tri tip turns out perfect. Preparing the meat, managing the oven temperature, and letting it rest are all important. I’ll guide you through these so you avoid common mistakes that can dry out or toughen the roast.
By following a clear plan, oven-cooked tri tip can be just as delicious as grilled versions. I’ll share tips on how to slice and serve your roast too, so every bite is flavorful and tender.
Key Takeways
- Cook tri tip at 425°F for 20 to 25 minutes per pound for medium-rare.
- Preparing and resting the meat are essential for juicy tri tip.
- Proper slicing and serving enhance the taste and texture.
Contents
- 1 Oven Temperature and Cooking Time for Tri Tip
- 2 How to Prepare Tri Tip for Oven Cooking
- 3 Step-by-Step Instructions for Oven Cooking
- 4 Factors That Affect Cooking Time
- 5 Resting and Slicing Tri Tip
- 6 Tips for Juicy and Flavorful Tri Tip
- 7 Common Mistakes to Avoid
- 8 Serving Suggestions for Oven-Cooked Tri Tip
- 9 FAQs
- 10 Conclusion
Oven Temperature and Cooking Time for Tri Tip
When cooking tri-tip in the oven, choosing the right temperature and knowing the exact cooking time are critical. Both depend on the size of the roast and how you like it cooked. I’ll break down the best oven temperatures, the approximate cooking times based on weight, and how these times change for different levels of doneness.
Recommended Oven Temperatures
I recommend cooking tri-tip at 325°F to 350°F (163°C to 177°C). This temperature range is ideal for slow, even cooking that keeps the meat juicy. Cooking above 350°F risks drying out the roast.
For a slower cook and more tenderness, 275°F to 300°F (135°C to 149°C) works well too, but it will take longer. Either way, I always use a meat thermometer to check the internal temperature.
Rest your tri-tip for 10-15 minutes after removing it from the oven. This helps the juices redistribute and keeps the meat moist.
Approximate Cooking Times by Weight
Cooking times vary mainly by weight. Here’s a basic guide for cooking tri-tip at 325°F:
- For a 2-pound tri-tip, cook it for 35 to 40 minutes.
- For a 3-pound tri-tip, aim for 45 to 55 minutes.
- For a 4-pound tri-tip, expect 60 to 75 minutes.
Keep in mind these are estimates. The size and shape of the roast affect cooking time, so always check the internal temperature for accuracy.
Using a meat thermometer is the most reliable way to avoid overcooking or undercooking your tri-tip.
Cooking Time Comparison: Rare, Medium Rare, and Well Done
The internal temperature of your tri-tip determines how long you cook it:
- Rare: 120°F to 125°F (49°C to 52°C). The meat is very red inside. Usually takes less time.
- Medium rare: 130°F to 135°F (54°C to 57°C). This is the sweet spot for tenderness. The meat is pink and juicy.
- Well done: 150°F and above (65°C+). The meat is fully cooked throughout and firmer.
Here’s a quick table to compare:
| Doneness | Target Temp (°F) | Approx. Oven Time (325°F) for 3 lb Tri-Tip |
|---|---|---|
| Rare | 120-125 | 35-40 minutes |
| Medium Rare | 130-135 | 45-55 minutes |
| Well Done | 150+ | 60-75 minutes |
Checking temperatures with a thermometer ensures you hit the right doneness every time.
How to Prepare Tri Tip for Oven Cooking

Preparing tri tip for the oven starts with choosing the right piece of meat and giving it the proper care before cooking. I focus on picking a good cut and making sure it’s well trimmed and seasoned. This sets the stage for a flavorful, tender roast.
Selecting the Right Cut
When picking tri tip, I look for a piece that weighs between 1.5 to 2.5 pounds. This size is ideal for even cooking and helps retain juiciness. The tri tip should have a bright red color without too much visible fat. A little marbling is good because it adds flavor and tenderness, but too much fat can cause flare-ups in grilling and uneven cooking in the oven.
Buy tri tip from a reputable butcher or grocery store that handles beef well. If possible, ask for fresh, not frozen, since fresh meat roasts more evenly. For more tips on selecting quality beef, the USDA’s guidelines provide useful information.
Trimming and Seasoning
Before cooking, I trim any large chunks of fat or silver skin from the tri tip. Removing these parts helps the seasoning stick better and prevents chewy bits after roasting. However, I leave a thin layer of fat on one side to keep the roast moist while it cooks.
For seasoning, I prefer a simple mix of salt, black pepper, garlic powder, and sometimes smoked paprika. This combo enhances the beef’s natural flavor without overpowering it. I rub the seasoning evenly over the entire roast, pressing it into the meat. Letting the tri tip rest with the seasoning for at least 30 minutes or overnight in the fridge improves the taste and texture.
Using a dry rub or marinade is also an option depending on your flavor preference. Either way, seasoning is key before oven cooking.
Step-by-Step Instructions for Oven Cooking

To cook tri tip perfectly in the oven, you need to handle it carefully before cooking, sear it to lock in flavor, and check its internal temperature during baking. Each step matters to get a juicy, tender roast with a nice crust.
Bringing Tri Tip to Room Temperature
Before cooking, I always take the tri tip out of the refrigerator and let it sit at room temperature for about 30 to 60 minutes. This helps the meat cook more evenly. If you put a cold roast straight into the oven, the outside will cook faster than the inside, which can cause uneven doneness.
Pat the meat dry with paper towels. This removes excess moisture and helps with browning during searing. Season the tri tip well with salt and your choice of spices or rub. Resting the meat also allows the seasoning to soak in lightly.
Searing Before Baking

I heat a heavy skillet or ovenproof pan over medium-high heat and add a bit of oil. When the oil is shimmering, I sear the tri tip for about 2 to 3 minutes on each side. This step creates a flavorful crust and seals the juices inside.
Make sure to get a good brown color without burning. Searing also jump-starts the cooking process before transferring the meat to the oven. After searing, I place the tri tip on a baking sheet or leave it in the ovenproof skillet for roasting.
Using a Meat Thermometer
A meat thermometer is essential to avoid overcooking or undercooking. I insert it into the thickest part of the tri tip, avoiding fat or bone. For medium-rare, I look for an internal temperature of 130°F to 135°F.
Remove the roast from the oven a few degrees below your target temperature because it will keep cooking while resting. Resting for 10 to 15 minutes lets the juices redistribute, making the meat tender and juicy. This method ensures you get the exact doneness you want every time.
Factors That Affect Cooking Time
Several key factors determine how long your tri-tip will take to cook in the oven. These include the size and thickness of the cut, the accuracy of your oven’s temperature, and the starting temperature of the meat before it goes in. Paying attention to these details helps me get consistent results and avoid undercooking or overcooking.
Size and Thickness of Tri Tip
The size and thickness of the tri-tip are the biggest influences on cooking time. A larger or thicker piece takes longer to cook because heat needs more time to reach the center. For example, a 2-pound tri-tip will cook faster than a 3-pound one at the same oven temperature.
If your tri-tip is particularly thick, you should add extra time to avoid having a cold center. I recommend using a meat thermometer to check the internal temperature rather than relying on time alone. The ideal temp for medium-rare tri-tip is 130-135°F. Thinner cuts can cook in about 20-30 minutes per pound at 325°F, but thicker cuts might need closer to 30-40 minutes per pound.
Oven Accuracy
Oven temperature might look right on the dial, but some ovens run hotter or cooler than the setting. This variance can affect how long your tri-tip takes to cook. If your oven is off by even 10-15 degrees, it can make a big difference in cooking time.
I use an oven thermometer to track the actual temperature inside. This is a simple tool that ensures what my oven says matches reality. If you find your oven runs hot, reduce the cooking time or lower the temperature to avoid drying out the meat. Conversely, a cooler oven will need more time. Calibration tips are available on sites like the USDA.
Starting Temperature of the Meat
Whether the tri-tip is straight from the fridge or allowed to come to room temperature changes how long it cooks. Meat that’s cold in the middle takes longer to reach the desired internal temperature in the oven.
I usually let my tri-tip sit out for 30-60 minutes before cooking. This short rest helps the meat cook more evenly and predictably. Starting cold can cause the outside to overcook while the center stays underdone. For safe practices and food handling, the FDA recommends not letting raw meat sit out for too long, so be sure to balance room temperature time carefully.
Resting and Slicing Tri Tip
Once the tri tip is out of the oven, the way I handle it next makes a big difference. Proper resting and cutting steps help keep the meat juicy and tender. I find these two details essential for the final texture and flavor.
Importance of Resting After Cooking
After cooking, I always let the tri tip rest for about 10 to 15 minutes. This rest time lets the juices that were driven to the center during cooking spread back throughout the meat. If I cut it too soon, the juices spill out and the meat becomes dry.
I usually cover the tri tip loosely with foil to keep it warm but still allow air to circulate. Resting also helps the internal temperature even out a bit, avoiding overcooked or raw spots. It’s a simple step, but skipping it can ruin hours of work.
How to Slice Against the Grain
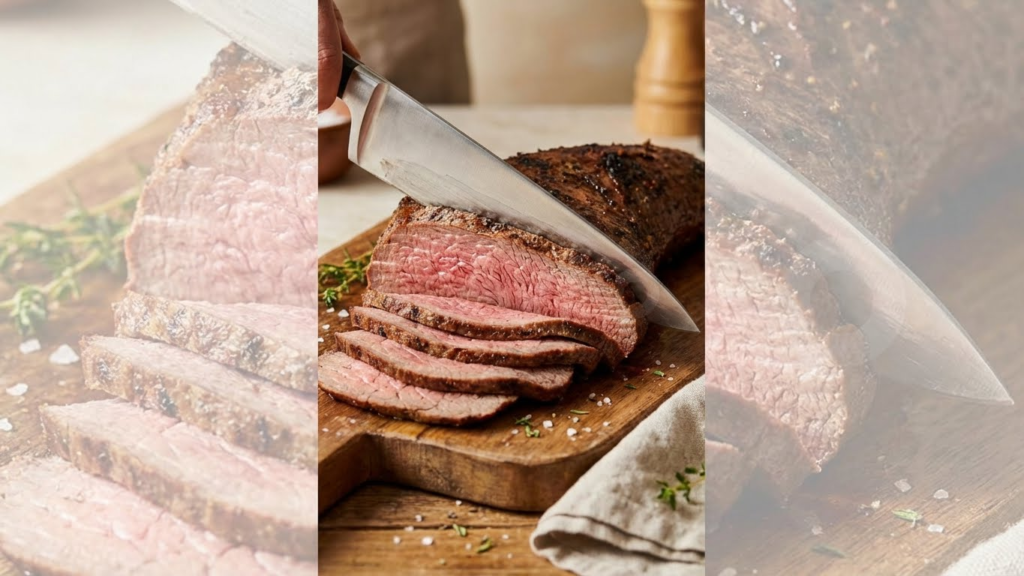
When it’s time to slice, I look closely at the direction of the muscle fibers, called the grain. Tri tip has different grain directions on its sides, so I adjust how I cut each section.
I slice thin against the grain, which breaks up the muscle fibers and makes each bite easier to chew. Cutting with the grain leaves long fibers and a tougher texture. Using a sharp knife helps make clean cuts. I find this technique makes the meat feel more tender and enjoyable in every bite.
Tips for Juicy and Flavorful Tri Tip
To get the best flavor and juiciness from a tri tip roast, I focus on boosting taste before cooking, managing heat during cooking, and keeping the meat moist. These steps make a big difference in the final result.
Marinades and Rubs
Using a marinade or dry rub can really improve the flavor and tenderness of tri tip. I like to marinate mine for at least 2 to 4 hours, or even overnight. A marinade with acidic ingredients like vinegar, citrus juice, or wine helps break down the meat fibers, making it more tender.
Dry rubs are a faster option. I mix salt, pepper, garlic powder, and smoked paprika for a basic rub. Rubbing the seasoning evenly over the surface not only adds flavor but also helps form a crust when cooking. For best results, I let the rubbed tri tip rest at room temperature for 30 minutes before putting it in the oven.
Covering With Foil During Cooking
Covering the tri tip with foil while it cooks can help keep it moist, especially during longer cooking times. I usually tent the roast loosely with aluminum foil after searing or partway through cooking to trap steam. This prevents the outside from drying out while the inside cooks through.
However, I avoid sealing it tightly early on because it softens the crust and keeps the meat from browning well. Near the end of cooking, I remove the foil to help the crust crisp up. This balance between covered and uncovered stages helps maintain both juiciness and a nice exterior.
Basting Techniques
Basting is a simple method to keep tri tip juicy during roasting. I use the pan juices or a small amount of broth or butter to baste the meat every 15-20 minutes. This adds moisture back to the surface and enhances flavor.
When basting, I spoon the juices over the top and sides of the roast quickly. This prevents heat loss when opening the oven and spreads flavor evenly. Basting helps especially in dry ovens, where air circulation can cause the outside of the roast to dry out faster than the inside cooks.
Common Mistakes to Avoid
One mistake I often see is overcooking the tri tip. This can make the meat dry and tough. To prevent this, I always use a meat thermometer to check the internal temperature. For a medium-rare tri tip, aim for about 130°F to 135°F. Relying only on cooking time can be misleading because ovens vary. You can learn more about perfect beef temperatures on the USDA’s official site.
Another common error is cutting into the meat right after cooking. When the tri tip comes out of the oven, the juices are still settling inside. If you slice too soon, the juices run out and the meat loses flavor and tenderness. I recommend resting the tri tip for at least 10 to 15 minutes before slicing. This step helps the juices redistribute, making the roast juicier.
Slicing incorrectly is a problem I watch for as well. Tri tip has grain running in a specific direction, and cutting with the grain makes the meat chewy. I always slice against the grain to keep it tender. You can identify the grain by looking at the direction of the muscle fibers.
Avoiding these mistakes will help you get the best results. For detailed tips on roasting tri tip, sites like Serious Eats offer helpful guides that I often use.
Serving Suggestions for Oven-Cooked Tri Tip
When I serve oven-cooked tri tip, I like to let the meat rest for at least 15 minutes. This helps the juices spread evenly, making each bite tender and juicy. After resting, I slice the tri tip thinly against the grain to keep it as tender as possible.
Tri tip pairs well with simple side dishes. I often choose roasted vegetables like carrots, Brussels sprouts, or asparagus. They add a fresh, earthy flavor that balances the richness of the meat. A baked potato or creamy mashed potatoes also work well as hearty sides.
For a lighter option, I serve tri tip with a fresh green salad. I like to add cherry tomatoes, cucumber, and a light vinaigrette. It adds a nice contrast in texture and flavor.
You can also use leftover tri tip in sandwiches or tacos. Just slice it and add your favorite toppings. I find that adding a bit of barbecue sauce or horseradish sauce can really bring out the flavor.
Here’s a quick list of my favorite serving ideas:
- Roasted vegetables (carrots, Brussels sprouts, asparagus)
- Baked or mashed potatoes
- Fresh green salad with vinaigrette
- Tri tip sandwiches with barbecue or horseradish sauce
- Tacos with sliced tri tip and toppings
These simple sides and serving ideas highlight the flavor of the tri tip without overpowering it.
FAQs
How long should I cook tri-tip in the oven?
I usually bake tri-tip for about 25 to 30 minutes per pound at 350°F. The exact time depends on the size and your desired doneness. Using a meat thermometer helps me get it just right.
What internal temperature should I aim for?
For medium-rare, I take the tri-tip out at 135°F (57°C). If you prefer medium, aim closer to 145°F. Resting the meat after cooking is key to achieving the perfect texture.
Do I need to rest the tri-tip after baking?
Yes. I always let the tri-tip rest for at least 15 minutes after removing it from the oven. This step helps the juices spread evenly, making the meat tender and juicy.How to Slice Against the
Can I cook tri-tip at a different oven temperature?
You can. Lower temps mean longer cook times but more even cooking. Higher temps cook faster but need close attention to avoid overcooking. I find 350°F to be a good balance.
Should I cover the tri-tip while baking?
I don’t usually cover it during baking. This helps create a nice crust. If you want to keep it extra moist, you can loosely tent it with foil during resting.
How do I make sure my tri-tip is tender?
Besides proper cooking time and resting, slicing against the grain is important. I slice thinly and across the muscle fibers to get the most tenderness.
Conclusion
Cooking tri tip in the oven takes careful attention to size, temperature, and doneness. I find that a temperature of 350°F works well for most cuts. The time will vary depending on how thick the meat is and how you like it cooked.
For a 1.5 to 2.5-pound tri tip, I usually plan on about 20-30 minutes for medium-rare, 30-40 minutes for medium, and 40-50 minutes for well-done. Using a meat thermometer is the best way to be sure. I aim for an internal temperature of 135°F (57°C) for medium-rare.
Resting the tri tip after cooking is important too. Let it sit for at least 15 minutes. This helps the juices spread evenly. It makes the meat juicier and easier to slice.
If you remember these key points—oven at 350°F, time by weight and doneness, and resting—you can cook tri tip confidently every time. Keep tools like a thermometer handy and adjust times based on your oven and taste.
Here’s a simple chart I use for quick reference:
| Weight (lbs) | Doneness | Time (minutes) | Internal Temp (°F) |
|---|---|---|---|
| 1.5 – 2.5 | Medium-Rare | 20-30 | 135 |
| 1.5 – 2.5 | Medium | 30-40 | 145 |
| 1.5 – 2.5 | Well-Done | 40-50 | 155+ |
Following these guidelines will make your oven-roasted tri tip tender and flavorful every time.