
How to Make Your Own Dish Rack: A Simple DIY Guide

Quick Answer
To make your own dish rack, cut two parallel base rails, drill matching peg holes, glue in hardwood dowels, and add a removable tray beneath. Measure your counter first and leave enough space between the pegs for airflow; this standard dish rack size guide helps you choose practical finished dimensions.
Quick Build Steps
- Measure the space: Allow clearance for the faucet, backsplash, cabinets, and drain tray.
- Choose the material: Use straight-grained hardwood or bamboo that can tolerate repeated wetting.
- Cut two rails: Make both base pieces identical so the rack sits square.
- Mark peg holes: Space paired holes evenly, usually 1 1/2 to 2 inches apart.
- Drill and assemble: Use a depth stop, waterproof glue, and a square to keep every peg aligned.
- Sand and finish: Smooth all edges, apply a suitable water-resistant finish, and let it cure fully.
A homemade dish rack solves two problems at once: poor fit and wasted counter space. I like this peg-style design because you can size it around your plates instead of adapting your kitchen to a store-bought rack.
The build is beginner-friendly, but accuracy matters. This guide covers dimensions, drainage, materials, assembly, finishing, and the mistakes that shorten a wooden rack’s life.
What Is a Homemade Dish Rack?
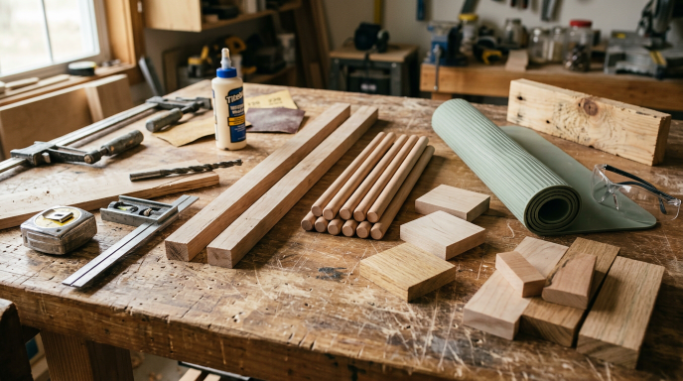
A homemade dish rack is a ventilated frame that holds washed dishes upright while water drains away. A safe, useful design must provide stability, separation, airflow, and a controlled path for drips.
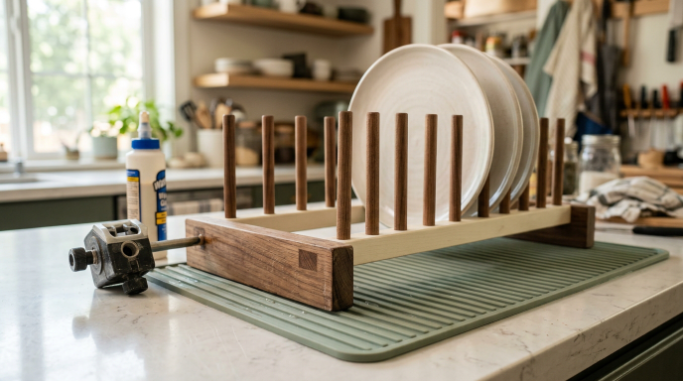
This project uses two hardwood rails joined by upright dowels. The paired pegs create slots for plates, lids, cutting boards, or shallow bowls.
- Difficulty: Beginner to intermediate
- Working time: About two to three hours, excluding curing time
- Typical finished size: 17 inches long by 12 inches wide by 6 inches tall
- Plate capacity: About eight standard dinner plates
- Essential skills: Measuring, straight cutting, drilling, sanding, and gluing
What Materials Do You Need to Build a Dish Rack?
Use a stable, close-grained hardwood such as maple, beech, white oak, or teak. Bamboo boards also work, although drilling near a laminated edge can cause splintering.
Avoid ordinary construction lumber. It dents easily, moves more as it gets wet, and often contains knots that weaken narrow rails.
Cut List for a 17-Inch Rack
| Part | Quantity | Suggested Size | Purpose |
|---|---|---|---|
| Hardwood base rails | 2 | 17 × 1 1/2 × 3/4 inches | Support the dowels and load |
| Hardwood dowels | 18 | 3/8-inch diameter × 6 inches | Form nine paired plate supports |
| Cross braces | 2 | 10 1/2 × 1 × 1/2 inches | Hold the rails parallel |
| Drain tray or silicone mat | 1 | At least 18 × 13 inches | Protects the counter and manages runoff |
You will also need waterproof wood glue, 120- and 220-grit sandpaper, and a water-resistant finish. Read the finish maker’s label for application, cure time, and intended use.
Tools for the Job
- Tape measure and sharp pencil
- Combination square
- Saw suitable for clean, square cuts
- Drill or drill press
- 3/8-inch brad-point bit
- Depth-stop collar or painter’s tape
- Two clamps
- Rubber mallet
- Eye protection
How Big Should You Make a DIY Dish Rack?
Make the rack slightly smaller than the tray beneath it. For many kitchens, 17 inches long and 12 inches wide holds a normal wash load without dominating the counter.
Measure the actual drying zone before buying lumber. Include the faucet handle’s movement and the full depth from backsplash to counter edge.
- Measure usable width: Record only the clear counter area beside the sink.
- Check usable depth: Leave at least one inch between the rack and the counter edge.
- Measure cabinet clearance: Test your tallest plate or bottle beneath the cabinet.
- Size the tray: Let it extend at least 1/2 inch beyond every side of the wooden frame.
- Test a plate: Set your largest dinner plate at the intended angle before finalizing peg height.
If your counter cannot spare that footprint, review these space-saving alternatives to a dish rack. An over-sink or roll-up setup may suit a rental kitchen better.
How Do You Make a Wooden Dish Rack Step by Step?
Build the frame dry before adding glue. A dry fit reveals crooked holes, uneven dowels, and tray conflicts while corrections remain easy.
1. Cut and Match the Base Rails
Cut both rails to exactly 17 inches. Clamp them side by side, align their ends, and label one left and one right.
Sand the cut ends lightly without rounding the edges yet. Square ends make the finished frame easier to align.
2. Mark Every Peg Position
Draw a centerline along each rail. Mark the first hole about 1 1/2 inches from the end, then continue at 1 3/4-inch intervals.
Transfer the marks across both rails with a square. Matching hole positions keep each plate slot from twisting.
Practical test: Place two short dowel offcuts at your planned spacing and slide in a plate. Increase the gap if a thick stoneware rim binds or rests too upright.
3. Drill Straight, Consistent Holes
Fit a 3/8-inch brad-point bit and set a drilling depth near 1/2 inch. Do not drill through the bottom of the rail.
A drill press gives the most consistent result. With a handheld drill, use a guide block with one square hole to keep the bit vertical.
- Clamp the rail: Never hold a narrow piece beside a spinning bit.
- Start slowly: Let the center spur locate the mark before increasing speed.
- Clear chips: Lift the bit during each hole so packed dust does not cause heat.
- Check depth: Test the first hole with a spare dowel before drilling the rest.
4. Cut and Smooth the Dowels
Cut 18 dowels to six inches. Use a stop block so every support finishes at the same height.
Round the exposed tops and sand each dowel to 220 grit. A smooth crown reduces chips and prevents scratches on glazed plates.
5. Add the Cross Braces
Position the rails 10 1/2 inches apart, measured between their inside faces. Fix one brace near each end with waterproof glue and corrosion-resistant screws driven from below.
Predrill the screw holes to reduce splitting. Confirm both diagonals match before tightening the clamps; equal diagonals indicate a square frame.
6. Glue the Pegs in Place
Apply a thin film of waterproof glue inside each hole. Too much glue creates squeeze-out around the dowels and adds cleanup.
Seat the dowels with gentle mallet taps. Use a square against several pegs as the glue sets, then remove squeeze-out with a damp cloth.
7. Sand and Apply the Finish
After the glue cures, sand the rails and braces through 120 and 220 grit. Ease sharp corners so water and finish do not collect along fragile edges.
Apply a finish whose manufacturer permits the intended damp kitchen use. The USDA Forest Products Laboratory publishes broader technical guidance through its wood research resources, but the product label should govern your application and cure time.
- Coat every face: Include undersides, drilled joints, brace ends, and screw holes.
- Use thin coats: Heavy coats cure slowly and can remain tacky in joints.
- Respect cure time: “Dry to touch” does not mean ready for wet dishes.
- Check yearly: Refinish when water stops beading or the wood feels rough.
How Should a Homemade Dish Rack Drain?
The rack should never sit in pooled water. Put it over a removable tray, ribbed silicone mat, or sloped drainboard that can empty into the sink.
The FDA Food Code emphasizes air drying for cleaned and sanitized equipment in food-service settings. At home, the same basic principle supports good drainage: keep items separated and let surfaces dry completely.
| Drainage Option | Best Feature | Maintenance | Main Limitation |
|---|---|---|---|
| Sloped plastic tray | Directs runoff toward sink | Rinse and dry frequently | Must match sink position |
| Ribbed silicone mat | Grips rack and stores easily | Empty, wash, and air-dry | Does not drain automatically |
| Stainless tray | Rigid and heat tolerant | Wipe mineral deposits | Can be costly or noisy |
If you want a mat-only backup while refinishing the rack, these methods for drying dishes without a dish rack cover temporary setups.
How Do You Keep a DIY Dish Rack Clean?
Empty the rack once dishes are dry, then wipe visible water from the wood. Wash the removable tray with dish soap and let both parts dry separately.
For general kitchen hygiene guidance, consult USDA food-safety resources. Follow your finish maker’s cleaning instructions before applying disinfectants, bleach, vinegar, or abrasive cleaners.
- After each load: Empty pooled water and wipe the frame.
- Weekly: Wash the tray and inspect dowel joints.
- Monthly: Check for rough grain, dark spots, cracks, or loose pegs.
- As needed: Clean with a mild product compatible with the finish.
- Before refinishing: Let the wood dry completely and follow the coating directions.
The EPA’s Safer Choice program can help you identify cleaning products that meet its ingredient and performance criteria. Compatibility with your specific wood finish still matters.
What Mistakes Should You Avoid?
The most common failure is trapping moisture beneath the rails. Small feet or waterproof bumpers create helpful airflow under the frame.
- Skipping the dry fit: Misaligned pegs become difficult to correct after glue sets.
- Using soft construction lumber: It swells, dents, and becomes rough with repeated wetting.
- Drilling without a stop: Inconsistent holes make the pegs uneven or break through the rails.
- Making narrow plate slots: Thick rims bind and may chip during loading.
- Leaving sharp corners: They feel uncomfortable and hold less finish.
- Ignoring the underside: Unsealed hidden faces absorb runoff and dry slowly.
- Using plain steel screws: Wet fasteners can corrode and stain surrounding wood.
- Loading before full cure: Water and plate pressure can mark a soft finish.
If long-term corrosion is your main concern, compare wood with the options in this guide to dish rack materials that resist rust.
Helpful Tools and Supplies for This Build
If you are starting without a full workshop, these are the three purchases I would prioritize for cleaner, more repeatable results:
🏆 Best for Straight Holes
Milescraft DrillBlock Hand-Held Drill Guide
★★★★☆
The hardened guide holes help keep a handheld drill square to the rail. I find a compact guide easier to control than judging the bit angle by eye.
💧 Best for Wet Joints
Titebond III Ultimate Wood Glue
★★★★★
This waterproof wood glue gives the dowel joints more protection from repeated splashes. I still use a thin coat because heavy squeeze-out is harder to remove around pegs.
🛡️ Best Counter Protection
OXO Good Grips Large Silicone Drying Mat
★★★★☆
Raised ribs improve airflow beneath the frame and contain drips. I prefer a removable mat because it can be washed and dried separately from the wooden rack.
Frequently Asked Questions
What is the best wood for a homemade dish rack?
Maple, beech, white oak, teak, and quality bamboo are practical choices because they are harder and more stable than common construction lumber. Whatever you choose, seal every surface with a finish suitable for the intended damp environment.
How far apart should dish rack pegs be?
Start with holes spaced about 1 1/2 to 2 inches on center. Test the layout with your thickest plate before drilling every hole, because stoneware rims need more clearance than thin plates.
Can I make a dish rack without woodworking tools?
Yes. You can place a clean cooling rack over a rimmed tray or use a roll-up sink rack. A wooden peg rack still needs accurate cutting and drilling, so ask a hardware store or maker space about tool access.
Do I need a drain tray under a wooden dish rack?
Yes, unless the entire rack sits over the sink. A removable tray or silicone mat stops runoff from pooling on the counter and lets you dry the wooden frame separately after each load.
How long should the finish cure before use?
Use the full cure time printed by the finish manufacturer, not the shorter dry-to-touch time. Temperature, humidity, coat thickness, and ventilation can change curing, so do not load wet dishes early.
Build It to Fit Your Kitchen
The best homemade dish rack is not the biggest one. It is the rack that fits your daily dishes, drains cleanly, stays stable, and leaves room to use the sink.
Measure twice, test one plate, and dry-fit the entire frame. Those few checks prevent most alignment and sizing mistakes before glue makes them permanent.
SEO METADATA (for WordPress SEO plugin — do not paste into content):
Meta Title: How to Make Your Own Dish Rack: Easy DIY Guide
Meta Description: Learn how to make your own dish rack with simple tools, accurate measurements, drainage tips, and a beginner-friendly wooden design.
URL Slug: how-to-make-your-own-dish-rack
Focus Keyword: how to make your own dish rack