How to Remove Rice Cooker Stains in Just 3 Simple Steps
Transform your stained rice cooker in just 3 simple steps using a powerful vinegar and baking soda solution. This foolproof method eliminates burnt-on residue without harsh scrubbing or chemicals. Restore your appliance to like-new condition in under 30 minutes.
Key Takeaways
- Act immediately: Fresh stains remove easiest before they harden permanently.
- Soak thoroughly: Hot, soapy water loosens stubborn rice residue effectively.
- Apply baking soda paste: Gentle abrasive action lifts tough stains without scratching.
- Use vinegar solution: Dissolve mineral deposits and hard water buildup easily.
- Never scrub non-stick: Avoid abrasive tools that damage the coating permanently.
- Prevent future stains: Clean promptly and use proper rice-to-water ratios.
- Always unplug first: Ensure safety by disconnecting power and cooling completely.
Why This Matters / Understanding the Problem
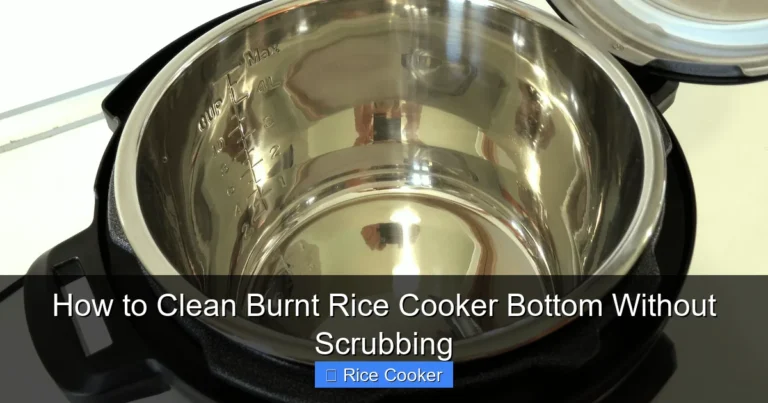
Let me tell you about my rice cooker. It’s been my kitchen buddy for three years now. I use it almost daily. Last month, I noticed something awful. The inner pot had ugly brown stains clinging to the sides. They wouldn’t budge no matter how hard I scrubbed. Sound familiar?
Those stains aren’t just ugly. They can actually affect how your rice cooks. Starch and minerals from water build up over time. Burnt bits from past meals stick around too. If you don’t clean them, they can start to smell. Worse, they might flake off into your next batch of rice. Yuck.
The good news? You don’t need harsh chemicals or a ton of elbow grease. Learning how to remove rice cooker stains in just 3 simple steps will save your favorite appliance. It will also keep your food tasting fresh. I’m going to share my exact method with you. It works on every type of rice cooker pot. Non-stick? Stainless steel? No problem.
Before we dive in, let’s talk about why this happens. Rice is mostly starch. That starch loves to glue itself to surfaces when heated. Hard water minerals join the party too. The result is a sticky film that bakes on with each use. Prevention helps, but eventually, everyone deals with this. You’re definitely not alone.
What You Need
Grab these items from your kitchen. You probably have them already. No fancy cleaners required.

Visual guide about How to Remove Rice Cooker Stains in Just 3 Simple Steps
Image source: sushiandrice.com
- A soft sponge or dishcloth (no steel wool!)
- Baking soda (the secret weapon)
- White vinegar or lemon juice
- Table salt (optional, for extra scrubbing power)
- Warm water
- A soft-bristled brush (like an old toothbrush)
That’s it. These are gentle but effective. They won’t damage your pot’s coating. Harsh scrubbers will scratch non-stick surfaces. Those scratches trap more stains later. Trust me, I learned this the hard way. Save your abrasive pads for the bottom of the sink, not your rice cooker.
Step-by-Step Guide to How to Remove Rice Cooker Stains in Just 3 Simple Steps
Ready to make your rice cooker pot sparkle again? This method takes about 30 minutes. Most of that time is just waiting. Let’s get started.

Visual guide about How to Remove Rice Cooker Stains in Just 3 Simple Steps
Image source: sushiandrice.com
Step 1: Prep and Initial Rinse
First, unplug your rice cooker. Always. Safety first, friends.
Remove the inner pot from the cooker. Give it a quick rinse under warm water. This washes away loose bits and rice grains. Don’t use cold water on a hot pot. That temperature shock can warp it. Let the pot cool down first.
Once it’s cool, wipe out any loose debris with your sponge. We want to remove the easy stuff before we tackle the tough stains. This step makes the next part way more effective. Think of it like clearing the stage before the main performance.
Step 2: The Baking Soda-Vinegar Power Clean
Now for the magic combo. Baking soda is a gentle abrasive. Vinegar is acidic. Together, they break down stains without harming your pot.
Sprinkle a generous layer of baking soda all over the stained areas. Don’t be shy. You want a nice, thick coating. Then, pour about a half-cup of white vinegar over the baking soda. You’ll see it fizz. That fizzing action is working to lift the stains. It’s like a mini science experiment in your sink.
Let this mixture sit for 15-20 minutes. The longer it sits, the better it works. For really tough stains, you can leave it for up to an hour. I’ve even left it overnight for some really baked-on messes. Just don’t make it a habit. You don’t want the vinegar to sit too long on the metal.
After it’s sat, add a little warm water to make a paste. Gently scrub with your soft sponge or brush. Use circular motions. The baking soda will do most of the work. You should see stains lifting away easily. If some spots are stubborn, sprinkle a bit more baking soda and scrub again.
For extra grip on slippery stains, add a pinch of salt to your baking soda paste. The salt crystals give you a bit more scrubbing power without scratching. It’s a trick I picked up from my grandmother. She used salt to clean everything.
Step 3: Rinse, Dry, and Final Polish
Once you’ve scrubbed away all the stains, rinse the pot thoroughly. Use warm water. Make sure you get every last bit of baking soda and vinegar out. Any residue left behind can affect the taste of your rice. That’s the last thing you want.
After rinsing, dry the pot completely with a soft towel. Water spots can lead to new stains. Plus, you want to prevent any mineral buildup from the water itself.
Here’s a little extra step that makes a big difference. Cut a lemon in half. Rub the cut side all over the inside of the pot. The citric acid gives it a final polish. It also neutralizes any lingering smells. Rinse again with cool water. Your pot should look brand new.
Place the pot back into the rice cooker. Wipe down the heating plate with a damp cloth. Never submerge the main unit in water. That’s an electrical appliance. Keep it dry.
Your rice cooker is now ready for its next meal. The whole process takes about 30 minutes. Most of that is hands-off waiting time. You can use those 20 minutes to prep dinner or scroll through your phone.
Pro Tips & Common Mistakes to Avoid
Pro Tip: Clean your rice cooker pot after every use. This is the single best way to prevent stains from building up. A quick rinse and wipe-down takes 30 seconds. It saves you a huge headache later.

Visual guide about How to Remove Rice Cooker Stains in Just 3 Simple Steps
Image source: removeanystains.com
Warning: Never use steel wool or harsh scouring pads on non-stick pots. I made this mistake once. Those scratches are permanent. They trap food and make future cleaning much harder. Stick to soft sponges and brushes.
Personal Insight: If you have hard water, consider using filtered water for your rice. The minerals in hard water are a major cause of stains. This simple switch has cut my cleaning time in half. It’s also improved the taste of my rice.
Another thing I learned the hard way: don’t let rice sit in the pot for hours after cooking. The keep-warm function is great, but prolonged heat bakes on stains. Transfer leftover rice to a storage container as soon as it’s done. Your pot will thank you.
If you’re dealing with really old, set-in stains, you might need to repeat the process. Don’t get discouraged. Sometimes it takes two rounds to get a pot looking perfect again. Persistence pays off.
For stainless steel pots, you can be a bit more aggressive. A paste of baking soda and water works wonders. Apply it with a soft cloth and let it sit overnight. The next day, rinse and you’ll see amazing results.
Remember to check your manufacturer’s instructions. Some brands have specific cleaning recommendations. When in doubt, stick to the gentlest method first. You can always step it up if needed.
If you want to learn more about preventing food from sticking in the first place, check out this helpful guide on how to prevent food from sticking to pans. Many of the same principles apply to your rice cooker pot.
FAQs About How to Remove Rice Cooker Stains in Just 3 Simple Steps
Q: Can I use dish soap with this method?
A: Yes, but only a tiny drop. Dish soap can interfere with the baking soda-vinegar reaction. I usually add it at the very end when I’m doing the final rinse scrub. Too much soap can leave a film on the pot.
Q: How often should I deep clean my rice cooker pot?
A: It depends on how often you use it. If you cook rice daily, aim for a deep clean once a week. For occasional use, once a month is plenty. Regular quick cleans after each use will keep deep cleaning to a minimum.
Q: What if my stains are really dark and old?
A: For stubborn, set-in stains, make a paste of baking soda and water. Apply it thickly and let it sit overnight. You can also boil a mixture of water and vinegar in the pot for 5-10 minutes. This loosens even the toughest buildup. Just be sure to ventilate your kitchen.
Q: Is it safe to use lemon on non-stick coatings?
A: Yes, lemon is completely safe. The acid is mild and won’t damage the coating. It’s actually one of the best natural cleaners for non-stick surfaces. Just don’t let it sit for more than 10 minutes.
Q: Can I put my rice cooker pot in the dishwasher?
A: It depends on the manufacturer. Most non-stick pots should be hand-washed only. Dishwashers can degrade the coating over time. Check your manual. When in doubt, hand wash. It’s gentler and extends the life of your pot.
Q: Why does my rice cooker smell even after cleaning?
A: That smell is usually trapped in the vent or the lid. Remove the lid and wash it separately. Clean the steam vent with a toothpick and soapy water. A quick wipe with a vinegar-dampened cloth will neutralize odors. Let everything air dry completely before reassembling.
Q: Will this method work on burnt rice at the bottom?
A: Yes, but it might take a bit more effort. For burnt rice, fill the pot with water and a tablespoon of baking soda. Bring it to a boil (if your pot is stovetop-safe) or let it sit for several hours. The burnt layer should soften and become much easier to scrub off.
If you’re struggling with rice that keeps burning, you might want to read up on how to cook rice perfectly every time. Getting the water-to-rice ratio right prevents most burning issues.
🎥 Related Video: remove spoiled rice smell in rice cooker | eco-friendly, no hash chemicals
📺 Aiza’s Abode
Final Thoughts
Cleaning your rice cooker doesn’t have to be a chore. With this simple three-step method, you can keep it looking new for years. The key is consistency. A little effort after each use prevents big messes later.
Remember, those stains are normal. They happen to everyone. Don’t feel bad if your pot looks less than perfect. It just means you’re cooking regularly. That’s a good thing.
Try this method this week. You’ll be amazed at how well it works. Your rice will taste better too. No more weird off-flavors from old, burnt bits.
And if you want to go the extra mile, consider keeping a box of cornstarch in your cleaning cupboard. A cornstarch paste works wonders on grease and can be used for quick touch-ups between deep cleans.
Happy cooking, and may your rice always be fluffy and your pot always be clean!