Complete Rice Cooker Troubleshooting Guide for Perfect Rice
This guide solves every common rice cooker problem you’ll face. Learn step-by-step fixes for undercooked, burnt, or mushy rice, plus electrical issues and maintenance tips. Get your appliance working perfectly with simple solutions anyone can try at home.
Key Takeaways
- Measure accurately: Use the correct rice-to-water ratio for your specific rice type to avoid most cooking problems.
- Clean regularly: Wipe the heating plate and steam vent after each use to prevent malfunctions and odors.
- Check power sources: Most “broken” cookers just have loose cords or tripped circuit breakers.
- Soak long-grain rice: 20-minute soaking prevents undercooked centers and reduces cooking time.
- Replace worn parts: A damaged thermal sensor or cracked pot can ruin every batch of rice.
- Know your rice type: Different varieties need different water amounts and cooking times.
Introduction: Take the Guesswork Out of Rice Cooker Problems
You bought a rice cooker to make perfect rice effortlessly. But now it’s burning your grains, refusing to turn on, or producing mushy disasters. Don’t worry—most rice cooker issues have simple fixes. This complete rice cooker troubleshooting guide walks you through every common problem with clear, step-by-step solutions. You’ll learn how to diagnose issues, perform basic repairs, and maintain your appliance for years of reliable service. By the end, you’ll transform from frustrated cook to rice cooker expert.
Why Rice Cooker Troubleshooting Matters
A rice cooker costs anywhere from $30 to $300. Throwing it away for minor issues wastes money and creates unnecessary trash. Most problems stem from simple causes: incorrect measurements, poor cleaning habits, or normal wear and tear. Understanding your cooker’s mechanics helps you prevent issues before they start. Plus, fixing problems yourself saves time compared to buying a new appliance. This guide covers everything from burnt rice to electrical failures, so you’ll always know what to do.
Visual guide about Complete Rice Cooker Troubleshooting Guide for Perfect Rice
Image source: ricearray.org
Essential Tools for Rice Cooker Troubleshooting
Before diving into fixes, gather these basic tools. You probably already own most of them.
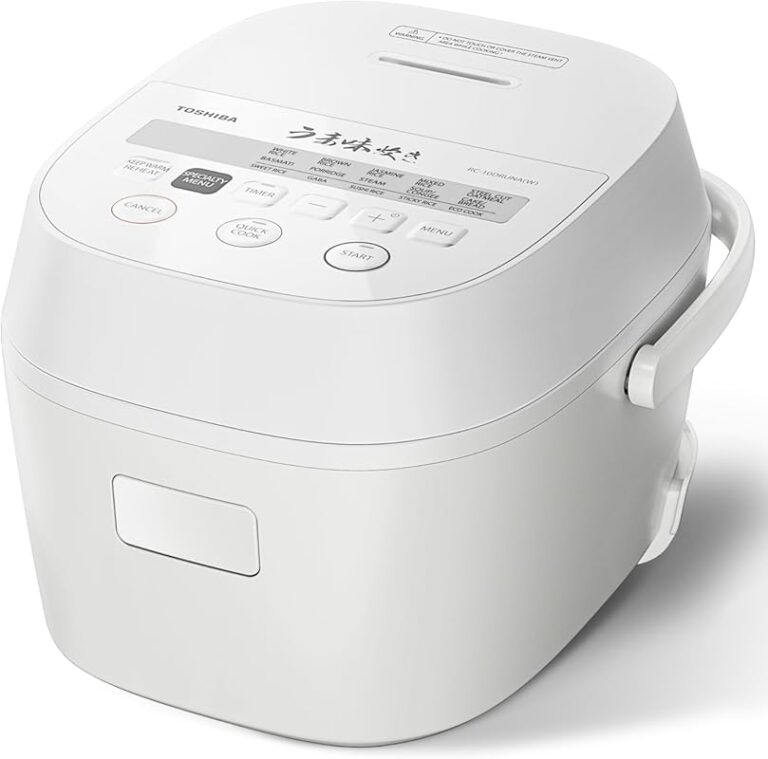
Visual guide about Complete Rice Cooker Troubleshooting Guide for Perfect Rice
Image source: expertreviewsbestricecooker.com
- A small Phillips-head screwdriver for accessing panels
- A multimeter to test electrical connections
- A soft-bristled brush for cleaning vents
- A clean microfiber cloth for wiping surfaces
- A toothpick or paperclip for unclogging steam vents
- Your rice cooker’s user manual (check online if you lost it)
Keep these handy so you’re ready to tackle any problem that arises.
Troubleshooting Common Rice Quality Problems
Most complaints about rice cookers involve the final result—not the appliance itself. Here’s how to fix rice texture and doneness issues.
Visual guide about Complete Rice Cooker Troubleshooting Guide for Perfect Rice
Image source: ricearray.org
Problem: Rice is Undercooked or Hard
Hard rice frustrates everyone. The grains stay firm and chewy when they should be fluffy. This usually happens for three reasons.
Check Your Water Ratio
Too little water is the top cause. Different rice types need different amounts. White rice typically uses a 1:1.5 ratio (one cup rice to 1.5 cups water). Brown rice needs more—usually 1:2. Check your manual for exact measurements. If you’re unsure, add an extra ¼ cup of water per cup of rice. Let the rice soak for 20 minutes before cooking. This softens the grains and helps them absorb water evenly.
For more details on rice varieties, see our guide on types of rice and best uses. Each type has unique water requirements.
Verify the Inner Pot is Seated Properly
The inner pot must sit flat on the heating plate. If it’s tilted or loose, heat distributes unevenly. Lift the pot out and reseat it. Make sure it sits level and touches the heating element completely. Wipe the bottom clean if you see rice residue or water droplets.
Test the Thermal Sensor
The thermal sensor (also called a thermostat) tells the cooker when to switch to warm mode. If it’s faulty, the cooker shuts off too early. Look for a small metal disc under the inner pot. It should be clean and undamaged. Gently press it to ensure it moves freely. If it’s stuck, carefully clean around it with a dry cloth. If it feels broken, you may need a replacement part.
Problem: Rice is Overcooked or Burnt
Burnt rice sticks to the bottom and smells bad. This wastes food and can damage your cooker.
Reduce Water Quantity
Too much water makes rice mushy. It boils too vigorously and evaporates slowly. For white rice, try 1:1.25 instead of 1:1.5. For brown rice, use 1:1.75 instead of 1:2. Adjust in small increments until you find the perfect ratio for your cooker.
Shorten the Cooking Time
Some cookers run too long on the “cook” setting. If yours has a timer, reduce it by 2-3 minutes. Most basic cookers cook for 15-20 minutes. If yours runs longer, it may need servicing. Unplug it and let it cool completely before checking the thermostat.
Clean the Heating Plate
Built-up gunk on the heating plate causes hot spots that burn rice. Unplug the cooker and remove the inner pot. Wipe the heating plate with a damp cloth and mild detergent. Dry it thoroughly with a towel, then heat it empty for 30 seconds to evaporate any moisture. This restores even heating.
Problem: Rice is Mushy or Gummy
Mushy rice lacks structure. It’s sticky and clumpy instead of separate grains.
Rinse Your Rice Thoroughly
Excess starch causes gumminess. Rinse rice under cold water for 30 seconds, then drain. Repeat until the water runs clear. This removes surface starch that makes grains stick together. Use a fine-mesh strainer for best results.
Use Less Water
Mushy rice often means too much water. Reduce your water by ¼ cup per cup of rice. If you’re using a “white rice” setting for brown rice, switch to the correct setting. Brown rice needs different temperatures and timing.
Let Rice Rest After Cooking
Opening the lid immediately releases steam that makes rice soggy. After the cooker switches to warm, let rice sit for 10-15 minutes. This allows excess moisture to evaporate. Then fluff with a fork and serve.
Problem: Rice Sticks to the Pot
Sticky rice makes cleanup difficult and wastes food.
Check the Non-Stick Coating
Scratched or worn non-stick coating causes sticking. Inspect the pot’s surface. If you see scratches, it’s time to replace the pot. Don’t use metal utensils that damage the coating. Always use wooden or plastic spoons.
Oil the Pot Lightly
Before adding rice, rub a thin layer of oil on the pot’s bottom and sides. Use a paper towel to spread it evenly. This creates a barrier that prevents sticking. Use neutral oils like canola or vegetable oil.
Cool the Pot Before Washing
Washing a hot pot causes rice to stick permanently. Let the pot cool completely before cleaning. Soak it in warm water for 30 minutes to loosen stuck grains. Then wash gently with a soft sponge.
Electrical and Mechanical Issues
When your cooker won’t turn on or behaves strangely, electrical problems are often the cause.
Problem: Rice Cooker Won’t Turn On
Nothing happens when you press the cook button. This is usually an easy fix.
Check the Power Cord
Unplug the cord and inspect it for damage. Look for frayed wires or bent prongs. Wiggle the cord near the base to see if it’s loose. If you find damage, replace the cord or take the cooker to a repair shop.
Test the Outlet
Plug another appliance into the same outlet to verify power. If it works, the outlet is fine. If not, check your circuit breaker. Reset any tripped breakers and try again.
Inspect the Lid Switch
Most cookers have a safety switch that prevents operation if the lid isn’t closed. Look for a small button near the hinge. Press it manually to see if it clicks. If it’s broken or stuck, the cooker won’t start. Clean around the switch with a toothpick to remove debris.
Problem: Cooker Won’t Switch to Warm Mode
The cooker keeps cooking until rice burns. This means the thermostat isn’t working.
Clean the Thermal Sensor
Food debris can jam the thermal sensor. Remove the inner pot and locate the sensor (usually a small metal disc). Clean it gently with a dry cloth. Don’t use water or oil, which can damage it.
Test with Different Rice Quantities
Thermostats react to steam temperature. If you cook very small batches (less than ½ cup), there might not be enough steam to trigger the switch. Try cooking at least 1 cup of rice. If it works, the thermostat is fine—you just need more rice for proper operation.
Check for Error Codes
Modern rice cookers display error codes for specific problems. Consult your manual to decode messages like “E01” or “F02.” These often indicate thermostat failures that need professional repair.
Problem: Unusual Noises During Operation
Buzzing, clicking, or rattling sounds mean something’s wrong.
Level the Cooker
Place the cooker on a flat, stable surface. Uneven countertops cause vibrations that make noise. Use a level to check the surface. Adjust by moving the cooker or placing a small object under one foot.
Check for Foreign Objects
Remove the inner pot and look for stray grains, utensils, or packaging material. These can rattle against moving parts. Clean out the cooker’s base with a soft brush.
Listen for Fan Issues
Some advanced rice cookers have cooling fans. If you hear grinding or whirring, the fan blade might be hitting something. Unplug the cooker and inspect the fan area. Remove any obstructions carefully.
Cleaning and Maintenance Problems
Poor maintenance causes many rice cooker issues. Regular cleaning prevents most problems.
Problem: Lingering Odors or Bad Taste
Rice tastes strange or smells like old food.
Deep Clean with Vinegar
Mix equal parts water and white vinegar. Pour it into the pot and run a cooking cycle. The vinegar neutralizes odors. Afterward, rinse thoroughly and run a cycle with plain water to remove any vinegar taste.
Clean the Steam Vent
The steam vent traps moisture and food particles that cause smells. Remove the vent cover (usually on top of the lid) and wash it in soapy water. Use a toothpick to clear any blockages. Reassemble and test.
Leave the Lid Open After Use
Always leave the lid slightly open after cooking. This lets moisture escape and prevents mold growth inside the cooker. Don’t store the cooker with the lid closed.
Problem: Steam Leaks and Water Overflow
Water leaks from the lid or base, making a mess on your counter.
Check the Lid Seal
Inspect the rubber gasket around the lid. If it’s cracked or hard, replace it. Clean the gasket with warm soapy water to remove sticky residue. Dry it completely before reattaching.
Don’t Overfill the Pot
Most rice expands to three times its size. Fill the pot only halfway. Overfilling causes water to bubble up and leak out. Use the measurement lines inside the pot as a guide.
Adjust the Lid Position
Ensure the lid sits squarely on the pot. If it’s crooked, steam escapes from one side. Lift and reposition it before starting the cooker. Some lids have alignment marks—match them up.
Advanced Troubleshooting Tips
For persistent problems, try these advanced solutions.
Calibrate Your Cooker
Some cookers let you adjust cooking time manually. If rice is consistently under or overdone, add or subtract 2 minutes from the cycle. Keep a log of adjustments until you find the perfect setting.
Test with Different Brands of Rice
Not all rice brands are equal. Some are drier or older, requiring more water. Try a different brand to see if the problem persists. This isolates whether the issue is the rice or the cooker.
Check Altitude Adjustments
If you live above 3,000 feet, water boils at a lower temperature. This affects cooking times. Add 1-2 tablespoons of water per cup of rice and increase cooking time by 5-10 minutes. Your manual may have altitude-specific instructions.
When to Call a Professional
Not all problems are DIY fixes. Call a repair technician if:
- The heating element is visibly damaged or broken
- You smell burning plastic or electrical odors
- The cooker smokes or sparks
- You’ve tried all troubleshooting steps and nothing works
- The warranty is still valid (check before voiding it)
Repair costs vary. For basic models under $50, buying a new cooker might be cheaper. For high-end models, professional repair is often worthwhile.
Conclusion: Keep Your Rice Cooker Running Smoothly
Rice cooker troubleshooting doesn’t require special skills. Most problems stem from simple causes: wrong measurements, poor cleaning, or normal wear. By following this guide, you’ll solve 90% of issues at home. Remember to measure accurately, clean regularly, and inspect parts monthly. When in doubt, consult your manual or contact the manufacturer. With proper care, your rice cooker will make perfect rice for years to come. Don’t give up—most “broken” cookers just need a little TLC and basic maintenance.