
How to Make a Homemade Organizer: Easy DIY Dish Rack Guide

Quick Answer
To make a homemade organizer for dishes, build two parallel wooden rails and add evenly spaced upright dowels between them. Size the rack around your plates, include a removable drip tray, and leave open space for airflow; this dish rack size guide can help you choose a practical footprint before cutting.
Quick Build Steps
- Measure first: Check your plates, counter space, sink position, and cabinet clearance.
- Cut two rails: Make matching base pieces from straight hardwood or another suitable material.
- Mark the slots: Space paired dowel holes evenly so dishes remain upright without touching tightly.
- Drill accurately: Clamp the wood and drill perpendicular holes using a guide or drill press.
- Glue the dowels: Use a moisture-resistant woodworking adhesive and keep the rack square while it cures.
- Add drainage: Set the finished organizer above a removable tray or draining surface.
My Simple Rule
- Dry-fit your largest plate before gluing anything permanently. If that plate feels stable and easy to remove, smaller everyday dishes usually become much easier to organize.
A homemade dish organizer is one of those projects that looks harder than it is. The key is measuring your dishes before you start cutting wood.
I like a simple peg-style rack because every dimension can match your kitchen. You can make it compact, wide, shallow, or even build several small modules.
What Is a Homemade Dish Organizer?
A homemade dish organizer is a DIY rack that separates plates, lids, boards, or similar kitchen items into individual slots. When used for wet dishes, it also needs airflow and a reliable way to handle dripping water.
The simplest version uses two base rails with upright dowels. Those dowels act as dividers and keep dishes from collapsing into a pile.
- Plate organizer: Uses closely spaced pegs for dinner plates and side plates.
- Lid organizer: Uses wider spacing for pot lids and food-container lids.
- Cutting-board rack: Uses taller supports and wider slots.
- Drying rack: Adds drainage and open space beneath wet dishes.
- Cabinet organizer: Focuses on storage rather than active drying.
As of 2026, you can find everything from compact plastic drainers to large aluminum racks. A homemade version earns its place when standard dimensions don’t fit your counter or cabinet.
What Materials Do You Need to Make a Homemade Organizer?
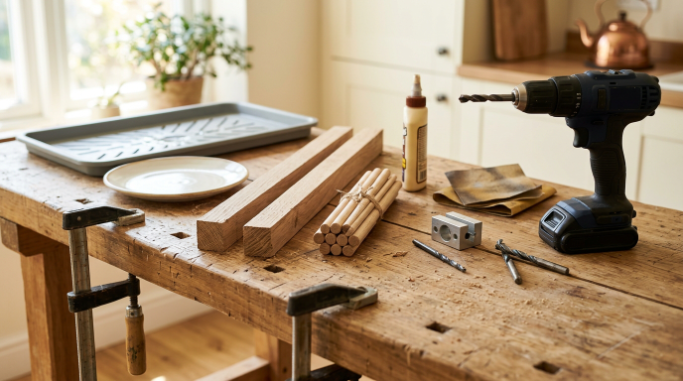
You need straight rails, dowels, glue, basic measuring tools, and a way to drill accurate holes. For a wet-area organizer, material choice matters more than decorative details.
Wood naturally exchanges moisture with the surrounding environment. The USDA Forest Service explains this relationship in its Wood Handbook, which is why drying and moisture control deserve attention in a wooden rack.
- Two hardwood rails: Around 3/4 to 1 inch thick gives you useful drilling depth.
- Hardwood dowels: 1/4-inch or 3/8-inch dowels work well for a light organizer.
- Wood glue: Choose an adhesive rated for the moisture exposure you expect.
- Drill and bits: Match the bit diameter closely to the dowels.
- Drill guide: Helpful when you don’t own a drill press.
- Clamps: Keep small pieces controlled during drilling and assembly.
- Sandpaper: Use it to remove splinters and ease sharp edges.
- Drain tray: Choose a washable tray slightly larger than the rack’s footprint.
Which material works best?
For a DIY wooden organizer, I prefer straight-grained hardwood over MDF or raw particleboard. Repeated moisture is much less forgiving to exposed composite edges.
If you would rather avoid wood, compare the tradeoffs in this guide to the best material for a dish rack. Metal, plastic, bamboo, and wood all behave differently around water.
| Material | DIY Difficulty | Water Concern | Best Use |
|---|---|---|---|
| Sealed hardwood | Easy to moderate | Must dry between uses | Custom peg racks |
| Bamboo | Moderate | Avoid trapped moisture | Lightweight organizers |
| Plastic | Hard to fabricate neatly at home | Won’t swell like wood | Washable inserts |
| Stainless or aluminum | Advanced without metalworking tools | Good moisture resistance when suitable material is used | Long-term wet-area racks |
How Big Should You Make a Homemade Dish Organizer?
Build around your largest everyday dish rather than copying a random rack online. For many kitchens, a finished footprint near 17 inches long and 12 inches deep is a useful starting example.
That is not a mandatory standard. Commercial racks vary significantly, so your available counter space should make the final decision.
- Length: 16 to 18 inches gives a compact rack several plate slots.
- Depth: About 10 to 12 inches suits many countertops.
- Peg height: Around 4 inches works for many standard plates.
- Slot spacing: Start around 1 1/2 inches, then test your own dishes.
- Tray clearance: Make the tray larger than the wet footprint of the rack.
Always test the layout with an actual plate. Thick stoneware may need noticeably wider gaps than thin dinnerware.
How Do You Make a Homemade Organizer Step by Step?
The basic process is measure, mark, drill, dry-fit, glue, sand, and finish. Accuracy during the drilling stage matters more than speed.
1. Measure the available space
Measure the counter or cabinet where the organizer will live. Include nearby faucets, backsplashes, appliance doors, and upper-cabinet clearance.
Then measure your widest plate, thickest bowl rim, and any cutting boards you want to store. Write those dimensions down before deciding on peg spacing.
2. Cut two matching base rails
Cut both rails to exactly the same length. Matching rails make the dowel pattern easier to align and help the rack sit square.
Sand the cut ends lightly before drilling. Rough ends are harder to handle accurately during layout.
3. Mark every dowel position
Clamp the two rails together with their ends flush. Mark the dowel centers across both pieces at the same time.
I prefer this method because it reduces layout drift. One small marking error repeated across two separate rails can leave the finished pegs visibly crooked.
4. Drill perpendicular holes
Use a drill press when available, or add a handheld drilling guide. Set a depth stop so every hole is consistent.
Clamp small workpieces instead of holding them in your hand. OSHA’s handheld-drill guidance specifically warns about stock catching and twisting during drilling.
Practical tip: Drill one test hole in scrap wood first. A dowel should fit snugly without needing enough force to split the rail.
5. Dry-fit the organizer
Insert the dowels without glue and place your largest plate between them. The dish should stand securely while remaining easy to lift out.
Also test bowls, lids, and boards if you plan to store them. This is your easiest opportunity to correct spacing.
6. Glue the dowels and keep everything square
Apply a controlled amount of glue inside each hole and insert the dowels. Remove squeeze-out before it hardens.
Use a square or straight reference while the adhesive sets. Follow the glue manufacturer’s curing instructions before loading the rack.
7. Sand the finished organizer
Round sharp corners lightly and smooth every area that can touch a dish. Pay special attention to dowel ends.
Don’t sand so aggressively that you create loose-fitting joints. The goal is a comfortable surface, not a change in dimensions.
8. Plan for drainage
A drying organizer should never depend on the wood itself to absorb runoff. Put a removable drain tray, sloped board, or other washable surface underneath.
The FDA Food Code requires air-drying or adequate draining for cleaned and sanitized utensils in food-service settings. That commercial rule isn’t a household construction code, but the air-drying principle supports an open rack design.
- Keep slots open: Don’t crowd plates tightly together.
- Empty standing water: Don’t leave a drip tray full overnight.
- Clean removable parts: Trays should be easy to wash separately.
- Let wood dry: Give the organizer time to dry between wet loads.
Can You Make the Organizer Without Woodworking Tools?
Yes. A no-build organizer can use an existing cooling rack, washable drying mat, removable wire shelf, or adjustable divider system.
These alternatives are useful for renters and anyone who doesn’t want to cut or drill material. This list of dish rack alternatives covers several simple options.
You can also create a dry-storage organizer inside a deep drawer. Pegs and dividers work especially well when you store dishes in a drawer.
- Cooling rack: Useful as a temporary elevated drying surface.
- Dish mat: Fastest option when you need something immediately.
- Drawer dividers: Better for dry bowls, lids, and lightweight dishes.
- Wire shelf: Provides airflow without woodworking.
What Mistakes Should You Avoid?
The biggest mistakes are building before measuring, drilling crooked holes, and ignoring water management. All three can make an otherwise attractive organizer frustrating to use.
- Guessing plate spacing: Test your thickest dish before final assembly.
- Using warped rails: Twisted wood makes alignment difficult.
- Holding wood while drilling: Clamp small pieces securely.
- Skipping drainage: Standing water creates extra cleaning and moisture problems.
- Using unknown reclaimed wood: Avoid material with stains, odors, rot, or uncertain chemical exposure.
- Sealing too early: Let adhesive cure as directed before finishing.
- Packing dishes tightly: Leave room for drainage and airflow.
The USDA also recommends cleaning kitchen utensils and surfaces with warm, soapy water and allowing appropriate items to air-dry. Its kitchen cleaning guidance is a useful reminder that the rack itself needs regular care.
How Can You Customize a Homemade Organizer?
Once the basic frame works, small changes can make the organizer more useful. Keep every addition removable or easy to clean whenever possible.
- Add a utensil cup: Mount a removable holder beside the plate area.
- Create wide slots: Reserve one end for pans, cutting boards, or lids.
- Make two modules: Separate plates from cookware instead of building one oversized rack.
- Add non-slip feet: Keep the base slightly raised above the tray.
- Build for cabinets: Skip the drainage tray when organizing completely dry dishes.
- Label zones: Useful for food-container lids or children’s dishes.
My favorite upgrade is modularity. Two 8-inch organizers can sometimes work better than one long rack because you can move them independently.
Useful Products for Building a DIY Dish Organizer
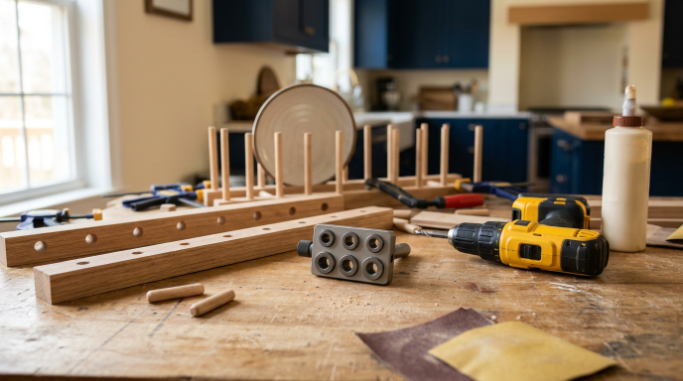
If you’re ready to build one, these are the tools and supplies I’d prioritize. You don’t need an entire workshop for a compact peg organizer.
🏆 Best for Accurate Holes
Milescraft 1312 DrillBlock
★★★★★ 4.9/5
This handheld guide includes six common drill-bushing sizes from 1/8 to 1/2 inch. I like it for a peg rack because straighter holes make matching rails much easier without a drill press.
💧 Best Moisture-Resistant Glue
Titebond III Ultimate Wood Glue
★★★★★ 4.9/5
Titebond III is sold as a waterproof woodworking adhesive that passes ANSI/HPVA Type I water-resistance testing. I prefer a moisture-rated glue for dowel joints that will live beside a sink.
🛠 Best All-Purpose DIY Drill
DEWALT DCD771C2 20V MAX Drill/Driver Kit
★★★★☆ 4.6/5
This compact 1/2-inch cordless drill is suitable for common home and light-to-medium DIY work. It gives you more flexibility than buying a specialized tool for one organizer project.
Frequently Asked Questions
How do you make a simple homemade dish organizer?
Cut two matching wooden rails, mark evenly spaced holes, drill both rails accurately, and glue matching dowels into the holes. Dry-fit your largest dish before gluing, then place the finished rack over a removable draining surface if you plan to use it with wet dishes.
What can I use to make an organizer without buying wood?
You can repurpose a clean wire cooling rack, removable shelf, washable dish mat, or adjustable drawer divider. Avoid reclaimed materials with unknown chemical exposure, mold, strong odors, oil stains, or surfaces that cannot be cleaned easily.
How far apart should the pegs be on a dish organizer?
About 1 1/2 inches is a useful starting point for many plates, but there is no universal spacing. Measure the thickness and curvature of your own dishes, then test two temporary pegs before drilling the complete rack.
Can a homemade wooden organizer be used for wet dishes?
Yes, but the design should minimize standing water and allow the wood to dry between uses. Use suitable materials, provide drainage below the rack, clean it regularly, and follow the adhesive and finish manufacturer’s curing and maintenance directions.
Is it cheaper to make a dish organizer than buy one?
It can be cheaper when you already own the drill, clamps, and basic cutting tools. If you must buy several power tools for one small project, a ready-made rack may cost less, so compare the tool expense with the value of getting a custom fit.
Final Takeaway
Learning how to make a homemade organizer comes down to three things: measure your dishes, drill accurately, and control moisture. A simple peg rack can organize plates, lids, cutting boards, or dry cabinet storage without wasting space.
Start with a small removable version instead of a complicated built-in. Once the spacing works with your everyday dishes, you can repeat the same design anywhere your kitchen needs better organization.