How Does a Push Vegetable Dicer Work? Explained

Quick Answer
A push vegetable dicer works by pressing a vegetable through a fixed grid of sharp blades. The downward pressure from the lid or pusher forces the food through the grid, cutting it into smaller, similarly shaped pieces that fall into a collection container. The blade-grid design determines the cut size, while the vegetable’s firmness and preparation affect how easily it passes through.
What Happens Inside a Push Vegetable Dicer?
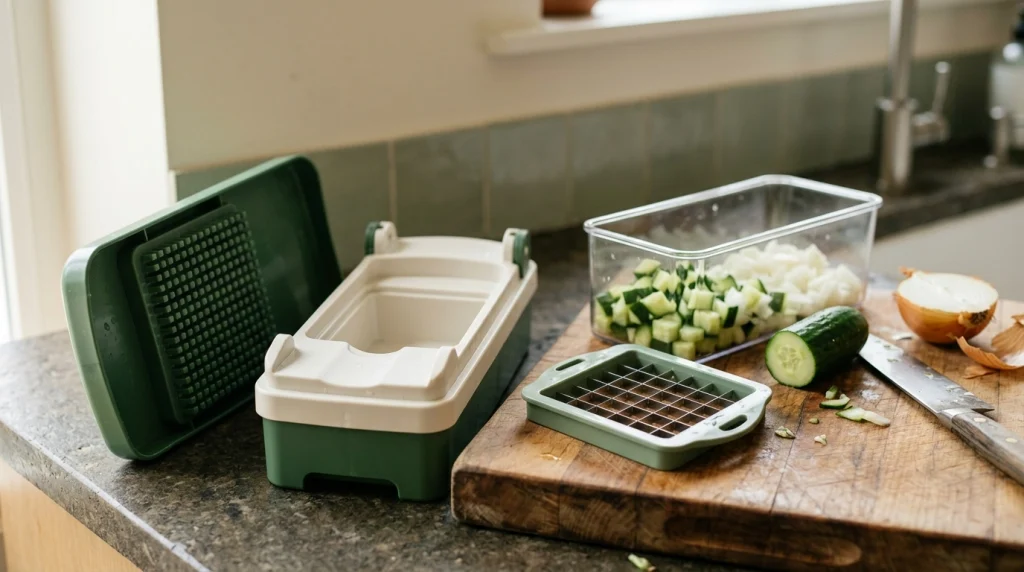
A push vegetable dicer is a manual kitchen tool that cuts vegetables using downward pressure rather than electricity. Its central mechanism is a cutting grid made from intersecting blades, usually held inside a rigid frame.
Most countertop models have four main parts:
- Cutting grid: Intersecting sharp blades form openings that determine the approximate width and shape of the cut pieces.
- Push lid or pusher: A hinged lid or pressure plate moves the vegetable down toward and through the blades.
- Collection container: A bowl or tray catches the diced food underneath the cutting area.
- Base and frame: These support the grid and container, helping the parts remain aligned during use.
Some designs include interchangeable grids for different cut sizes, a shaped plate that fits into the grid, or a mechanism that helps remove food stuck to the pusher. Features vary, so the exact construction depends on the model.
The key principle is simple: the blades stay in place while the pusher moves the food through them. Unlike a knife, which requires repeated cutting movements, a push dicer can make many cuts in one downward press.
How Does the Dicing Mechanism Cut Vegetables?
The cutting process combines the force applied by your hand with the geometry of the blade grid. Each blade creates a cutting edge, and the intersecting blades divide the vegetable into multiple sections as it moves through the openings.
Imagine pressing a suitable piece of potato through a square grid. The first set of edges separates it into strips in one direction. The crossing edges divide those strips in the other direction, producing small, roughly square pieces.
The pusher helps distribute pressure across the vegetable and guides it into the grid. On models with raised teeth or a matching press plate, these parts can also help push the cut pieces completely through the openings.
Three factors influence the result:
- Grid spacing: Smaller openings generally produce smaller pieces; larger openings produce larger pieces.
- Food firmness: A vegetable that is too hard, too large, or unsuitable for the blades may resist cutting or become stuck.
- Alignment: Food positioned fully over the grid is more likely to pass through evenly than a piece extending beyond the cutting area.
A grid does not automatically produce perfect cubes from every vegetable. The shape of the original piece, its internal structure, and the direction in which it sits all affect the final result.
How to Use a Push Vegetable Dicer Step by Step
For an ordinary countertop push dicer, the following process explains how to prepare the ingredients and use the cutting mechanism. Always follow the instructions for your specific model, particularly its permitted ingredients and assembly requirements.
- Set up the dicer. Place the collection container on a firm, level surface. Fit the correct blade grid securely into its designated position and confirm that the lid and other components align properly.
- Prepare the vegetable. Wash it, remove stems or unwanted ends, and peel it when necessary. Cut large vegetables into smaller sections that fit entirely within the grid.
- Position the food. Open the pusher and place one prepared piece over the cutting grid. If the manufacturer’s instructions specify a flat side facing down, follow that orientation.
- Close the pusher. Keep your fingers away from the cutting area while bringing the lid or press plate into position.
- Press down firmly and evenly. Apply controlled pressure through the intended handle or pusher. Do not strike the lid, rock the unit aggressively, or force food that resists the blades.
- Check the result. Lift the lid as instructed and confirm that the pieces have passed through the grid. If food remains lodged in the mechanism, stop and clear it safely before continuing.
- Empty the container. Remove the diced vegetables from the collection tray and repeat with the next prepared portion.
A manufacturer example is the Fullstar 9-in-1 vegetable chopper instruction manual, which describes placing prepared food on the blade and pressing the pusher downward. Its directions also emphasize keeping the vegetable within the blade area.
Which Vegetables Work Best in a Push Dicer?
Push dicers generally work best with vegetables that are firm enough to hold their shape but not so hard that they resist the cutting grid. The result also depends on the blade size and the manufacturer’s instructions.
- Onions: Cut large onions into manageable sections. The intersecting blades can create small pieces for sauces, soups, and stir-fries.
- Cucumbers: Firm cucumber sections can pass through a suitable grid to produce pieces for salads and cold dishes.
- Bell peppers: Remove the stem, seeds, and unsuitable inner portions before cutting the remaining flesh into sections that fit the grid.
- Zucchini: Firm zucchini can be diced when the pieces are prepared to suit the opening size.
- Potatoes and carrots: These are denser vegetables, so size, firmness, and blade suitability matter. Prepare them according to the model’s instructions rather than forcing large or unusually hard pieces.
Very soft tomatoes can crush or release substantial juice instead of producing neat pieces. Extremely hard produce, frozen food, pits, and other items not approved by the manufacturer can damage some grids or create unsafe operating conditions.
For mixed vegetables, use the same preparation principle: make each piece small enough to fit the cutting area and suitable for the chosen grid.
Why Does a Push Vegetable Dicer Sometimes Get Stuck?
A push dicer usually becomes difficult to operate when food cannot pass cleanly through the grid or when the pusher and cutting assembly are not correctly aligned. Applying more force is not necessarily the solution.
Common causes include:
- Oversized pieces: A large section may bridge several openings and resist the downward movement.
- Incorrect food placement: A vegetable extending beyond the grid can be cut unevenly or prevent the pusher from closing correctly.
- Unsuitable texture: Very hard produce may resist the blade, while soft or wet ingredients may compress and smear.
- Food trapped in the grid: Fibrous strands, skins, and pieces of vegetable can obstruct openings.
- Misaligned or unsecured parts: A blade insert or pusher that is not fitted as instructed can prevent smooth operation.
If the pusher will not close normally, stop. Do not use body weight, strike the lid, or place your fingers near the blades to force the vegetable through.
Open the device only as directed by the manufacturer, keeping hands away from the cutting edges. Remove trapped food with the supplied cleaning tool or another method specifically permitted by the instructions. If a blade is bent, cracked, loose, or damaged, stop using the dicer until the part is safely replaced or the unit is repaired.
How Does Blade Size Affect the Final Cut?
The cutting grid largely determines the approximate dimensions of diced vegetables. Some push dicers include two or more interchangeable grids, while simpler models offer only one cutting size.
A finer grid is useful when you want smaller pieces for ingredients such as onions or peppers. A coarser grid may be more suitable for larger vegetable pieces intended for salads, roasting preparation, or chunky dishes.
However, the size printed on a blade or stated in a manual should not be assumed to describe every finished piece exactly. Irregular vegetable shapes, incomplete cuts, and the original dimensions of the food can create variation.
Choose the grid according to the intended use of the vegetables and the instructions for the device. Before changing an insert, make sure the unit is empty and follow the designated locking and removal procedure. Never try to exchange a blade while pressing food through the mechanism.
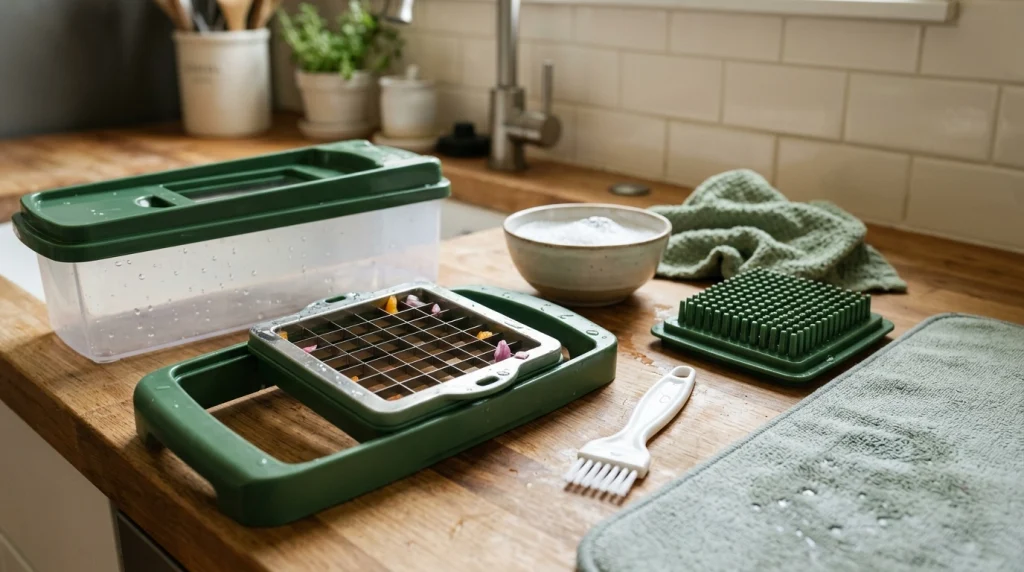
How to Clean a Push Vegetable Dicer After Use
Cleaning is easier when vegetable residue has not dried inside the narrow openings. The sharp grid, pusher grooves, hinge, and container may each need attention.
- Disassemble the unit safely. Empty the container and remove detachable parts according to the instructions. Handle the blade assembly by its frame or designated safe edges.
- Remove loose food residue. Use the supplied brush, scraper, or cleaning fork where provided. Keep fingers away from both sides of the cutting grid.
- Wash the components. Use mild dish soap and water when permitted. Check the manual before putting any part in a dishwasher because care requirements differ among models.
- Inspect the grid. Check for trapped food and visible damage. Do not use a knife tip or another sharp metal utensil to clear an opening.
- Dry and store correctly. Allow the parts to dry fully, then store the blade assembly securely so it cannot be contacted accidentally.
Some models include a cleaning plate or mesh that pushes residue from the pusher’s grooves. This feature helps with cleanup, but it does not remove the need to handle the sharp cutting grid carefully.
For more everyday kitchen guidance, see the site’s cooking tips collection and its guide to kitchen safety for home cooks for related food-preparation advice.
Is a Push Dicer Different From an Electric Vegetable Chopper?
Yes. A push dicer typically cuts food through a stationary grid, while an electric vegetable chopper commonly uses a motor-driven rotating blade inside a bowl. Both reduce the size of ingredients, but their cutting mechanisms and operating methods differ.
A push dicer is useful when you want pieces shaped by a fixed grid and prefer a manual tool that does not need a motor or power supply. It also allows you to see where the vegetable is placed before pressing.
An electric chopper may be more suitable for tasks that call for repeated chopping or a less uniform result, depending on its design. However, its output can vary with operating time, blade arrangement, and food quantity.
Neither tool is ideal for every ingredient or preparation task. If consistent diced pieces are important for a recipe, a correctly sized push-dicer grid can be useful; if you need a fine mince or a coarse chop, another tool or technique may suit the job better.
Related Product
Manual Push Vegetable Dicer
A manual dicer with a collection container and a suitable cutting grid can help prepare evenly sized vegetable pieces for everyday cooking.
As an Amazon Associate, we earn from qualifying purchases.
Frequently Asked Questions
1. Does a push vegetable dicer need electricity?
No. A standard push vegetable dicer uses hand-applied pressure to move food through its cutting grid. It does not need a motor, battery, or electrical outlet.
2. Does a push vegetable dicer make perfectly uniform cubes?
It can produce relatively uniform pieces when the vegetable fits the grid and passes through cleanly. The original shape of the food and the completeness of the cut can still cause some variation.
3. Can I use a push dicer on raw potatoes and carrots?
Some models are designed for these vegetables, but suitability depends on the tool’s instructions and the produce’s firmness. Prepare appropriately sized pieces and never force a vegetable that resists the blade.
4. Why does food remain stuck in the blade grid?
Food may become trapped because a piece is too large, the vegetable is fibrous, or residue has accumulated in the openings. Stop using the dicer and clear the obstruction with the supplied tool according to the manufacturer’s directions.
5. Can the cutting blades be replaced?
Some models have removable or interchangeable cutting grids, while others use a fixed assembly. Check the model’s manual to determine whether replacement parts are supported and how to install them safely.
6. Is a push vegetable dicer dishwasher-safe?
It depends on the model and the individual components. Check the manufacturer’s care instructions before using a dishwasher, and handle removable blades carefully during cleaning and storage.
Conclusion
A push vegetable dicer works by using hand pressure to move prepared vegetables through a stationary grid of intersecting blades. The grid determines the approximate cut size, while the vegetable’s firmness, preparation, and position affect how easily it passes through.
For reliable results, choose the appropriate grid, cut large vegetables into manageable pieces, and keep the food within the cutting area. If the pusher resists movement, stop rather than forcing it.
Careful cleaning and safe handling of the blade assembly help keep the tool ready for future food preparation. Always follow the instructions supplied with your particular model.