How to Use a Push Down Vegetable Chopper

Quick Answer
To use a push down vegetable chopper, prepare your vegetables by peeling and trimming them as needed, cut large pieces to fit the blade area, place the chopper on a stable surface, and position the food over the cutting grid. Close the lid or pusher and press down firmly using the design intended for your model. Remove the chopped vegetables, then disassemble and clean the chopper according to its instructions, keeping your fingers away from the sharp blades.
A push down vegetable chopper makes vegetable preparation easier by pressing food through a cutting grid or blade assembly. It can help dice onions, potatoes, carrots, cucumbers, and other suitable ingredients without requiring you to chop everything by hand.
The key to using one successfully is preparing the vegetables to fit the cutting area, applying controlled pressure, and choosing ingredients that the blades can handle. The exact mechanism varies: some models have a hinged lid and cutting grid, while others use a top-mounted press that drives rotating blades.
How to Use a Push Down Vegetable Chopper Step by Step
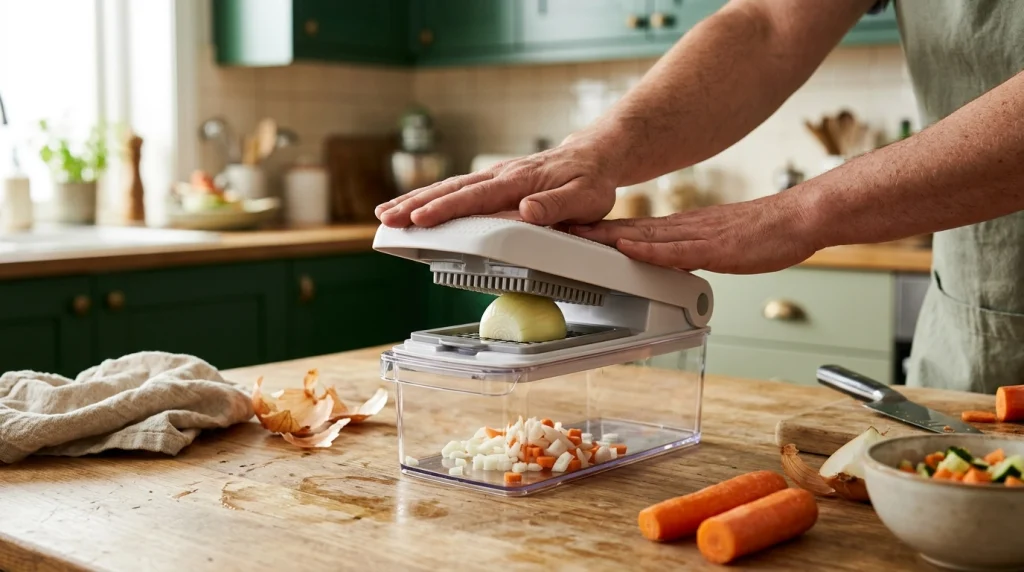
Most manual push down choppers follow a similar process, although the assembly and pressing mechanism depend on the model. Read the supplied instructions before using a new chopper, especially if it includes interchangeable blades or a locking mechanism.
Step 1: Assemble the Chopper Correctly
Place the collection container on a flat, stable work surface. Fit the cutting grid, blade attachment, or rotating blade assembly into its designated position, following the manufacturer’s instructions.
Check that removable parts are seated securely and that the lid or pusher closes correctly. Never operate the chopper with a loose cutting attachment, a damaged component, or an incorrectly fitted lid.
Step 2: Wash and Prepare the Vegetables
Rinse vegetables under clean running water before cutting them. Peel ingredients when necessary, remove stems and tough ends, and discard damaged sections that should not be eaten.
Cut large vegetables into pieces that fit comfortably inside the cutting area. For a grid-style chopper, the food must fit within the grid and be positioned so the pusher can press it through the blades.
- Onions: Remove the dry outer skin and trim the ends. Cut large onions into halves, quarters, or smaller sections as required by the model.
- Carrots: Trim the ends and cut thick carrots into shorter sections that fit the cutting area.
- Potatoes: Peel if desired and divide large potatoes into manageable pieces.
- Cucumbers: Trim the ends and cut them into sections that fit the blade assembly.
- Bell peppers: Remove the stem, seeds, and inner membrane, then cut the pepper into suitable pieces.
These are general preparation guidelines, not universal size requirements. Always follow the dimensions and ingredient limitations specified for your particular chopper.
Step 3: Position the Vegetable Over the Blades
Open the pusher or lid if your model requires it. Place one prepared piece of vegetable over the cutting grid, keeping the entire piece within the blade area.
For many grid-style choppers, positioning the flat or larger side against the cutting area helps the vegetable remain stable. Avoid stacking several pieces unless the manufacturer specifically permits it.
Step 4: Close the Lid and Press Down
Close the pusher or lid as directed by the manufacturer. Position your hands on the designated pressing surfaces and push down firmly and in a controlled motion.
The pusher should drive the vegetable through the cutting grid or activate the blade mechanism. Do not place your fingers near the cutting edges, and do not force the handle if the vegetable resists the cutting action.
If the chopper will not cut the ingredient, stop and release the pressure. Open the mechanism only as instructed, check the vegetable’s position, and cut it into smaller pieces if necessary.
Step 5: Check the Cut and Empty the Container
Once the pressing mechanism has completed its movement, check whether the vegetables have been cut to the desired size. Some models produce uniform cubes, while others chop ingredients into less regular pieces or use rotating blades to create different textures.
Open the chopper only when the moving parts are stationary and it is safe to do so. Remove the chopped vegetables from the container using a suitable utensil rather than reaching into the cutting assembly.
If some pieces remain uncut, reposition them only after the mechanism is safely open and your fingers are clear of the blades. Repeat the process with smaller portions rather than forcing oversized pieces through the grid.
Which Vegetables Work Best in a Push Down Chopper?
Vegetables that fit the cutting area and yield to the blades with reasonable pressure are generally the easiest to process. The best choices depend on the blade design, cutting-grid size, and the manufacturer’s ingredient restrictions.
| Ingredient | Preparation | Practical tip |
|---|---|---|
| Onions | Peel and divide into smaller sections. | Keep each section within the grid. |
| Carrots | Trim and cut to a suitable length. | Avoid forcing very hard or oversized pieces. |
| Cucumbers | Wash, trim, and section. | Expect softer pieces to produce a different texture. |
| Potatoes | Cut large potatoes into smaller portions. | Check the manual for hard-food restrictions. |
| Bell peppers | Remove seeds and cut into sections. | Avoid folded or overlapping pieces. |
Always distinguish between a grid-style vegetable dicer and a rotary or pull-cord chopper. A grid-style model forces food through fixed cutting edges, while a rotary model uses moving blades inside a container. Their operating methods and suitable ingredients are not necessarily interchangeable.
How to Get Evenly Chopped Vegetables
Uneven results usually come from inconsistent food preparation, poor positioning, or a cutting assembly that is not suited to the ingredient. A few adjustments can make a noticeable difference.
- Use similar-sized sections. Divide large vegetables into pieces of comparable size before placing them in the chopper.
- Center the food. Keep the vegetable within the cutting grid instead of letting part of it hang over the edge.
- Work in manageable batches. Avoid crowding the blade area or stacking pieces when the design is intended for one piece at a time.
- Choose the correct attachment. If the chopper has interchangeable grids or blades, select the one intended for the cut you want.
- Inspect the blade assembly. Food residue, damaged blades, or incorrectly fitted components can interfere with cutting.
For example, if you want evenly diced onions for a sauce, divide a large onion into sections that fit the grid and process them individually. Trying to press an entire oversized onion through a small cutting area is more likely to produce resistance and irregular results.
Tip
If the chopper struggles, reduce the size of the vegetable pieces and check their position before applying pressure again. Using more force is not a substitute for correct preparation.
Common Mistakes to Avoid
Most problems with manual push down choppers can be prevented by following the correct preparation and handling procedure.
- Pressing oversized vegetables: Large pieces may not fit through the grid and can cause the mechanism to jam.
- Forcing a resistant handle: Excessive force can damage components or cause the chopper to shift unexpectedly.
- Overfilling the container: Too much food can obstruct the mechanism or leave insufficient space for chopped pieces.
- Using the wrong ingredients: Very hard produce, fibrous ingredients, and other unsuitable foods may exceed the limits of a particular model.
- Reaching into the cutting area: Sharp blades can cause injuries even when the chopper is not being actively used.
- Using a damaged attachment: Bent, loose, or broken components should be replaced or assessed according to the manufacturer’s guidance.
Warning
Never clear a jam with your fingers or attempt to push food through the blades by hand. Stop using the chopper, open or disassemble it according to its instructions, and use the supplied cleaning tool or a suitable utensil where permitted.
How to Clean a Push Down Vegetable Chopper
Clean the chopper promptly after preparing vegetables so that food particles do not dry onto the cutting grid, pusher, or container. Always follow the cleaning instructions for your exact model because dishwasher suitability and disassembly procedures vary.
- Separate the parts safely. Remove the lid, container, pusher, and removable cutting assembly as directed. Keep the sharp edges away from your hands.
- Remove loose food residue. Empty the container and rinse away accessible vegetable pieces before they dry.
- Wash the components. Use warm water, dish soap, and a suitable soft brush or sponge. Pay attention to the spaces around the blades and pusher.
- Clear stubborn pieces carefully. Use the manufacturer’s cleaning tool if supplied. Do not run your fingers along the blade edges or force a utensil into a position where it could slip.
- Rinse and dry. Remove soap residue and dry the components as directed before storing or reassembling the chopper.
- Store it securely. Keep blade attachments protected and out of children’s reach.
Some vegetable choppers are dishwasher-safe, but that does not mean every part of every model can go into a dishwasher. Check the product manual for approved parts, rack placement, and any restrictions on washing the blades or lid.
For more general kitchen-tool care, the manufacturer’s vegetable chopper care instructions illustrate why blade handling, dismantling, and cleaning requirements should be checked for the specific design.
What to Do If the Chopper Gets Stuck
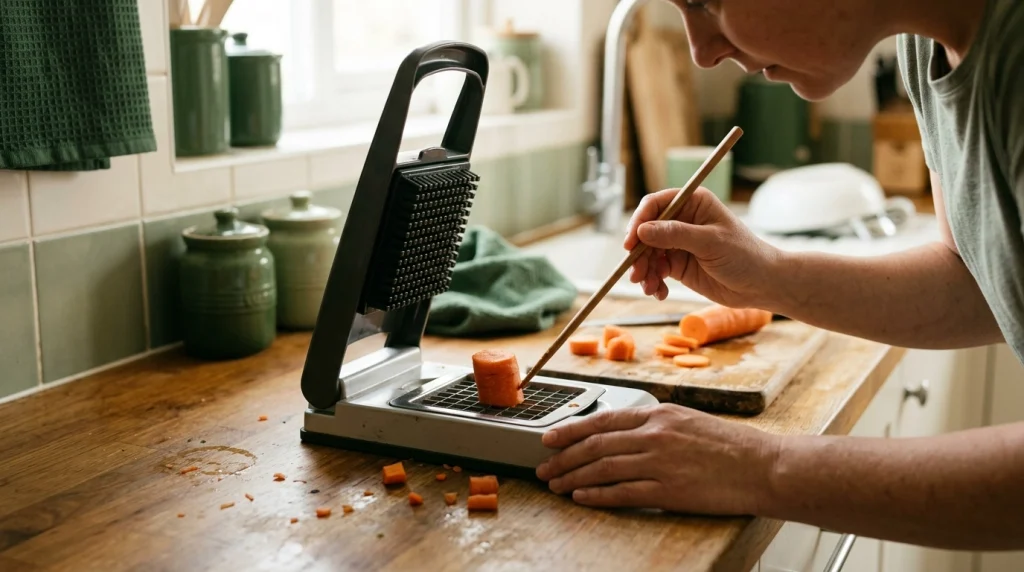
If the pusher stops moving or a vegetable becomes trapped, stop pressing immediately. Do not twist the lid forcefully, strike the handle, or use your fingers to dislodge the food while the cutting assembly is engaged.
- Release the pressure. Allow the mechanism to return to its safe resting position if the design permits.
- Open it according to the instructions. Keep your fingers clear of the cutting edges while accessing the trapped food.
- Check the ingredient size. Oversized or unusually hard pieces may be unsuitable for the chopper.
- Inspect for obstructions. Look for trapped fibers, food residue, a misaligned attachment, or visible damage.
- Try a smaller piece only if appropriate. Reassemble the chopper correctly before resuming use.
If the mechanism still resists movement, the blades appear damaged, or a component will not lock into place, stop using the device. Consult the manufacturer rather than forcing it through another cycle.
When Is a Push Down Chopper the Right Tool?
A push down vegetable chopper is useful when you want repeatable cuts for suitable vegetables and prefer a manual tool over a knife. It can be convenient for preparing ingredients for salads, soups, stir-fries, and other dishes that call for chopped produce.
However, it is not suitable for every cutting task. A kitchen knife gives you more control over unusual shapes, very fine chopping, delicate ingredients, and vegetables that do not fit the grid. A rotary chopper may be more appropriate for ingredients that its manufacturer specifically approves.
Choose the tool according to the ingredient, the desired cut, and the amount of preparation involved. Forcing an unsuitable vegetable through a chopper is less effective than switching to a tool designed for the job.
Key Insight
The most reliable way to use a push down chopper is to match the food to the cutting grid, not to match your force to the resistance. Correct sizing, stable positioning, and safe handling matter more than pressing harder.
Related Kitchen Tool
Manual Push Down Vegetable Chopper
A manual vegetable chopper can help prepare suitable ingredients for everyday cooking. Compare the blade design, container size, cleaning requirements, and ingredient restrictions before choosing one.
As an Amazon Associate, the site may earn from qualifying purchases.
Frequently Asked Questions
1. Do you need to cut vegetables before using a push down chopper?
Usually, yes, if the vegetable is larger than the cutting area. Cut large ingredients into manageable pieces that fit within the grid or the manufacturer’s recommended loading area.
2. Why won’t my push down vegetable chopper cut an onion?
The onion may be too large, poorly positioned, or too difficult for the particular blade assembly. Stop pressing, check the instructions, and divide the onion into smaller sections before trying again if the model permits it.
3. Can you use a push down chopper for carrots?
Some models can chop carrots when the pieces fit the cutting area and the manufacturer permits their use. Trim and section the carrots first, and never force unusually hard or oversized pieces through the blades.
4. Can a push down vegetable chopper go in the dishwasher?
Only if the manufacturer identifies the relevant parts as dishwasher-safe. Check the manual for instructions about the blades, lid, container, and placement in the dishwasher.
5. How do you remove vegetables stuck in the blades?
Stop using the chopper and open it according to the manufacturer’s instructions. Use the supplied cleaning tool or another permitted utensil to remove the food without touching the sharp edges.
6. How do you get evenly diced vegetables with a push down chopper?
Prepare similarly sized pieces, center them within the cutting area, and use the correct blade attachment. Avoid overloading the chopper, and process ingredients in smaller batches when necessary.
Conclusion
Using a push down vegetable chopper correctly starts with preparing vegetables to fit the cutting area, assembling the tool properly, and pressing the mechanism with controlled force. Smaller, well-positioned pieces generally make the process easier and help produce more consistent cuts.
Keep your fingers away from the blades, stop whenever the mechanism jams, and clean the components according to the manufacturer’s instructions. With suitable ingredients and careful handling, a push down chopper can simplify routine vegetable preparation without unnecessary strain or risk.