

How to Make a Homemade Dish Rack Organizer
Quick Answer
Make a homemade dish rack organizer by fitting removable dowels into a sealed wooden base. Space the dowels around your plates, lids, bowls, and cutting boards, then place the organizer on a washable draining mat. If you need a temporary setup, consider these dish rack alternatives before building a permanent organizer.
Quick Building Steps
- Measure the space: Record the usable counter or cabinet width, depth, and height.
- Choose a base: Use a smooth hardwood or bamboo board about 3/4 inch thick.
- Mark the layout: Position your largest dishes on the board and mark dowel locations around them.
- Drill the holes: Make straight holes that closely match the dowel diameter without passing through the base.
- Seal the wood: Sand every surface and apply a moisture-resistant finish according to its label.
- Add drainage: Elevate the base slightly and place a drying mat or draining tray underneath.
Important Safety Tip
- Let every finish cure completely before the organizer touches clean dishes.
A homemade organizer can turn an awkward counter or cabinet into useful storage. I especially like this project because removable pegs let you change the layout later.
This guide covers measurements, materials, construction, drainage, and cleaning. You can use the same basic design for drying dishes or storing cookware.
What Is a Homemade Dish Rack Organizer?
A homemade dish rack organizer is a custom holder that separates dishes with dowels, dividers, or upright supports. Unlike a fixed rack, it can match your exact dishes and available space.
The simplest version uses a flat wooden base and removable round pegs. Plates, lids, trays, and cutting boards stand between the pegs instead of sitting in unstable stacks.
- Countertop version: Holds wet dishes over a draining tray or absorbent mat.
- Cabinet version: Stores dry plates, pans, lids, and boards vertically.
- Drawer version: Uses shorter pegs to keep stacked dishes from shifting.
- Portable version: Uses a small base that can be stored when it is not needed.
Before choosing dimensions, review the most common dish rack dimensions. That gives you a practical starting point without forcing your kitchen into a standard size.
What Materials Do You Need?
You need a base, several dowels, non-slip feet, sandpaper, and a moisture-resistant finish. A drill, matching bit, measuring tape, pencil, square, and clamps complete the basic tool list.
For a medium organizer, start with the following materials:
- One 16-by-12-inch hardwood or bamboo board, about 3/4 inch thick
- Twelve to sixteen hardwood dowels, each 3/8 inch in diameter
- Four silicone or rubber feet
- 120-grit and 220-grit sandpaper
- A water-resistant finish suitable for the intended use
- A washable silicone mat or rimmed draining tray
- Optional waterproof wood glue for permanent pegs
Choose straight, smooth dowels without splits. Rough or warped pegs can scratch dishes and make spacing inconsistent.
Which Material Works Best for the Base?
Hardwood and bamboo provide the best balance of strength, appearance, and workability. Plastic lumber handles water well but can require different cutting tools.
| Material | Water Resistance | Ease of Building | Best Use | Main Caution |
|---|---|---|---|---|
| Maple or beech | Good when sealed | Easy | Premium countertop rack | Needs regular drying |
| Bamboo board | Good when sealed | Moderate | Lightweight organizer | Can splinter while drilling |
| Exterior plywood | Fair when edges are sealed | Easy | Budget prototype | Exposed edges absorb water |
| Plastic lumber | Excellent | Moderate | Wet countertop use | Heavy and harder to finish neatly |
Avoid medium-density fiberboard and particleboard near wet dishes. Their cut edges can swell after repeated moisture exposure.
If corrosion is your main concern, compare these rust-free dish rack materials. That guide also helps when you want to add metal fasteners or a draining tray.
How Do You Measure and Plan the Organizer?
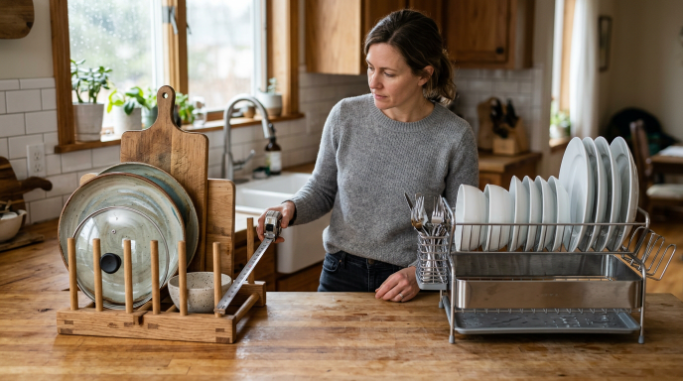
Measure the usable area before cutting anything. Leave room for cabinet hinges, wall trim, faucet movement, and the edge of the sink.
- Measure the footprint. Record the maximum width and depth available.
- Check vertical clearance. Measure your tallest plate, board, or pan lid.
- Arrange the dishes. Place the items on paper in the order you want to store them.
- Trace the base. Draw a rectangle that fits around the arrangement.
- Mark peg pairs. Place one peg on each side of every planned slot.
- Check hand access. Leave enough room to lift each item without hitting another.
I prefer to test the layout on cardboard first. Cardboard reveals cramped slots before any wood gets drilled.
How Far Apart Should the Dowels Be?
There is no universal spacing because dishes vary in thickness and shape. Use the actual items as templates and add a little clearance for easy removal.
- Dinner plates: Start around 1 1/2 to 2 inches between slot boundaries.
- Pan lids: Allow roughly 2 to 3 inches, depending on handles.
- Cutting boards: Use about 1 to 2 inches for slim boards.
- Bowls: Plan wider sections rather than narrow individual slots.
- Baking sheets: Use tall pegs and enough clearance for raised rims.
These figures are planning ranges, not rules. Thick stoneware and handled lids usually need extra space.
You can also use this dish rack sizing guide to compare the organizer’s footprint with your daily dish load.
How Do You Build a Wooden Peg Dish Organizer?
Build the organizer by drilling a measured grid of shallow holes into a smooth base. Removable dowels then form adjustable supports for different dishes.
1. Cut and Smooth the Base
Cut the board to your planned dimensions, or ask the lumber store to make a square cut. Slightly round the corners to remove sharp points.
Sand the entire board with 120-grit paper. Follow with 220-grit paper until the edges and faces feel smooth.
2. Mark a Flexible Grid
Draw faint parallel lines along the length of the board. Mark matching hole locations on both sides of each intended dish slot.
A 2-inch grid creates useful flexibility for many kitchens. Keep the outside holes at least 3/4 inch from the board’s edges.
- Use a carpenter’s square to keep rows aligned.
- Mark every hole with a small center point.
- Set dishes over the marks before drilling.
- Remove marks that do not serve a clear purpose.
3. Drill Straight, Consistent Holes
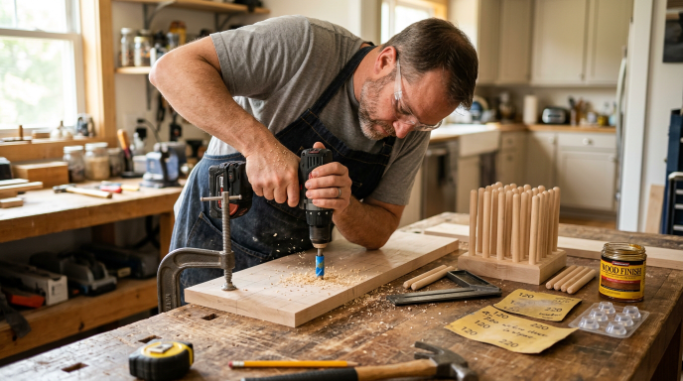
Clamp the board to a stable work surface. Fit a drill bit that matches the dowel diameter closely.
Wrap painter’s tape around the bit as a depth marker. For a 3/4-inch base, a hole around 1/2 inch deep leaves material underneath.
- Wear eye protection.
- Keep fingers away from the bit.
- Drill slowly to reduce tear-out.
- Test one hole in scrap wood first.
- Use a drill guide when straight holes are difficult by hand.
The Consumer Product Safety Commission’s safety resources provide broader guidance for using household products and tools safely.
4. Cut and Fit the Dowels
Cut plate-support dowels to about 5 or 6 inches. Taller cookware may need longer supports and a wider base.
Sand both ends of every dowel. Round the exposed top edges so they cannot scratch hands or dishes.
Press each peg into a hole and check for wobble. Keep them removable if you expect your storage needs to change.
5. Seal the Wood
Remove all sanding dust before applying the finish. Follow the manufacturer’s directions for ventilation, coats, drying, and full curing time.
Seal the holes, dowels, cut edges, and underside. Water often enters through overlooked end grain and drilled openings.
Finish tip: “Dry to the touch” does not always mean fully cured. Keep dishes off the organizer until the finish reaches the complete cure time stated on its label.
6. Add Feet and a Drainage Surface
Attach one non-slip foot near each corner. The small air gap helps the base and counter dry after use.
Place the finished organizer on a rimmed tray or washable drying mat. Never rely on a flat wooden board to manage dripping water alone.
How Can You Make the Organizer Drain Properly?
A countertop organizer needs airflow underneath and a removable surface that catches water. Without both, moisture can remain trapped against the wood or counter.
- Use a sloped tray: Direct its open edge toward the sink when the design allows.
- Add raised feet: Create space for air to move below the organizer.
- Limit solid contact: Keep dishes between pegs instead of resting broad wet surfaces on wood.
- Empty pooled water: Do not leave water standing in a tray overnight.
- Rotate drying mats: Wash one while the other remains in use.
Wet wood should not stay trapped beneath stacked dishes. The EPA’s mold information explains why controlling moisture remains central to preventing indoor mold growth.
If you lack room for a permanent draining station, learn how to dry dishes without a dish rack. A temporary method may suit a small kitchen better.
How Do You Adapt the Design for Cabinets or Drawers?
A dry-storage organizer does not need a draining tray, but it still needs stable spacing. Shorter pegs and a lower base often work better inside cabinets.
For a Cabinet
- Use 4-to-6-inch pegs for plates, lids, and cutting boards.
- Keep tall plates below the shelf above.
- Add non-slip feet to prevent sliding.
- Position heavy items near the cabinet’s side walls.
- Leave room for handles and knobs.
For a Deep Drawer
- Use short pegs that remain below the closed drawer.
- Arrange plates in small, stable stacks.
- Place pegs around the stacks to limit sideways movement.
- Keep heavy dishes within the drawer manufacturer’s load limit.
- Check that no peg can strike the counter above.
As of 2026, adjustable peg systems remain popular because they accept changing dish collections. A flexible grid also makes future repairs simpler.
What Common Building Mistakes Should You Avoid?
The most common mistakes involve trapped water, weak materials, and cramped spacing. Most are easy to prevent during the cardboard planning stage.
- Using untreated fiberboard: It can swell when moisture reaches the edges.
- Skipping a drain tray: Standing water can damage both the organizer and counter.
- Drilling through the base: Open holes can hold moisture and create rough contact points.
- Making narrow slots: Tight storage can chip dishes or make them hard to lift.
- Using rough dowels: Splinters may scratch plates and hands.
- Gluing every peg immediately: Permanent placement removes the design’s main advantage.
- Loading it unevenly: Tall, heavy items can tip a base that is too narrow.
- Ignoring cure time: A partly cured finish may remain soft or develop marks.
Test the finished rack with dry dishes first. Push each item gently from several directions and widen any unstable slot.
How Should You Clean a Homemade Dish Organizer?
Remove the dishes and pegs before cleaning. Wipe the board with a damp cloth and a mild cleaner compatible with its finish.
- Empty and rinse the drainage tray.
- Wash removable silicone mats according to their care labels.
- Wipe each peg, including its lower end.
- Clean the drilled holes with a small, soft brush.
- Dry every component separately before reassembly.
- Inspect the finish for cracks, peeling, or exposed wood.
Avoid soaking a wooden base or placing it in a dishwasher. Heat, prolonged water exposure, and detergent can damage wood and its finish.
For cleaning-product options, the EPA Safer Choice product search lists products that meet the program’s ingredient and performance requirements.
When Is a Store-Bought Organizer the Better Choice?
Buy a finished rack when you need integrated drainage, collapsible storage, or tested weight capacity. Commercial racks also save time if you lack suitable tools.
A homemade rack works best when standard sizes waste space. It is also useful when you need unusual slots for cutting boards, pan lids, or handmade pottery.
| Priority | Homemade Organizer | Store-Bought Rack |
|---|---|---|
| Exact fit | Excellent | Depends on available sizes |
| Fast setup | Requires building and curing | Usually ready quickly |
| Adjustability | High with removable pegs | Varies by model |
| Drainage | Must be designed separately | Often integrated |
Dish Organizer Products Worth Considering
If building is not practical, these are the types of organizers I would compare first. Confirm current dimensions and materials before ordering.
🏆 Best Adjustable Design
Umbra Peggy Drawer Organizer
★★★★☆ 4.7/5
Its movable pegs create custom sections for plates, bowls, and containers. I like this format when drawer contents change frequently.
💧 Best for Wet Dishes
OXO Good Grips Aluminum Dish Rack
★★★★☆ 4.6/5
This rack combines separated supports with a purpose-built draining system. I would choose it over wood for a consistently busy washing area.
🌿 Best Bamboo Option
IKEA OSTBIT Plate Holder
★★★★☆ 4.5/5
The simple bamboo frame holds plates, lids, or small boards vertically. I like it as a compact reference design or an inexpensive cabinet organizer.
Frequently Asked Questions
Can I make a dish organizer without power tools?
Yes. Use an unfinished wooden plate rack, removable shelf dividers, or a slotted crate instead of drilling a pegboard. Sand rough surfaces, stabilize the base, and add a washable draining mat if wet dishes will touch the organizer.
Can I use plywood for a homemade dish rack?
Exterior-grade plywood can work for a prototype if every face, edge, and hole is sealed. Solid hardwood or bamboo usually gives a neater result. Avoid particleboard and medium-density fiberboard because exposed edges handle repeated moisture poorly.
Should the dowels be glued into the base?
Leave the dowels removable when you want an adjustable layout. Glue them only after testing every slot with your real dishes. If you use glue, choose one suitable for moisture exposure and follow its complete curing instructions.
How do I prevent a wooden organizer from getting moldy?
Use a sound moisture-resistant finish, raised feet, and a removable drainage surface. Empty standing water promptly and let every component dry separately. Replace the organizer if the wood develops persistent odor, soft areas, deep cracks, or growth that cleaning cannot remove.
Can a homemade organizer hold heavy pans?
It can hold some pans when the base is wide, the pegs fit tightly, and the load stays balanced. Test with one dry pan at a time. For heavy cast iron, use a purpose-built metal rack with a stated load capacity.
Build Around the Dishes You Actually Use
The best homemade organizer is not the one with the most pegs. It is the one that holds your daily dishes securely while allowing water and air to escape.
Start with a cardboard layout, build a sealed base, and keep the first set of pegs removable. After one week of use, adjust any awkward slots and keep only the positions that improve your routine.