
Manual Vegetable Chopper Cleaning: Easy Step-by-Step Guide

Quick Answer
To clean a manual vegetable chopper, disassemble its removable parts, rinse away food scraps, and wash the bowl and blades with warm, soapy water. Use a soft brush around sharp edges, rinse thoroughly, and let everything dry completely before storage. Keep pull-cord mechanisms out of water unless the manufacturer specifically permits immersion. A clean dish drying rack can help removable parts air-dry safely.
Quick Cleaning Steps
- Disassemble safely: Remove the lid, blade assembly, and detachable accessories.
- Remove food: Empty the container and rinse loose vegetable pieces away.
- Wash removable parts: Use warm water, mild dish soap, and a nonabrasive sponge.
- Brush the blades: Clean around cutting edges without running fingers across them.
- Clean the lid: Wipe moisture-sensitive pull-cord lids instead of submerging them.
- Dry completely: Allow all washable components to dry before reassembly.
Important Safety Reminder
- Check the manual: Dishwasher compatibility and lid-cleaning instructions vary by model.
Manual vegetable choppers save chopping time, but cleaning their sharp blades and narrow corners can feel surprisingly frustrating. Bits of onion, garlic, and herbs often hide where a regular sponge cannot reach.
I prefer a simple cleaning routine that addresses those hidden areas without risking damaged blades or a wet pull-cord mechanism. This guide explains how to handle different chopper designs, remove stubborn residue, and prevent unpleasant odors.
What Is a Manual Vegetable Chopper?
A manual vegetable chopper is a hand-operated kitchen tool that cuts vegetables using blades, a pressing mechanism, or a pull-cord system. Unlike an electric food processor, it does not need electricity to operate.
Most models contain several removable or connected parts that need different cleaning methods.
- Chopping container: Holds ingredients and collects chopped food.
- Blade assembly: Contains the sharp cutting edges.
- Lid: Covers the container and may contain a drive mechanism.
- Pull cord or handle: Operates the blades on certain models.
- Chopping grid: Creates uniform cubes on push-style choppers.
- Non-slip base: Helps keep the container stable during use.
Understanding which parts separate is essential. A removable bowl may tolerate thorough washing, while an enclosed mechanical lid may require only careful wiping.
How Do You Clean a Manual Vegetable Chopper Step by Step?
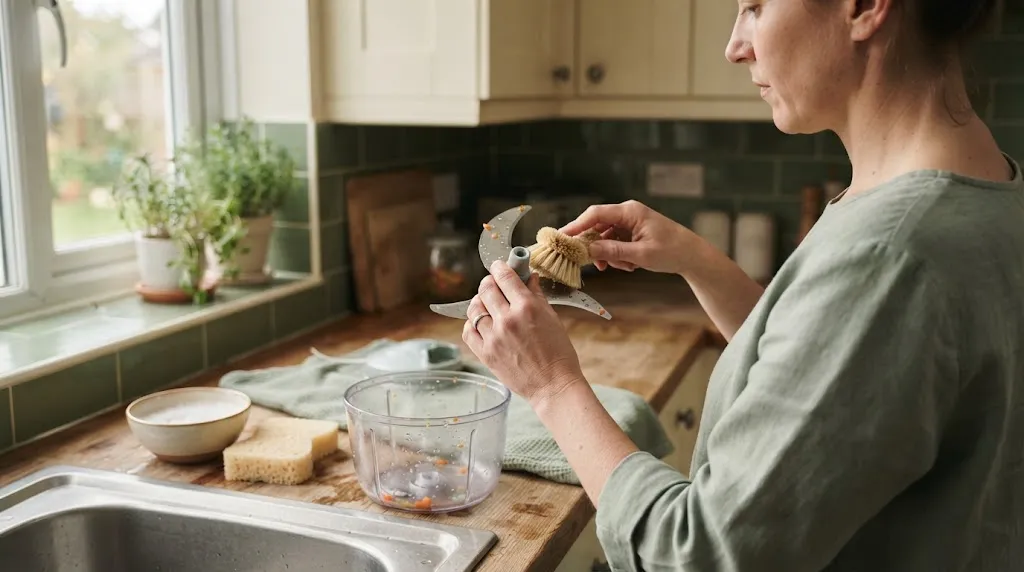
The safest general method is to separate the approved removable components, wash food-contact surfaces thoroughly, and dry them individually. Never force apart a component that the manufacturer designed to remain assembled.
Step 1: Disassemble the Chopper Carefully
Place the chopper on a stable countertop before opening it. Remove the lid, then lift the blade assembly using its designated plastic hub or handle.
Avoid gripping metal cutting edges. If your chopper has a removable cutting grid, release it according to the manufacturer’s instructions.
- Keep loose blades away from children and pets.
- Do not leave exposed blades hidden in a sink of water.
- Place sharp components on a clear, stable surface.
- Inspect locking tabs before applying pressure.
Step 2: Remove Leftover Vegetable Pieces
Empty remaining food scraps directly into the compost or trash. Rinse washable components under running water to loosen residue.
Onions, peppers, and leafy vegetables can stick around blade supports. Use a soft cleaning brush to remove pieces without touching the cutting edges.
Rinsing promptly matters. Dried food becomes harder to remove from tight corners.
Step 3: Wash the Bowl With Warm, Soapy Water
Fill the removable bowl with warm water and a small amount of mild dish soap. Use a soft sponge to clean the bottom, inside walls, rim, and exterior.
Pay attention to grooves where the lid connects. These areas can collect vegetable juice even when the bowl looks clean.
- Use a nonabrasive sponge on plastic containers.
- Clean the rim and locking grooves thoroughly.
- Remove detachable rubber bases when permitted.
- Rinse until no soap or visible residue remains.
Avoid abrasive pads that leave deep scratches. Scratched plastic can become harder to clean over time.
Step 4: Clean the Blade Assembly Safely
Use a small dish brush to clean removable blades while holding their central plastic hub. Move the brush away from sharp cutting edges whenever possible.
Do not slide a sponge or cloth along an exposed blade. The metal can cut through soft cleaning materials and injure your fingers.
For stubborn food, soak the detached blade assembly briefly in warm, soapy water if the manufacturer allows it. Brush away the softened residue and rinse thoroughly.
Blade Cleaning Tip
A small, soft-bristled cleaning brush offers better control than a large sponge. Use a blade guard or protective cover when storing the clean assembly.
Step 5: Clean the Lid and Operating Mechanism
The lid needs special attention because some manual choppers contain gears, springs, and retractable pull cords. Water trapped inside these mechanisms can interfere with operation or create persistent moisture.
For lids that cannot be submerged, wipe food-contact areas with a lightly damp, soapy cloth. Remove soap with a separate clean, damp cloth and follow the manufacturer’s instructions for drying.
- Pull-cord lid: Wipe the exterior and accessible food-contact surfaces.
- Gear housing: Avoid flooding internal openings.
- Removable push lid: Wash according to its specific care instructions.
- Handle joints: Clean accessible grooves with a soft brush.
For example, Zyliss specifies that its Easy Pull Processor lid should only be wiped clean. Its bowl and blade unit are dishwasher safe.
Step 6: Rinse and Dry Every Part
Rinse washable components under clean running water. Check the blade hub and container corners for remaining soap or food particles.
Place the components separately on a clean draining surface. Keep sharp blades secure and positioned where nobody can accidentally reach them.
Do not immediately seal a damp chopper for storage. Moisture can remain trapped between the lid, blade hub, and bowl.
Step 7: Reassemble and Store
Once every component is dry, reinstall the blade assembly using its designated hub. Attach the lid securely without forcing the locking mechanism.
Store the chopper in a clean, dry cupboard. Keep exposed blades protected and away from loose utensils.
Can You Put a Manual Vegetable Chopper in the Dishwasher?
Some manual vegetable choppers are dishwasher safe, but that does not mean every component can go inside. Always check the manufacturer’s instructions for each individual part.
For instance, certain Zyliss choppers permit dishwasher cleaning of the bowl and blade assembly but not the mechanical lid. Some OXO push-style models have removable components designed for top-rack dishwasher cleaning.
| Component | Preferred Cleaning | Dishwasher Guidance |
|---|---|---|
| Plastic bowl | Warm, soapy water | Only if labeled safe |
| Removable blades | Soft brush and careful rinsing | Model-dependent |
| Pull-cord lid | Damp-cloth cleaning | Usually avoid unless approved |
| Chopping grid | Brush between openings | Model-dependent |
| Rubber base | Damp cloth or hand washing | Check care instructions |
Hand washing gives you more control over delicate cutting edges and small moving parts. It also makes inspecting hard-to-reach surfaces easier.
How Do You Remove Stuck Food From Chopper Blades?
Remove stuck vegetable pieces with warm water, a soft brush, and careful access to the blade assembly. Never use bare fingers to pull food from sharp cutting edges.
Different ingredients create different cleaning problems. Garlic becomes sticky, carrots can wedge into grids, and leafy herbs may wrap around the central shaft.
- Onion: Rinse promptly and brush around the blade hub.
- Garlic: Soften sticky residue with warm, soapy water before brushing.
- Carrot: Use the supplied grid-cleaning tool if one is included.
- Herbs: Brush fibers away from the central shaft.
- Tomato: Rinse pulp from container seams and blade supports.
Do not poke around the blades with metal knives or screwdrivers. Improvised tools can damage the assembly or slip unexpectedly.
If you regularly prepare garlic, our guide on garlic press waste explains why sticky leftovers can become a problem with small cutting tools.
How Can You Remove Onion and Garlic Smells?
Start by removing every trace of food, washing with dish soap, and drying the chopper thoroughly. Persistent odors often remain around plastic surfaces, blade supports, and lid grooves.
A second gentle wash is usually a better first response than aggressive cleaning chemicals. Avoid fragrance-heavy solutions that could leave unwanted smells on food-contact surfaces.
For Mild Vegetable Odors
- Disassemble the approved removable parts.
- Wash them thoroughly with warm, soapy water.
- Use a soft brush around small grooves.
- Rinse with clean water.
- Allow complete drying in a ventilated location.
For Persistent Odors
Check whether food remains trapped beneath a removable seal or inside the blade hub. Clean accessible parts according to the manual.
If the manufacturer permits it, a mild baking-soda-and-water paste may help with odors on suitable plastic surfaces. Test a small area first, rinse completely, and avoid applying paste inside mechanical housings.
Important Distinction
Odor removal is not the same as sanitizing. Baking soda and ordinary vinegar should not be treated as substitutes for a food-contact sanitizer when sanitizing is necessary.
How Do You Sanitize a Manual Vegetable Chopper?
Clean the chopper before attempting to sanitize its food-contact surfaces. Sanitizing works best after visible food and grease have been removed.
The USDA recommends using sanitizers suitable for surfaces that touch food. Follow the sanitizer label, the chopper manufacturer’s material restrictions, and any rinsing requirements.
- Wash removable food-contact parts with soap and water.
- Rinse away detergent and food debris.
- Use an approved food-contact sanitizer only where the material permits.
- Follow the product’s stated contact time and dilution.
- Rinse afterward if directed and allow proper drying.
Never mix bleach with vinegar, ammonia, or other cleaning chemicals. Avoid exposing metal blades and sensitive lid mechanisms to chemicals that their manufacturers prohibit.
The USDA food safety guidance explains why cleaning should come before sanitizing.
What Cleaning Mistakes Should You Avoid?
The biggest mistakes involve sharp blades, trapped moisture, and cleaning methods that ignore the chopper’s design. Avoiding these problems can make routine maintenance simpler.
- Submerging mechanical lids: Water can enter components not intended for washing.
- Touching exposed blades: Sharp edges can cause cuts during cleaning.
- Using steel wool: Abrasive materials may scratch plastic and damage finishes.
- Skipping small grooves: Vegetable residue may remain near seals and supports.
- Storing damp parts: Trapped moisture can encourage unwanted odors and microbial growth.
- Assuming dishwasher safety: Parts from the same chopper may have different requirements.
- Forcing removable pieces: Incorrect disassembly can break clips and locking tabs.
I find the most useful cleaning rule is to inspect the blade hub and bowl rim before putting the chopper away. Those two areas are easy to overlook.
How Often Should You Clean a Manual Vegetable Chopper?
Wash the food-contact parts after every use. You should also clean the chopper before switching between foods when residue could cause cross-contamination.
The FDA’s safe food handling guidance recommends washing utensils and other food-contact surfaces after preparing food items.
| When | Cleaning Task |
|---|---|
| After every use | Wash bowl, blades, and relevant food-contact parts |
| Between food types | Clean before preparing another food when cross-contamination is possible |
| Before storage | Inspect and dry all components |
| Periodically | Inspect seals, blade condition, locking tabs, and accessible grooves |
A quick rinse alone is not enough after chopping vegetables. Soap and proper brushing help remove residue that water may leave behind.
How Can You Keep Your Vegetable Chopper Clean Longer?
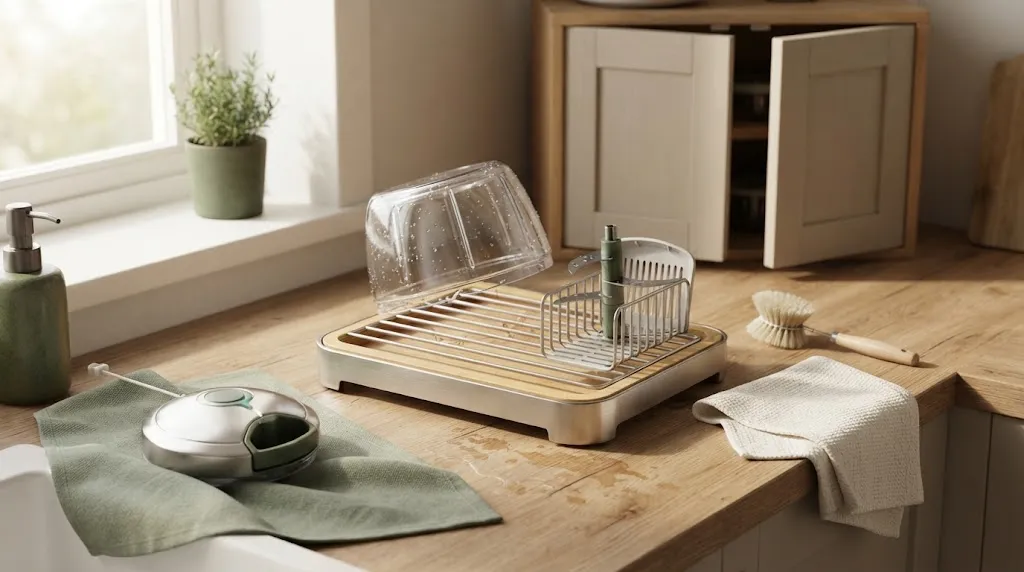
Regular maintenance starts with quick cleaning and careful storage. You do not need a complicated routine or expensive supplies.
- Clean promptly: Wash removable components before food dries onto them.
- Use soft brushes: Reach tight spaces without abrasive scrubbing.
- Inspect blade hubs: Look for fibers or trapped vegetable pieces.
- Keep lids dry: Protect non-washable operating mechanisms.
- Store safely: Cover sharp blades and prevent moisture buildup.
- Replace damaged components: Follow manufacturer guidance for cracked bowls, bent blades, or failing locks.
A well-ventilated drying area also helps. If you use a countertop rack, the guide on keeping drying areas clean
Which Manual Vegetable Choppers Are Easier to Clean?
A chopper with removable blades, accessible corners, and clear washing instructions is generally easier to maintain. The best choice depends on whether you prefer pull-cord chopping or a push-down cutting grid.
Here are two real models worth comparing for their cleaning designs. These are feature-based suggestions, not claims of personal hands-on testing.
Best for Pull-Cord Chopping
Zyliss Easy Pull Food Processor
★★★★☆
The 800 ml bowl and removable blade unit are dishwasher safe according to Zyliss. The lid requires wipe-only cleaning, so it suits buyers comfortable maintaining a separate mechanical component. The stars indicate an editorial cleaning-convenience assessment, not a customer rating.
Best for Grid-Style Chopping
OXO Good Grips Vegetable Chopper With Easy-Pour Opening
★★★★☆
This push-down chopper has a removable cutting grid and separable components for cleaning. Its published instructions identify the pieces as top-rack dishwasher safe. The stars represent an editorial cleaning-convenience assessment, not verified customer reviews.
Frequently Asked Questions
1. Can I wash a vegetable chopper with regular dish soap?
Yes. Mild dish soap and warm water are suitable for cleaning many removable vegetable chopper components. Use a soft brush for hard-to-reach areas, rinse thoroughly, and follow any material-specific instructions provided by the manufacturer.
2. How do I clean the blades without cutting myself?
Hold the blade assembly by its designated plastic hub or handle. Use a soft dish brush to clean around cutting edges while keeping your fingers clear. Never leave exposed blades loose in cloudy dishwater.
3. Can water damage a pull-cord vegetable chopper?
Yes, water may damage or become trapped inside a pull-cord lid that is not designed for immersion. Some manufacturers specifically require wipe-only cleaning. Always check your model’s instructions before rinsing or submerging its lid.
4. Why does my vegetable chopper smell after washing?
Odors can remain when onion, garlic, or other food residue gets trapped in grooves or blade supports. Disassemble approved components, clean thoroughly with soapy water, inspect hidden areas, and dry completely. Persistent odors alongside visible damage may warrant replacing a component.
5. Can I clean a manual vegetable chopper in the dishwasher?
Only if the manufacturer identifies the relevant parts as dishwasher safe. Some bowls and blade units can go on the top rack, while pull-cord lids require wiping. Never assume that every component follows the same cleaning instructions.
Final Takeaway
Manual vegetable chopper cleaning becomes easier when you wash removable parts promptly, handle blades with care, and protect moisture-sensitive mechanisms. The most important habits are removing trapped food, using gentle cleaning tools, and allowing complete drying.
Check your model’s care instructions before using a dishwasher or sanitizer. A consistent routine helps keep your chopper ready for the next meal without unnecessary cleaning complications.
