How to Properly Use a Dish Rack: Simple Step-by-Step Guide

Quick Answer
To properly use a dish rack, place it beside the sink with its drainboard or spout pointing toward the basin. Load plates upright, angle bowls so water escapes, turn cups upside down, separate utensils, and leave enough space for air to move around everything. Clean dishes and kitchen surfaces also matter for basic kitchen food safety.
Quick steps
- Clean the rack: Start with a clean rack, tray, and utensil holder.
- Position drainage: Aim the drainboard or spout toward the sink.
- Load plates first: Stand plates upright instead of stacking them flat.
- Angle bowls: Keep their openings downward so water can escape.
- Invert cups: Place cups and glasses upside down without trapping water.
- Allow airflow: Avoid packing dishes tightly together.
A dish rack looks simple, but small loading mistakes can leave dishes wet and counters covered in water. I’ve found that good drainage and a little breathing room make the biggest difference.
This guide shows exactly how to arrange dishes, utensils, glasses, and cookware. I’ll also explain where to place your rack and how to keep it clean.
What Is the Proper Way to Use a Dish Rack?
The proper way to use a dish rack is to arrange clean dishes so water drains freely and air can circulate. Nothing should sit in a puddle or trap water against another item.
A dish rack is a raised holder designed to support washed dishes while excess water drains and the surfaces dry. Most racks include slots, a utensil cup, and either a drainboard or drainage tray.
Here’s the routine I recommend for everyday use:
- Wash the rack if needed. Remove crumbs, grease, standing water, or visible residue before loading clean dishes.
- Position it beside the sink. Point the drainboard or spout toward the basin.
- Shake off extra rinse water. You don’t need to dry each dish, but removing large droplets reduces pooling.
- Load plates first. Put them vertically into the rack’s slots.
- Add bowls at an angle. Keep their interiors facing down enough for water to escape.
- Turn mugs and glasses upside down. Use raised tines or a section that prevents their rims from sitting in water.
- Separate utensils. Avoid packing spoons and forks into one tight bundle.
- Leave space around large pieces. Pots, cutting boards, and mixing bowls need room to drain.
- Let everything dry completely. Put items away once visible moisture is gone.
My biggest rule is simple: never treat the rack like a storage basket. Its job is drying, so airflow matters more than fitting in one more bowl.
Where Should You Place a Dish Rack?
Place your dish rack close to the sink on a stable, water-resistant surface. Any drainage channel or spout should send water back into the sink instead of onto the counter.
I also keep the rack far enough from food preparation areas that splashes from dirty dishes don’t reach ready-to-eat food.
- Beside the sink: Best for countertop racks with drainboards.
- Inside the sink: Useful when the rack is specifically designed for in-sink use.
- Across the sink: Roll-up racks and certain expandable models can drain directly into the basin.
- On a drying mat: Helpful for racks without a built-in drainage tray.
Avoid placing a standard countertop rack where dripping water can reach unfinished wood, electrical outlets, or appliances.
How Should Plates, Bowls, Cups, and Utensils Be Arranged?
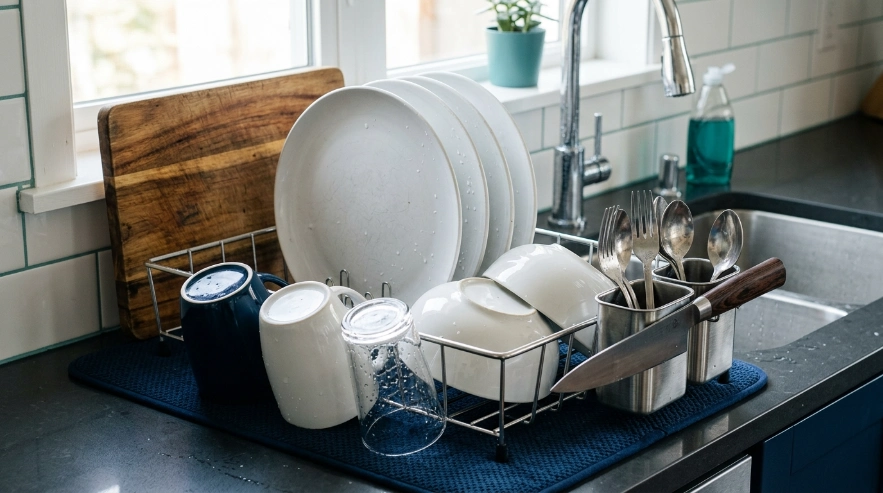
Arrange each item according to where water naturally collects. Openings and hollow areas generally need to face downward or sit at an angle.
This is the loading pattern I use most often:
| Item | Best Position | Why It Works | Common Mistake |
|---|---|---|---|
| Dinner plates | Vertical in plate slots | Both sides stay exposed to air | Stacking plates together |
| Bowls | Open side downward at a slight angle | Water escapes instead of pooling | Nesting wet bowls |
| Cups and mugs | Upside down on raised supports | Interior water drains away | Leaving them upright |
| Forks and spoons | Loosely separated in utensil sections | Reduces nesting and trapped water | Packing them into one bundle |
| Sharp knives | Separate with handles easy to grab | Reduces accidental contact with blades | Leaving sharp points exposed |
| Cutting boards | Upright with both faces exposed | Allows moisture to leave both sides | Laying one flat beneath dishes |
For knives, safety comes first. I prefer drying sharp chef’s knives separately when the utensil basket doesn’t secure them well.
Should Dishes Be Towel-Dried or Air-Dried?
Air-drying on a clean dish rack is the simplest low-contact option after washing. It avoids rubbing clean dish surfaces with a towel that may already have been used elsewhere.
FoodSafety.gov advises washing dishes, utensils, cutting boards, and countertops with hot, soapy water after use. You can review its broader cleaning and food-safety guidance.
The FDA Food Code is written for retail and food-service settings rather than ordinary homes. Still, its emphasis on controlled cleaning and sanitary handling is useful context.
If you do towel-dry something, use a clean, dry towel. Don’t grab the damp hand towel that has been hanging beside the sink all day.
How Do You Keep a Dish Rack Clean and Sanitary?
Keep the rack dry between loads and clean it before residue builds up. Drain trays deserve special attention because water, soap residue, and debris tend to collect there.
My routine is simple enough that it doesn’t become another kitchen chore.
- After each load: Empty standing water and remove food particles.
- When visibly dirty: Wash the rack and tray with warm water and dish soap.
- For daily users: Give removable parts a more thorough regular cleaning.
- After cleaning: Rinse well and let the rack itself dry.
- Check corners: Inspect utensil cups, feet, joints, and drain channels where residue can hide.
The CDC’s food-safety guidance also stresses keeping kitchen surfaces clean and preventing cross-contamination.
If the rack develops an odor, slippery film, visible mold, or heavy mineral buildup, clean it immediately. Don’t keep loading freshly washed dishes onto a dirty surface.
What Dish Rack Mistakes Should You Avoid?
The most common mistakes are overcrowding, poor drainage, and leaving water trapped under dishes. These problems defeat the reason you’re using a drying rack.
- Stacking wet plates: Water stays trapped between their surfaces.
- Nesting bowls: The inside of the lower bowl may remain wet.
- Overfilling the rack: Dishes touch each other and block airflow.
- Ignoring the drainboard: A backward spout can send water onto your counter.
- Leaving mugs upright: Water collects in the bottom.
- Putting sharp knives point-up: Exposed blades create an unnecessary injury risk.
- Leaving standing water: Empty trays instead of allowing old water to remain.
- Using the rack for dirty dishes: Keep the drying rack for clean items whenever possible.
I also avoid leaning a heavy cutting board against delicate glasses. A rack should keep items secure, not create a balancing act.
Which Type of Dish Rack Is Easiest to Use?
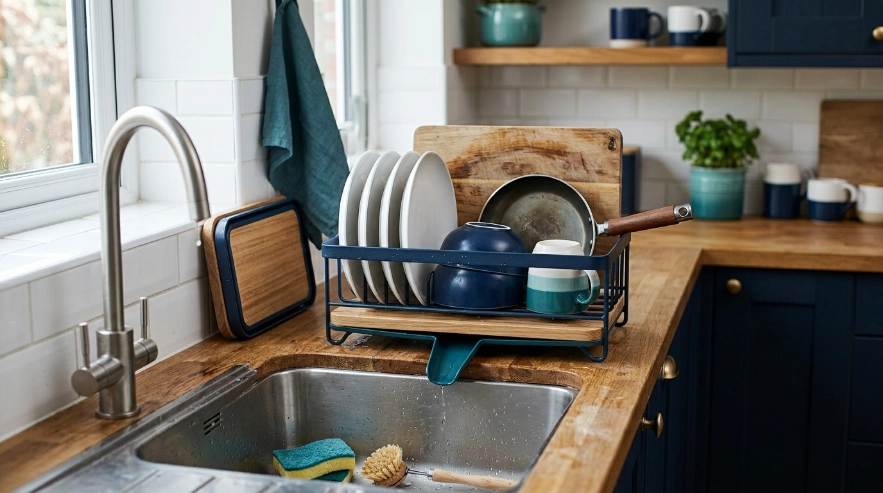
A countertop rack with direct drainage is easiest for most kitchens. Smaller spaces may work better with a fold-flat or over-the-sink design.
As of 2026, I would choose by sink layout and dish volume before worrying about appearance.
| Rack Type | Best For | Drainage | Main Tradeoff |
|---|---|---|---|
| Countertop with spout | Daily family use | Directs water toward sink | Uses counter space |
| Fold-flat rack | Small kitchens | Usually uses a draining base | Less room for bulky cookware |
| Over-the-sink rack | Limited counter space | Water falls into sink | Uses part of the sink |
| Two-tier rack | High dish volume | Varies by tray design | Taller and harder to clean |
A well-designed rack should remain stable when loaded. It should also make the drain tray easy to remove and clean.
If you’re ready to choose one, these are the three designs I’d consider first:
🏆 Best Overall
simplehuman Steel Frame Dishrack
★★★★★
This rack uses a swivel drainage spout, silicone-capped plate supports, a removable wine-glass holder, and a large steel frame. I like it for kitchens where the dish rack stays on the counter every day and drainage matters more than compact storage.
🍳 Best for Capacity
KitchenAid Full-Size Dish Rack
★★★★☆
A commonly listed version measures about 20 × 14.96 × 7 inches and uses a rust-resistant stainless-steel frame with a self-draining board. I’d choose this style when plates, bowls, pans, and cutting boards regularly need to dry together.
🏠 Best for Small Kitchens
OXO Good Grips Aluminum Fold Flat Dish Rack
★★★★☆
OXO lists this rack at about 16.4 × 14.6 inches, with a rustproof aluminum frame, two-level design, raised drainage ridges, and removable utensil cup. I like that it can fold down when counter space matters more than maximum capacity.
Frequently Asked Questions
Do plates face a certain way in a dish rack?
Yes. Plates should normally stand vertically in the rack’s slots with small gaps between them. This position exposes both sides to air and lets rinse water move downward instead of becoming trapped between stacked plates.
Should cups be placed upside down in a dish rack?
Yes. Cups, mugs, and glasses should generally be placed with their openings downward so water drains out. Keep them on raised supports or angled surfaces when possible, because a rim sitting flat on a wet tray can trap moisture inside.
Can pots and pans go in a dish rack?
Yes, if the rack is strong and large enough to support them safely. Place heavier cookware where it cannot tip onto glasses or plates, and angle each piece so water leaves the interior rather than collecting in the bottom.
How often should I clean my dish rack?
There isn’t one schedule that fits every kitchen. Empty standing water after use and clean the rack whenever you notice residue. If you use it every day, inspect and wash the tray, utensil holder, corners, and drainage areas regularly.
Why are my dishes still wet after sitting in the rack?
The rack may be overcrowded, bowls may be nesting, or cups may be trapping water. Separate touching dishes, turn hollow items downward, clear the drain path, and give large pieces more room so air reaches their wet surfaces.
Final Takeaway
Using a dish rack properly comes down to drainage, spacing, stability, and cleanliness. Point the drainage system toward the sink, keep dishes separated, and arrange every item so trapped water has somewhere to go.
Once I started loading plates upright, angling bowls, and resisting the urge to cram in one last pan, my sink area became much easier to manage. Use the same approach, and your dish rack can do its job with less mess and fewer damp dishes.
For broader kitchen hygiene guidance, the U.S. Food and Drug Administration food section is a useful reference for safe food handling and cleaning practices.