
How Does a Push-Down Vegetable Chopper Work?

Quick Answer
A push-down vegetable chopper works by forcing prepared vegetables through a fixed grid of sharp blades when you press its lid or pusher downward. The blades divide the food into smaller, similarly shaped pieces that fall into a collection container underneath. It works best when the vegetables fit the cutting grid and are not too hard or oversized for the particular model.
A push-down vegetable chopper is a manual kitchen tool that uses downward pressure rather than electricity to cut food. It is commonly used to dice onions, cucumbers, peppers, potatoes, and other vegetables for salads, soups, sauces, and everyday cooking.
The mechanism is straightforward: a sharp cutting grid stays in place while a lid-mounted pusher presses the vegetable through it. Understanding how these parts work together helps you prepare ingredients correctly, get more consistent cuts, and avoid forcing food through a blade that cannot handle it.
What Parts Make a Push-Down Vegetable Chopper Work?
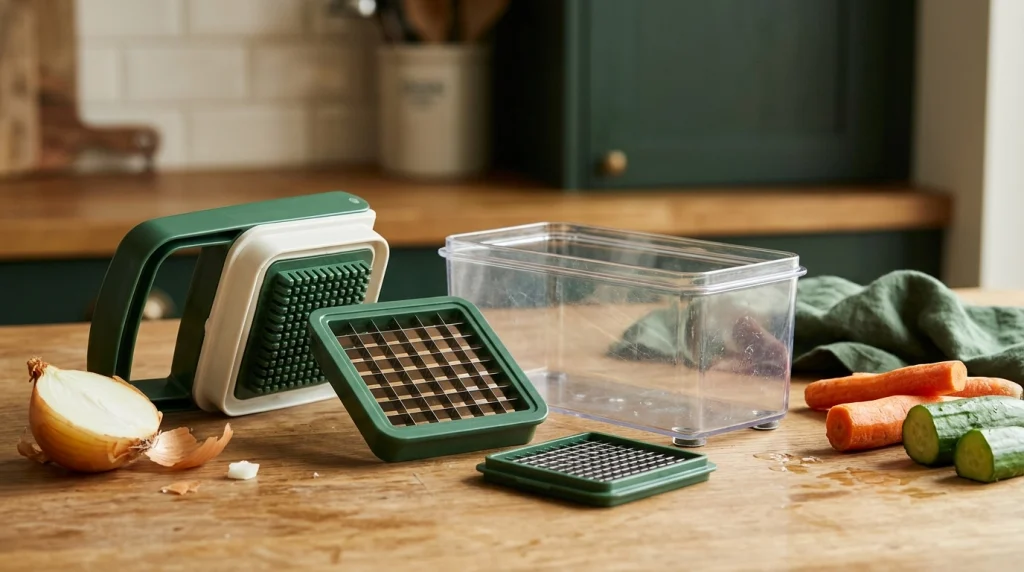
Most push-down choppers have four main components, although the design and attachment system vary by model.
- Cutting grid: A frame containing intersecting, sharp blades that divide food into pieces as it passes through.
- Pressing lid or pusher: The hinged or movable top that applies pressure to the vegetable. Some models have raised ridges that help push food through the grid.
- Collection container: A bowl or tray underneath the blades that catches the chopped ingredients.
- Base and locking mechanism: The supporting structure that holds the cutting insert in position and helps keep the tool stable during use.
Some models include interchangeable grids for different cut sizes, while others have a single cutting arrangement. Additional accessories may provide slicing or other functions, but those attachments operate differently from the standard dicing grid.
The OXO Good Grips vegetable chopper instructions illustrate the basic arrangement: prepare the food, position it on the cutting area, close the lid, and press down firmly to chop.
How Does the Cutting Mechanism Actually Work?
The cutting action comes from the interaction between the stationary blade grid and the downward force applied through the pusher. The blades do not need to rotate or move electrically; the vegetable moves through the cutting edges instead.
1. The vegetable meets the blade grid
You place a prepared piece of food directly over the cutting grid. Its position matters because the vegetable needs to cover the intended cutting area and remain aligned with the pusher.
If the piece is too large, sits unevenly, or extends beyond the grid, the pressure may not be distributed properly. The food can shift, become trapped, or resist the downward movement.
2. Downward pressure forces the food through the blades
When you close the lid and press down, the pusher transfers your hand force to the vegetable. The sharp blade edges penetrate the food, while the intersecting grid divides it along multiple cutting lines.
For a dicing grid, those crossing cuts create cube-like pieces. The result depends on the grid’s geometry, the vegetable’s shape, and how well the food passes through the cutting area.
3. The chopped pieces fall into the container
As the vegetable passes through the grid, the separated pieces drop into the container below. This collects the ingredients in one place and reduces the need to transfer chopped food from a cutting board.
Once the pusher has completed its travel, you can open the lid, remove any remaining food safely, and repeat the process with the next piece.
Key Insight
The blade grid determines the basic cut size, but the food’s firmness, dimensions, and alignment determine how smoothly it passes through. A properly sized piece is often more important than applying extra force.
How to Use a Push-Down Vegetable Chopper Correctly
For consistent results, prepare the vegetables first, secure the correct cutting insert, and use a controlled downward press. The exact assembly and permitted foods depend on the manufacturer’s instructions for your model.
- Set up the chopper. Place the collection container on a stable, level work surface. Confirm that the cutting insert and lid are correctly fitted and locked into place where required.
- Wash and prepare the vegetables. Remove unwanted stems and trim the ends. Peel ingredients when necessary, and cut large vegetables into smaller sections that fit the grid.
- Position the food. Open the lid and place the vegetable over the cutting area, with a flat or stable side facing the grid when the design calls for it. Keep your fingers away from the blades.
- Close the lid and press. Apply firm, even downward pressure using the designated hand grips. Follow the manufacturer’s directions for the speed and force of the stroke.
- Check the result. Open the lid only when the movement is complete and the tool is stable. If food remains caught in the grid, stop and clear it using the approved cleaning tool rather than your fingers.
- Empty and repeat. Transfer the chopped ingredients from the container as needed, then process the next appropriately sized piece.
For a model-specific example, the Fullstar 9-in-1 vegetable chopper manual explains how to fit and lock the cutting insert, position the food, press the pusher, and clean the components.
Which Vegetables Work Best in a Push-Down Chopper?
A push-down chopper generally works well with vegetables that can be cut by its blade grid without excessive force. The most suitable choices depend on the blade design, the food’s firmness, and the manufacturer’s stated limitations.
- Onions: Cut them into sections that fit the grid. Their layered structure makes them useful for dicing, although loose layers may separate during cutting.
- Cucumbers: Their relatively tender flesh usually passes through a suitable grid readily. Trim and section them to fit the cutting area.
- Bell peppers: Remove the stem, seeds, and internal membranes before cutting the flesh into manageable pieces.
- Cooked potatoes: Firm, cooled pieces may work well with a suitable grid. Very soft potatoes can compress or break apart instead of forming neat cubes.
- Carrots: These are harder and may require smaller, manageable pieces. Use them only if the specific chopper is designed to handle them; never compensate for resistance by forcing the lid down.
- Tomatoes: Firm tomatoes may work with an appropriate sharp grid, but very ripe tomatoes can crush and release juice instead of producing clean cubes.
There is no universal list of compatible foods. Some choppers are intended for relatively soft produce, while others have stronger blade assemblies and different cutting grids. Check the instruction manual before using hard, frozen, unusually large, or otherwise restricted ingredients.
Why Does a Push-Down Vegetable Chopper Sometimes Get Stuck?
A chopper that will not press through food may have an oversized piece, an unsuitable ingredient, a misaligned pusher, or food lodged between the blades. Applying more force is not the right first response.
The vegetable is too large
If a piece extends beyond the grid or cannot sit flat, the pusher may press one side before the other. Open the chopper safely and divide the food into smaller sections that fit within the cutting area.
The food is too hard
Hard produce can exceed the intended capacity of a lightweight chopper. If the lid stops moving, do not lean your body weight on it or strike it to force the food through.
Stop, release the pressure, and check the manufacturer’s guidance. If the ingredient is not suitable for the tool, use a more appropriate cutting method.
Food is lodged between the blades
Dense pieces, skins, and vegetable fibers can become trapped in the grid or pusher. Stop using the tool, keep your fingers away from the cutting edges, and follow the manual’s clearing procedure with the designated scraper or brush.
The blade insert is not seated correctly
A loose or incorrectly installed cutting insert can interfere with the pusher’s movement. Before using the chopper again, check that the insert is the correct one and that all required locks are engaged.
Warning
Never push vegetables through a cutting grid with your fingers, test the sharpness of the blades by touch, or attempt to clear a jam while pressing the lid. Release pressure first and follow the manufacturer’s safe disassembly instructions.
How Is a Push-Down Chopper Different From an Electric Chopper?
Both tools reduce vegetables into smaller pieces, but they use different cutting mechanisms. A push-down chopper forces food through a stationary grid, whereas an electric chopper typically uses a motor to rotate a blade inside a bowl.
| Feature | Push-Down Chopper | Electric Chopper |
|---|---|---|
| Power source | Manual hand pressure | Electric motor |
| Cutting action | Food passes through a fixed grid | Rotating blades cut food in a bowl |
| Piece shape | Often more uniform when using a dicing grid | Depends on blade design, speed, and processing time |
| User control | Controlled by hand pressure and piece size | Controlled by operating time and appliance settings |
| Main limitation | Grid size and the force the tool can safely handle | Motor capacity, bowl size, and blade configuration |
For salads, salsa ingredients, and recipes that benefit from relatively uniform diced pieces, a grid-based tool can be convenient. For larger quantities, repeated chopping, or different textures, an electric model may be more appropriate.
How to Clean and Maintain the Cutting Mechanism
Cleaning is easier when food residue has not dried inside the grid. However, the blade assembly needs careful handling because its edges remain sharp even when the chopper is not in use.
- Empty the container. Remove the chopped food and separate components only as directed by the manual.
- Rinse away loose residue. Use running water and the manufacturer’s recommended cleaning method to loosen vegetable pieces.
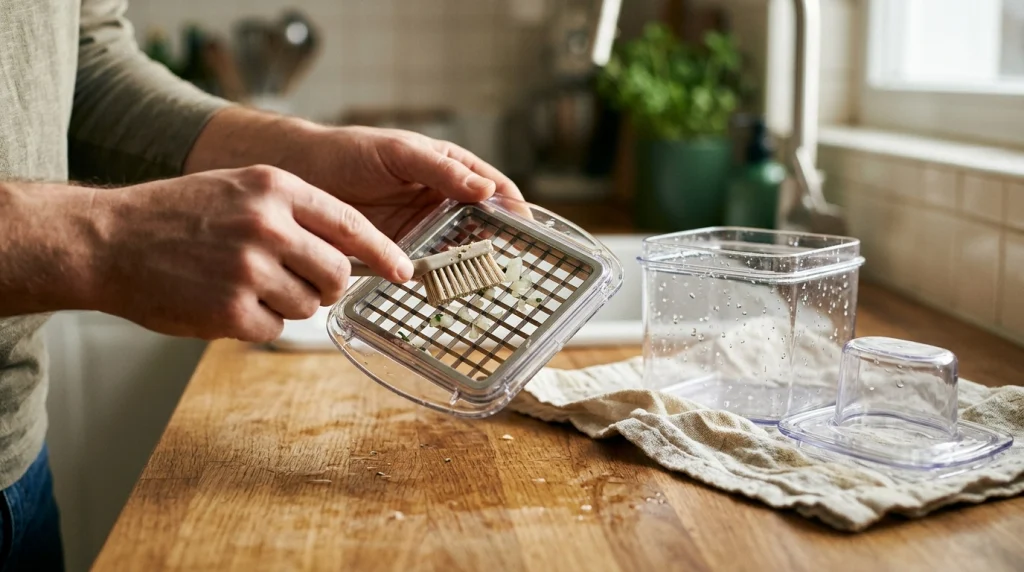
- Use the proper brush or scraper. Guide the cleaning tool along the intended direction without placing fingers between the blades. Avoid improvised sharp tools that could slip or damage the assembly.
- Wash the remaining parts. Clean the container, lid, and removable components according to their material and care instructions.
- Dry and store safely. Allow the parts to dry thoroughly before storing them, and use the designated blade cover or storage compartment if provided.
Do not assume that every component is dishwasher-safe. Some designs allow particular parts on the top rack, while others require handwashing or specific disassembly steps.
For a detailed example of blade handling, the Fullstar manual’s cleaning section recommends keeping fingers clear of the grid and using the designated cleaning brush. Always follow the instructions for your own model if they differ.
Frequently Asked Questions
1. Does a push-down vegetable chopper need electricity?
No. A manual push-down chopper uses hand pressure to force vegetables through a stationary blade grid. It does not need a motor, batteries, or a power outlet.
2. Why does a push-down chopper make uniform vegetable pieces?
The intersecting blades create a repeating cutting pattern. When a suitably sized vegetable passes evenly through the grid, the resulting pieces tend to have similar dimensions.
3. Can a push-down vegetable chopper cut raw carrots?
That depends on the model and its blade assembly. Carrots are relatively hard, so use them only when the manufacturer permits it and prepare them as directed. Never force a resistant lid.
4. Why does food stick to the chopper blades?
Food can stick when pieces are oversized, the vegetable is very soft, or residue accumulates in the grid. Stop, release pressure, and clear the obstruction using the manufacturer’s recommended tool.
5. Can I use a push-down chopper for tomatoes and onions?
Many models can dice onions and suitably firm tomatoes. Prepare the ingredients so they fit the grid, and expect very ripe tomatoes to produce less distinct pieces because their soft flesh can crush under pressure.
6. How often should I clean a push-down vegetable chopper?
Clean it after each use, following the manufacturer’s instructions. Removing residue before it dries helps prevent food from becoming trapped around the blades and pusher.
Conclusion
A push-down vegetable chopper works by using a hand-operated pusher to move food through a stationary grid of sharp blades. The grid establishes the basic cut pattern, while correct food preparation and even pressure help the mechanism work smoothly.
For the best results, choose vegetables that suit the model, cut oversized pieces into manageable sections, and stop if the lid resists movement. Clean the grid carefully after use and follow the manufacturer’s assembly, food-compatibility, and storage instructions. These habits help you use the chopper efficiently without putting unnecessary strain on its blades or risking injury.