
Push Down Chopper Blade Cleaning: How to Remove Stuck Food Safely

Quick Answer
To clean a push down chopper blade, remove loose food, detach the blade assembly according to the manufacturer’s instructions, and rinse away residue before it dries. Use the supplied cleaning comb or a compatible soft brush to clear trapped vegetables without touching the sharp edges. Wash removable parts with mild dish soap, rinse thoroughly, and dry them completely before storage.
The safest cleaning steps
- Disconnect the parts: Empty the container and remove the blade attachment using its frame or designated release mechanism.
- Rinse promptly: Use running water to loosen fresh tomato, onion, potato, and other vegetable residue.
- Brush carefully: Clear the cutting grid with the supplied cleaning tool, keeping fingers away from the edges.
- Wash each part: Use mild dish soap and follow the model’s instructions for handwashing or dishwasher use.
- Check the pusher: Remove food trapped between the push plate’s teeth and the grid openings with a suitable cleaning comb.
- Dry before storing: Rinse away soap, dry the components thoroughly, and inspect the blade for residue or damage.
One essential safety rule
- Never push food through the cutting grid with your fingers or use a knife tip to dislodge stuck pieces. If residue remains, soften it with warm water and use an appropriate cleaning tool.
A push down vegetable chopper makes meal preparation easier, but its closely spaced blades can trap food in awkward places. Cleaning becomes especially frustrating when potato starch, tomato skin, or onion pieces lodge between the cutting grid and the pusher.
In this guide, I’ll explain how to clean a push down chopper blade safely, remove stubborn residue, choose the right tools, and avoid damage during washing. I’ll also cover what to do when food gets stuck or the blade attachment becomes difficult to clean.
What Is Push Down Chopper Blade Cleaning?
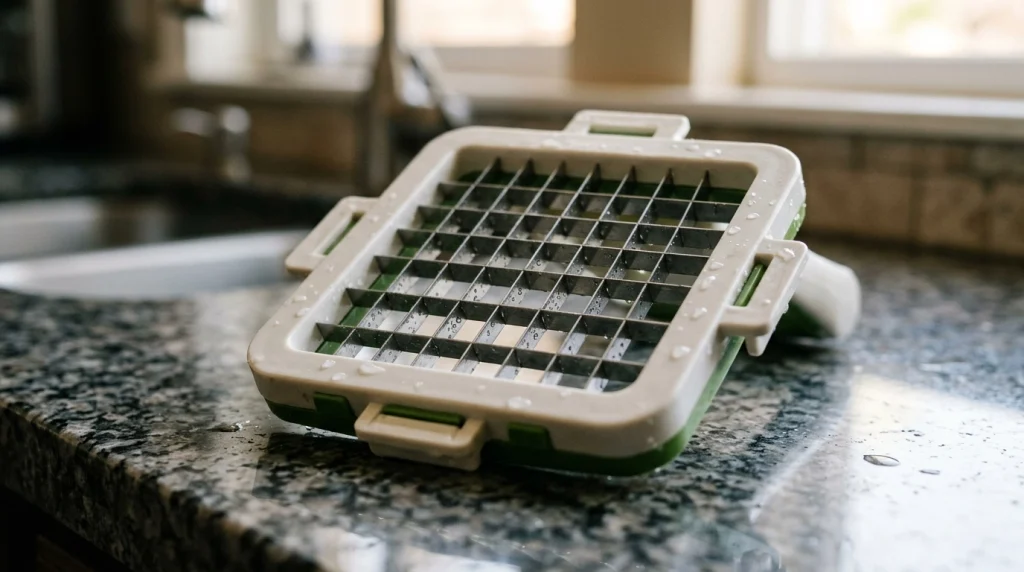
Push down chopper blade cleaning is the process of removing food residue from a manual vegetable chopper’s cutting grid, pusher teeth, attachment frame, and surrounding components without damaging the blades or injuring yourself. The goal is to remove visible debris, wash away food films, and leave every part clean and dry.
Unlike a smooth kitchen knife, a push down chopper often has several intersecting cutting edges. Its matching pusher may also contain rows of teeth that press vegetables through the grid, creating narrow spaces where food can become trapped.
These are the main areas to check after chopping:
- Cutting grid: The sharp openings that dice vegetables into smaller pieces.
- Pusher teeth: The raised sections that push food through the cutting grid.
- Blade frame: The surrounding support that holds the cutting attachment in place.
- Hinges and release points: The moving or locking sections that may collect food fragments.
- Collection container: The bowl or tray that catches the chopped ingredients.
Each part needs attention, but the blade grid and pusher usually deserve the most careful inspection. Food left in either area can dry and become harder to remove later.
How Do You Clean a Push Down Chopper Blade Step by Step?
The safest approach is to remove loose debris first, separate removable parts, and clean the blade grid without placing your fingers near its cutting edges. Work over a clear sink or countertop so you can see every attachment while handling it.
Step 1: Empty the Chopper and Prepare Your Workspace
Remove the chopped vegetables from the collection container and clear away any loose scraps. Set the chopper on a stable surface, away from other dishes that could hide a sharp attachment.
Keep children away from the cleaning area and avoid placing loose blades in cloudy sink water. You should always be able to see where the sharp parts are.
Step 2: Remove the Blade Attachment Correctly
Open the pusher and release the blade assembly using the mechanism provided by your model. Hold the attachment by its plastic or designated frame, never by the cutting grid itself.
Some push down choppers have removable blade inserts, while others use a different release system. Check the instruction manual before forcing a stuck attachment or attempting to dismantle parts that are not designed to separate.
Step 3: Rinse Away Fresh Food Residue
Rinse the removable grid under running water soon after use. Fresh vegetable pieces generally come away more easily than residue that has dried inside the openings.
For a grid with food packed tightly into its openings, follow the manufacturer’s recommended rinsing direction. If the instructions permit, rinsing from the underside may help loosen pieces without pressing them farther into the grid.
Step 4: Clean the Blade Grid With a Suitable Brush
Use the cleaning comb supplied with your chopper, if available. Otherwise, choose a soft brush that the manufacturer considers suitable for the blade assembly.
Work carefully around the openings, using the tool to dislodge food rather than your fingertips. Keep the cutting edges away from your hands, and avoid aggressive scrubbing that could damage the frame or leave bristles behind.
- For tomato skin: Rinse away loose skin and use the cleaning tool to lift pieces from the openings.
- For potato residue: Rinse away the starchy film and gently loosen remaining pieces with the approved brush.
- For onion fragments: Flush the grid thoroughly and inspect narrow openings for thin layers of residue.
- For carrot fibers: Use the cleaning comb or compatible brush to clear strands from individual openings.
Step 5: Clean the Pusher Teeth
The pusher can be just as troublesome as the cutting grid because vegetable pieces often stick between its raised teeth. Separate the pusher from the lid only if the design allows it.
Rinse the removable pusher and use a compatible brush or cleaning comb to clear each groove. Some models include a movable cleaning plate or built-in mechanism that pushes residue out when you operate a release button.
Follow the manual if your model has this feature. Never force the mechanism or place your fingers between the pusher teeth and blade grid.
Step 6: Wash, Rinse, and Inspect Every Component
Wash the removable parts with mild dish soap and water unless the product instructions specify another method. Clean the collection container, lid, pusher, frame, and removable inserts separately where possible.
Rinse away all soap and loosened food. Before drying, inspect the grid openings, pusher grooves, and attachment frame under good lighting to confirm that no visible debris remains.
Step 7: Dry the Chopper Before Storage
Dry the components thoroughly with a clean towel or let them air-dry as the manufacturer recommends. Pay attention to narrow gaps where moisture can remain trapped.
Store the blade attachment securely, preferably in its designated holder or another protective arrangement. Keep loose cutting inserts away from children and avoid storing damp parts in a closed container.
Which Cleaning Tools Work Best for Push Down Chopper Blades?
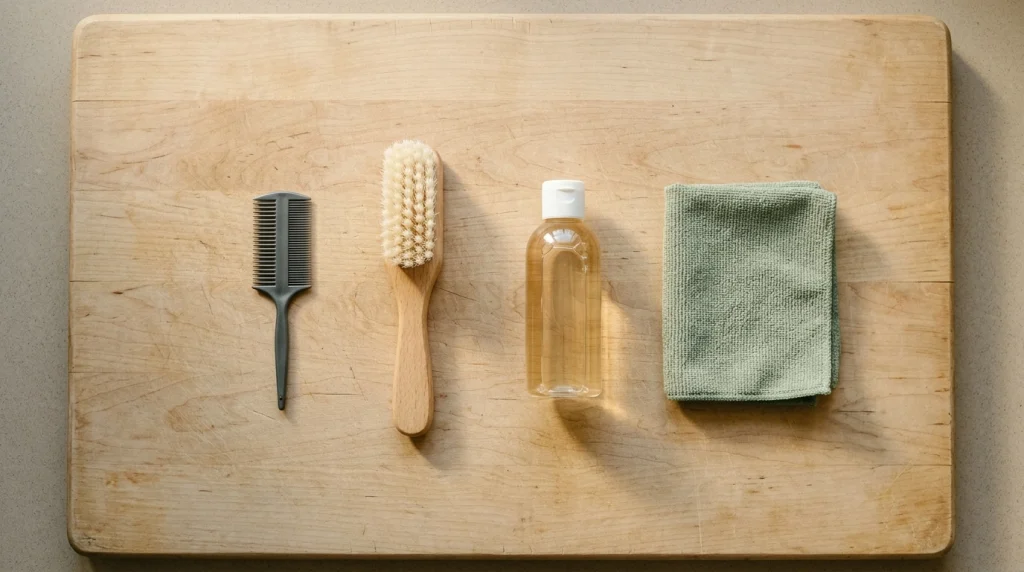
The best cleaning tool is one that removes residue from narrow openings without exposing your fingers to sharp edges or damaging the attachment. A purpose-made cleaning comb is usually the most convenient starting point when your chopper includes one.
You don’t need an elaborate collection of cleaning products. A few compatible tools can handle most routine cleanup.
| Cleaning tool | Best use | Important caution |
|---|---|---|
| Supplied cleaning comb | Removing food from the grid and pusher teeth | Use only on compatible parts and as directed. |
| Soft cleaning brush | Loosening small vegetable fragments | Avoid damaged bristles and unsuitable brush materials. |
| Mild dish soap | Removing food films and everyday residue | Rinse thoroughly after washing. |
| Clean microfiber cloth | Drying smooth plastic surfaces and the container | Keep your fingers away from cutting edges. |
| Warm water | Loosening fresh or softened food residue | Avoid temperatures that exceed the product’s limits. |
Avoid using knives, metal picks, or other sharp improvised tools to clear blocked openings. They can slip unexpectedly, damage plastic components, or create an additional cutting hazard.
For broader meal-preparation advice, see these practical cooking hacks for organizing kitchen tasks and preparing ingredients more efficiently.
How Do You Remove Stubborn Food From a Chopper Blade?
When vegetable pieces refuse to come loose, soften the residue with warm water and mild dish soap if the manufacturer’s instructions allow it. Then use the appropriate cleaning comb or brush rather than applying more force to the blade.
Removing Dried Potato and Starchy Residue
Potatoes can leave a sticky, cloudy film that clings to the grid and pusher teeth. Rinse the affected parts and let the residue soften before brushing gently.
Check the openings again after rinsing. Avoid scraping with a knife or using abrasive cleaners that could damage the blade frame or its finish.
Cleaning Tomato Skin and Seeds
Tomato skin can fold around individual grid openings, while seeds and pulp may collect underneath the attachment. Use running water to loosen the material and clear the remaining fragments with a compatible cleaning tool.
If the tomato residue has dried, allow more time for gentle softening. Don’t pull stubborn skin away with your fingertips while the blade remains exposed.
Removing Carrot Fibers and Onion Pieces
Fibrous vegetables can leave strands between the grid openings, while onion pieces may flatten against the pusher. Work through these areas slowly and inspect both sides of the attachment.
If a piece remains trapped after normal cleaning, stop and check the manual for an approved removal method. Do not force the grid apart or bend its cutting edges.
What If the Food Will Not Come Out?
Stop brushing if the attachment moves unexpectedly or you cannot hold it securely by its frame. Recheck the release mechanism and product instructions before attempting another cleaning method.
If the blade is bent, cracked, loose, or visibly damaged, stop using the chopper until you can obtain a suitable replacement or have the unit assessed. Cleaning cannot repair a damaged cutting attachment.
Can You Put Push Down Chopper Blades in the Dishwasher?
Some push down choppers have dishwasher-safe blade inserts, pushers, and containers, while others require handwashing for certain components. The correct method depends on the exact model and its materials.
Check the manufacturer’s instructions before placing any part in the dishwasher. A claim that the container is dishwasher-safe does not automatically mean the lid or blade attachment has the same approval.
| Component | Handwashing approach | Dishwasher guidance |
|---|---|---|
| Blade insert | Rinse and clean with the approved brush. | Use only if the model explicitly permits it. |
| Pusher and lid | Clean grooves and joints carefully. | Check for removable parts and temperature restrictions. |
| Collection container | Wash with mild soap and rinse. | Follow the container’s dishwasher rating. |
| Cleaning comb | Rinse out trapped debris. | Check the care instructions for the accessory. |
If the manual approves dishwasher cleaning, follow its placement and temperature guidance. Otherwise, handwashing is the safer default because it gives you direct control over how each component is handled.
For general kitchen hygiene, the USDA Food Safety and Inspection Service’s cleaning guidance explains why washing utensils with warm, soapy water matters and why cleaning should come before sanitizing when additional sanitizing is appropriate.
What Cleaning Mistakes Should You Avoid?
Most chopper-cleaning problems come from rushing, using the wrong tool, or assuming every component can withstand the same treatment. A careful routine helps protect both the user and the equipment.
- Waiting until food dries: Rinse the attachment promptly to make residue easier to remove.
- Using bare fingers: Keep fingers away from the blade openings, even when the attachment looks clean.
- Scraping with a knife: Use a compatible cleaning comb or brush instead of a sharp improvised tool.
- Forcing a stuck insert: Check the release instructions rather than twisting or bending the frame.
- Using harsh chemicals: Choose mild dish soap unless the manufacturer specifies another approved cleaner.
- Ignoring the pusher: Inspect its grooves and teeth, not just the cutting grid.
- Storing wet parts: Dry components fully before putting them away.
- Assuming every part is dishwasher-safe: Verify the care instructions for each component.
These precautions are especially important when a chopper has several interchangeable blade inserts. For more ways to avoid common kitchen-preparation errors, read this guide to common cooking mistakes and how to avoid them.
How Often Should You Clean Push Down Chopper Blades?
Clean the blade grid, pusher, and other food-contact components after every use. Even when the attachment looks clean, small food fragments can remain inside the openings or between the pusher teeth.
In 2026, the most practical approach remains simple: clean promptly, inspect carefully, and follow the instructions supplied with your particular model.
- After every use: Remove visible food, wash all used components, and rinse away soap.
- Before storing: Confirm that the grid and pusher contain no visible residue and are fully dry.
- After heavy chopping: Spend extra time inspecting dense or fibrous residue in narrow openings.
- Before the next use: Check for leftover food, unusual discoloration, loose parts, or blade damage.
Routine cleaning also gives you a chance to notice problems before they affect your next meal. If you see corrosion, broken plastic, or bent cutting edges, consult the manufacturer rather than trying to repair the attachment with household tools.
Which Cleaning Accessories Are Worth Having?
You can clean most manual vegetable choppers without buying a special kit. However, a purpose-made cleaning comb and a compatible soft brush can make narrow grids and pusher teeth easier to maintain.
If you want to add a tool to your kitchen, focus on compatibility and safe handling rather than the number of accessories included in a set.
🏆 Best for Grid Cleaning
Vegetable Chopper Cleaning Comb
A cleaning comb designed for a compatible push down chopper can help remove pieces from narrow openings and pusher teeth. I’d check the shape and compatibility first instead of assuming a universal tool will fit every grid.
💰 Best Everyday Option
Soft Nylon Cleaning Brush
A soft cleaning brush can help loosen food from compatible removable parts without requiring a large cleaning kit. I’d choose one with a comfortable handle and durable bristles, provided the chopper manufacturer permits its use.
🧽 Best for Final Drying
Lint-Free Microfiber Cloth
A clean microfiber cloth works well for drying smooth plastic parts and the collection container. I’d use it on safe-to-handle surfaces and allow the blade assembly to finish drying without touching its cutting edges.
These are accessory categories rather than tested or ranked individual products. You don’t need all three if your chopper already includes a suitable cleaning tool.
Frequently Asked Questions
Can I touch the push down chopper blade while cleaning it?
No. The cutting edges can cause serious cuts, even when the blade is wet or partly covered with food. Hold the attachment by its designated frame, use an approved cleaning comb or brush, and keep your fingers away from the grid openings throughout cleaning.
How do I clean a push down chopper blade without a cleaning tool?
Rinse the removable attachment promptly and use a compatible soft brush if the manufacturer permits one. Let stubborn food soften in warm, soapy water when allowed, then rinse and inspect the grid. Never substitute your fingers, a knife tip, or a sharp metal pick.
Can I soak a vegetable chopper blade overnight?
Overnight soaking is unnecessary for routine cleaning and may not suit every blade, frame, or attachment. Start with a brief rinse and gentle softening in warm, soapy water if the instructions allow it. Follow the manual’s limits and dry the parts thoroughly after washing.
Why does food keep getting stuck between the blade and pusher?
The pusher teeth press vegetables through narrow cutting openings, so soft, starchy, or fibrous ingredients can leave fragments behind. Clean both parts after each use, trim ingredients to the size recommended by the manufacturer, and check that the pusher and blade attachment match your model.
How can I tell whether a chopper blade needs replacing?
Replace or have the attachment assessed if you notice bent cutting edges, cracks, loose components, significant corrosion, or damage that prevents secure fitting. A dirty blade usually needs cleaning, but a damaged blade requires more than washing. Use only a compatible replacement approved for your chopper.
Final Takeaway: Keep Your Chopper Blade Clean and Safe
Push down chopper blade cleaning becomes easier when you remove food promptly and use the right tool for each part. Rinse the grid, clean the pusher teeth, wash removable components according to their care instructions, and inspect everything before storage.
My main recommendation is to make cleaning part of the chopping routine rather than leaving it until later. A few careful steps after each meal help prevent stubborn buildup and keep your vegetable chopper ready for the next preparation task.
For additional kitchen-cleaning ideas, you can also read this guide on how often to wash a dish rack. The same basic habit applies: remove food residue promptly, clean thoroughly, and allow kitchen equipment to dry properly.
Affiliate disclosure: This article contains affiliate links. If you purchase through these links, RecipesPalette may earn a commission at no additional cost to you.