
What Is the Cheapest Way to Make Shelves?

Quick Answer
The cheapest way to make shelves is to reuse sound boards and mount them on simple wooden cleats or basic metal brackets. For kitchen storage, inspect reclaimed wood carefully and seal it against moisture, especially when building a homemade dish rack organizer.
Cheapest Shelf-Building Steps
- Measure the space: Confirm the shelf length, depth, and required clearance.
- Find free boards: Reuse cabinet panels, solid bed slats, or clean construction offcuts.
- Choose simple supports: Use scrap-wood cleats for the lowest cost or metal brackets for easier installation.
- Locate wall studs: Fasten load-bearing supports into studs whenever possible.
- Seal kitchen shelves: Apply a water-resistant finish and let it cure fully before use.
I’ve built shelves from new lumber, old cabinet doors, and boards rescued before trash day. The reclaimed versions usually cost the least, but only when the material is straight and safe.
This guide explains where to save, where not to cut corners, and how to build an inexpensive shelf that stays level. I’ll also cover moisture-resistant options for dishes and kitchen supplies.
What Is the Absolute Cheapest Way to Make Shelves?
Reuse a sound board and support it with scrap-wood cleats. If you already own screws and basic tools, one shelf may cost almost nothing.
A cleat is a narrow strip of wood fastened horizontally to a wall. The shelf rests on top of it, while side cleats can support each end inside an alcove or cabinet.
- Free shelf boards: Old solid-wood shelves, cabinet panels, bed slats, and clean project offcuts can work.
- Low-cost cleats: Straight strips cut from scrap lumber provide hidden support beneath the shelf.
- Existing hardware: Reusing undamaged screws and brackets lowers the final cost.
- Simple finish: Leftover paint or water-resistant polyurethane can protect the surface.
I prefer cabinet panels over pallet boards for indoor kitchen projects. Their flat surfaces require less sanding and are easier to wipe clean.
Free material isn’t automatically suitable, though. Reject wood that smells musty, feels soft, contains active insect holes, or has unknown chemical stains.
Which Cheap Shelf Material Gives the Best Value?
Plywood and reused solid boards give the best balance of price, strength, and easy installation. Particleboard costs less when new, but moisture and heavy loads can shorten its life.
| Material | Typical Thickness | Cost Level | Moisture Resistance | Best Use |
|---|---|---|---|---|
| Reclaimed solid board | 3/4 inch or thicker | Free to low | Good after sealing | General and kitchen storage |
| Plywood | 1/2 to 3/4 inch | Low to moderate | Fair after edge sealing | Long shelves and utility storage |
| Pine board | 3/4 inch | Moderate | Good after sealing | Visible wall shelves |
| Particleboard | 5/8 to 3/4 inch | Low | Poor if edges get wet | Light, dry indoor storage |
| Wire shelving | Varies by system | Moderate | Good with intact coating | Dish drying and ventilated storage |
Is plywood cheaper than solid wood?
Plywood usually gives you more usable shelf area per purchased sheet. It also stays more consistent than inexpensive solid boards, which may contain knots or warping.
For a small shelf, however, a single common pine board may cost less than a full plywood sheet. Check the store’s offcut bin before buying either option.
Can I use particleboard for cheap shelves?
Particleboard works for light items in a dry room. It’s a poor choice beside a sink because exposed edges swell after absorbing water.
If you reuse laminated particleboard, seal every cut edge. Add a center support when the shelf spans a wide opening.
How Can You Build Cheap Shelves Step by Step?
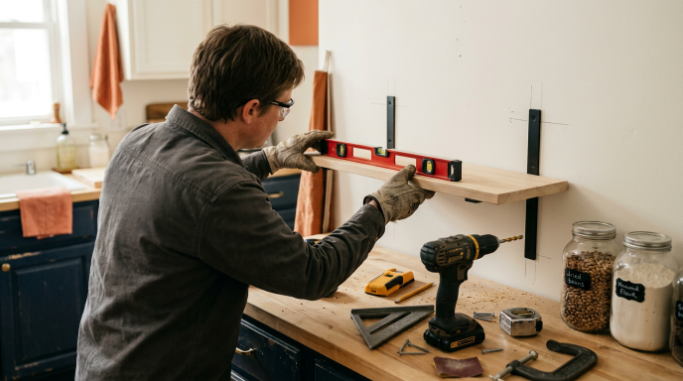
Measure first, cut one straight board, anchor the supports, and test the shelf gradually. A basic bracket shelf is manageable with a drill, level, saw, and tape measure.
- Choose the location. Check for doors, pipes, electrical fixtures, and working space around the shelf.
- Decide the dimensions. An 8-to-12-inch depth suits many dishes, pantry jars, and everyday kitchen items.
- Inspect the board. Look along its edge and reject severe bows, twists, rot, or deep splits.
- Cut it to length. Clamp the board and support both sides of the cut.
- Sand the surfaces. Smooth splinters, sharp corners, and rough cut edges.
- Find the studs. Confirm their positions with a stud finder and a secondary check.
- Mark a level line. Position each bracket or cleat along that reference.
- Install the supports. Use screws suited to the wall material and the expected load.
- Attach the shelf. Secure the board so it cannot slide or tip forward.
- Test it carefully. Add weight in stages while checking movement and deflection.
Before drilling, consider what might be hidden inside the wall. The OSHA hand and power tool guidance also offers sensible reminders about guards, cords, and eye protection.
How far apart should shelf brackets be?
Bracket spacing depends on the shelf material, thickness, depth, and load. Place supports closer together when using thin boards or storing heavy plates.
I treat visible bending as a warning, not a design feature. A center bracket often costs less than replacing a bowed shelf and broken dishes.
Can You Make Cheap Shelves for Dishes?
Yes, but dish shelves need stable supports, a washable surface, and protection from standing water. Open shelves store dry dishes, while a draining rack needs airflow and a way to control runoff.
Start by checking the size of your plates and bowls. This prevents shallow shelves, awkward stacks, and wasted space.
If you’re designing around dinnerware, my guide to arranging dishes on shelves explains practical placement. Keep frequently used pieces between waist and shoulder height.
What should you use for a homemade dish-drying shelf?
Use coated wire, stainless steel, sealed hardwood, or another water-tolerant surface. Include open space beneath dishes so air can circulate.
- Add drainage: Place a sloped drainboard or removable absorbent mat beneath wet dishes.
- Avoid trapped water: Leave gaps around rails, corners, and utensil containers.
- Protect the wall: Use a washable backsplash or keep the rack away from vulnerable drywall.
- Separate materials: Prevent wet metal parts from resting against unfinished wood.
- Plan for cleaning: Make trays and holders easy to remove without dismantling the shelf.
You can follow these principles when you make your own dish rack. For damp kitchens, I’d avoid unsealed MDF and raw particleboard.
A homemade rack also needs routine washing. The USDA food-safety resources provide broader guidance for keeping food-preparation areas clean.
Where Can You Find Free or Low-Cost Shelf Materials?
Start with materials you already own, then check local reuse sources and store offcut bins. Transportation and repair work can make a “free” board more expensive than a discounted new one.
- Old furniture: Cabinet sides and existing shelves are often flat and already finished.
- Habitat ReStores: Availability varies, but stores may carry used lumber, cabinets, and hardware.
- Local marketplaces: Search for shelving, cabinet panels, timber offcuts, and renovation leftovers.
- Lumber offcut bins: Short pieces may suit compact wall shelves or support cleats.
- Workshop scraps: Ask before taking anything and confirm its previous use.
When sourcing new wood, certification can help identify responsibly managed forest products. The Forest Stewardship Council explains its labeling and certification system.
Is pallet wood a good free option?
Pallet boards can be rough, split, stained, or difficult to clean. I wouldn’t use wood with an unknown history near dishes or food.
Look for clear markings and reject chemically contaminated or oily boards. Even acceptable pallet wood usually needs nail removal, sanding, and sealing.
How Do You Make Cheap Shelves Look Better?
Careful sanding, consistent bracket placement, and one simple finish make budget shelves look intentional. You don’t need decorative hardware if the proportions and alignment are clean.
- Ease the edges: Lightly sand sharp corners for a finished feel.
- Hide plywood layers: Add iron-on edge banding or a thin solid-wood strip.
- Match the brackets: Paint mismatched supports in one compatible finish.
- Fill visible holes: Use suitable wood filler before painting.
- Repeat dimensions: Equal shelf spacing creates a calmer appearance.
I once saved money by reusing two cabinet panels with different finishes. Painting both the same warm white made them look like a matched set.
For a damp area, choose a finish labeled for the material and intended environment. Follow its drying and curing instructions before loading the shelf.
What Cheap Shelf-Building Mistakes Should You Avoid?
The biggest mistakes are trusting weak drywall anchors, using warped boards, and underestimating the stored weight. Saving a few dollars isn’t worthwhile if the shelf can pull away from the wall.
- Ignoring studs: Heavy shelves should connect to framing or another suitable structural support.
- Using random screws: Screw length and type must suit the bracket, wall, and load.
- Making deep shelves: Excess depth adds leverage and encourages overloading.
- Skipping a level: A small slope becomes obvious across several shelves.
- Leaving raw edges: Exposed composite board edges absorb kitchen moisture quickly.
- Storing wet dishes on wood: Standing water can stain finishes and encourage deterioration.
Don’t rely on a universal load number copied from another project. Capacity changes with every board, fastener, bracket, wall, and installation.
When uncertainty remains, use more supports and store lighter objects. Put heavy appliances in properly built cabinets or on countertops.
My Cheapest Shelf Plan for 2026
For a low-cost kitchen shelf in 2026, I’d reuse a 3/4-inch cabinet panel and install it on two or three basic brackets. I’d add the third bracket whenever the span or dish load caused concern.
My purchasing order would be simple:
- Reuse a safe board already available.
- Reuse sound brackets when their capacity and condition are known.
- Buy appropriate screws and anchors rather than improvising.
- Add a water-resistant finish for kitchen use.
- Buy new lumber only if the reclaimed board needs major repair.
If the goal is drying rather than storage, I’d build an open rack instead. This guide to making a homemade dish rack covers that more specialized project.
Useful Tools for Building Budget Shelves
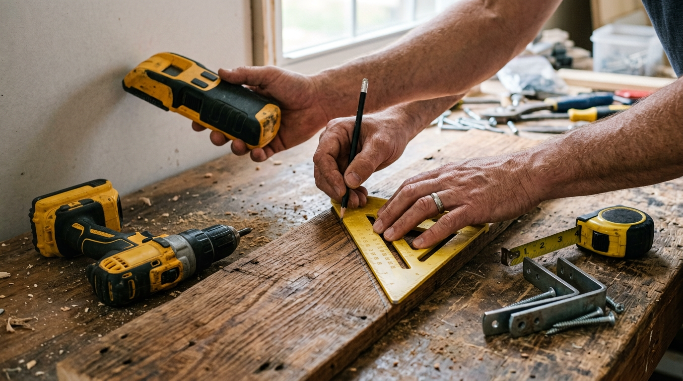
If you’re ready to build, these are the tools I’d prioritize. Borrowing them may still be cheaper when you only need one shelf.
🏆 Best Essential Tool
BLACK+DECKER 20V MAX Drill/Driver
★★★★☆
A cordless drill handles pilot holes and most shelf-fastening jobs. I favor a compact drill because it’s easier to control beside walls and inside cabinets.
💰 Best for Simple Layouts
Swanson 8-Inch Speed Square
★★★★½
This compact square helps mark straight, repeatable cuts on narrow boards. I also use it to check bracket alignment before drilling.
🧱 Best for Wall Mounting
Zircon StudSensor e50
★★★★☆
This electronic finder is designed to locate stud edges behind common drywall. I still verify each reading before installing shelf hardware.
Frequently Asked Questions
Can I make shelves without buying wood?
Yes. Reuse straight cabinet panels, existing shelves, solid bed slats, or clean construction offcuts. Inspect every piece for rot, insects, contamination, splitting, and warping before bringing it indoors or placing it near dishes.
What is the cheapest shelf support?
Scrap-wood cleats are usually the cheapest supports when suitable lumber and screws are already available. Basic metal angle brackets are an affordable alternative and make it easier to create open wall shelving.
How thick should a cheap wooden shelf be?
A 3/4-inch board is a practical starting point for many household shelves, but thickness alone doesn’t determine strength. Material quality, shelf depth, unsupported span, fasteners, and stored weight all affect performance.
Can I put dishes on reclaimed-wood shelves?
You can store dry dishes on clean, sound reclaimed wood after sanding and sealing it. Avoid boards with unknown chemical exposure, oil stains, mold, strong odors, insect damage, or surfaces that cannot be cleaned properly.
Are floating shelves the cheapest option?
Floating shelves aren’t always the cheapest because concealed mounting hardware can add cost. A plain board supported by visible cleats or standard brackets is usually less expensive, easier to install, and easier to reinforce.
Final Takeaway
The cheapest shelves begin with a safe reused board, simple supports, and a plan matched to the expected load. Spend your limited budget on correct fasteners and moisture protection rather than decorative extras.
Start with one small shelf and test it carefully. Once the method works, repeat the same dimensions for an inexpensive, coordinated storage system.