
How to Clean a Push Down Chopper: A Safe, Step-by-Step Guide

Quick Answer
To clean a push down vegetable chopper, remove its detachable parts according to the manufacturer’s instructions, rinse away loose food, and wash approved components with warm water and mild dish soap. Use the supplied cleaning tool or a soft brush to remove food trapped between the blades. Keep your fingers away from sharp edges and check the manual before placing any component in the dishwasher.
Steps for safe, effective cleaning
- Empty the container: Remove chopped vegetables and loose scraps.
- Disassemble carefully: Detach removable components according to the manual.
- Rinse promptly: Remove fresh residue before it dries.
- Clear the grid: Use a cleaning comb or suitable soft brush.
- Wash and rinse: Use mild dish soap and clean water.
- Dry completely: Let all components dry before reassembly and storage.
A push down chopper can make everyday meal preparation quicker, but tiny pieces of onion, potato, tomato, and other vegetables can cling to its blades and pressing plate.
In this guide, I’ll explain how to clean a push down chopper without damaging its cutting grid or risking a cut. I’ll also cover stubborn buildup, dishwasher safety, common cleaning mistakes, and features to look for when choosing a chopper that’s easier to maintain.
What Is a Push Down Vegetable Chopper?
A push down vegetable chopper is a manual kitchen tool that cuts vegetables when you press a lid or pressing mechanism against a cutting grid. Most models include a collection container, a blade insert, and a pressing surface that pushes food through the grid.
Unlike an electric food processor, this tool relies on hand pressure rather than a motor. Its compact grid makes dicing convenient, but the narrow spaces between the blades can trap food that ordinary rinsing doesn’t remove.
Which parts need cleaning?
- Cutting grid: The sharp intersecting blades can trap vegetable pieces.
- Press plate: Raised teeth and grooves may retain food scraps.
- Collection container: Vegetable juice and small pieces can collect in its corners.
- Lid and hinges: Recessed areas may hold moisture and food particles.
- Cleaning accessory: A supplied comb or brush can help clear difficult spaces.
Not every chopper separates into the same components. Check your model’s manual before removing a blade insert, releasing a hinge, or immersing any part in water.
How Do You Clean a Push Down Chopper Step by Step?
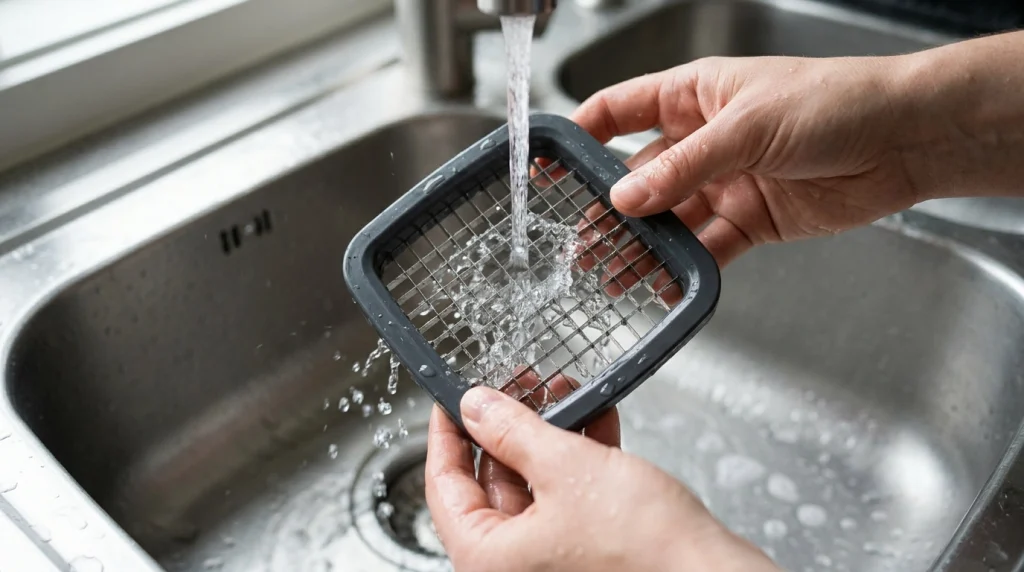
The easiest way to clean a push down chopper is to remove loose food first, rinse the removable parts, and then wash every accessible surface. Clean it soon after use, while vegetable residue remains soft.
Step 1: Empty the container and prepare your workspace
Transfer the chopped vegetables into a bowl or cooking pan, then discard any remaining scraps. Place the chopper on a stable surface with enough room to separate its components safely.
Keep a dishwashing brush, mild dish soap, a clean sponge, and the supplied cleaning tool nearby. A clear workspace reduces the chance of accidentally touching or dropping an exposed blade.
Step 2: Remove the blade grid and pressing plate
Follow the manufacturer’s instructions to remove the cutting insert, container, and detachable pressing components. Hold the blade insert by its plastic frame or designated handle, never by the cutting edges.
Some models use locking tabs, while others have removable grids or hinged lids. Never force a component that feels stuck because you could damage its locking mechanism or lose control of the sharp insert.
Step 3: Rinse away loose vegetable pieces
Rinse removable parts under running water to loosen fresh scraps before washing them with soap. Direct water through the grid openings without placing your fingers near the blades.
Pay attention to potato starch, onion skins, tomato seeds, and leafy vegetable fibers. These small leftovers can remain trapped even when the main surfaces appear clean.
Step 4: Clean the cutting grid and pressing plate
Use the supplied cleaning comb, fork, or an appropriate soft brush to remove food lodged between the grid openings. Follow the tool’s intended direction and keep your other hand clear of the cutting path.
For the pressing plate, gently brush around the raised teeth and grooves where food may collect. If the manufacturer provides a built-in cleaning mechanism, operate it according to the instructions rather than forcing the teeth through the grid by hand.
Step 5: Wash each component with mild soap
Wash approved removable parts with warm water and mild dishwashing liquid. Use a soft sponge on smooth plastic surfaces and a suitable brush for recessed areas.
Clean the container’s corners, the underside of the lid, the hinge area, and any removable seals. Rinse each part thoroughly so soap and loosened residue do not remain on food-contact surfaces.
Step 6: Dry and reassemble the chopper
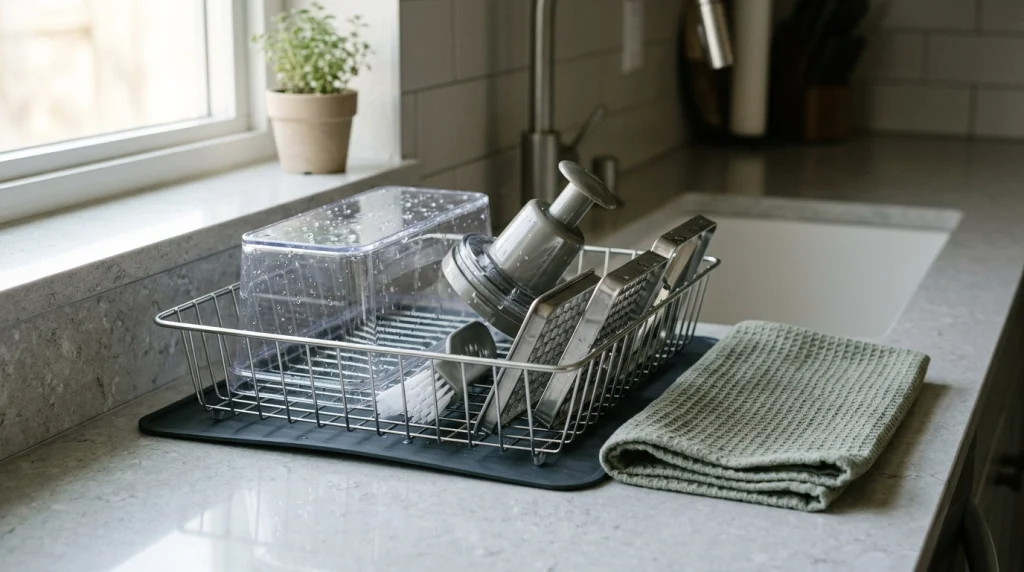
Place the cleaned components on a clean drying rack and allow them to dry completely. Use a clean towel on accessible surfaces if needed, but avoid dragging it across exposed blades.
Once everything is dry, reinstall the components according to the manual. Store the chopper in a dry location, with the blade insert protected and out of children’s reach.
How Do You Remove Stuck Food From a Chopper Grid?
When food becomes wedged between the blades, soak the removable component briefly in warm, soapy water if its care instructions permit soaking. Then loosen the residue with the supplied cleaning tool or a soft brush.
The best approach depends on the ingredient. Starchy potatoes, fibrous vegetables, and juicy tomatoes leave different kinds of residue.
| Food residue | Why it sticks | Cleaning method |
|---|---|---|
| Potato | Starch and compacted pieces | Rinse promptly and use a suitable brush. |
| Onion | Thin layers and papery skins | Remove loose skins and brush the grooves gently. |
| Tomato | Seeds, pulp, and juice | Rinse with water and wash away remaining pulp. |
| Carrot | Firm fibers and small fragments | Use the cleaning comb or a soft brush. |
| Leafy greens | Thin leaves and fibrous strands | Rinse thoroughly and remove visible strands with a suitable tool. |
These are practical cleaning approaches, not timed performance tests. The amount of residue depends on the vegetable, how firmly it was pressed, and the design of the cutting grid.
What if food remains stuck after rinsing?
Don’t reach through the grid or push food out with a knife. Instead, repeat the permitted soaking and brushing process, following the manufacturer’s instructions for safe handling.
If residue remains inaccessible, check whether the grid can be removed or whether the manufacturer recommends a specific cleaning accessory. Stop if the component won’t release normally or appears damaged.
Can You Put a Push Down Chopper in the Dishwasher?
Some push down choppers are dishwasher-safe, but others require handwashing or have components that must stay out of the dishwasher. Always check the manual for your exact model before choosing a cleaning method.
For example, the OXO official website provides product information and care guidance for its kitchen tools. Check the instructions for the specific model you own because different designs may have different cleaning requirements.
| Component | Handwashing approach | Dishwasher guidance |
|---|---|---|
| Blade grid | Wash carefully with a suitable brush. | Use only if the manual permits it. |
| Collection container | Wash with mild soap and rinse. | Check the permitted rack and cycle. |
| Press plate | Clean between teeth and grooves. | Confirm that the component is dishwasher-safe. |
| Lid and hinges | Wipe and clean accessible crevices. | Check whether the lid can be immersed or washed mechanically. |
Even when a chopper is dishwasher-safe, removing large food particles first helps prevent residue from remaining in narrow openings. Place sharp inserts securely according to the manufacturer’s directions so they cannot shift and injure someone unloading the dishwasher.
When the manual is missing, look up the manufacturer’s instructions using the product’s model name or number. Don’t assume dishwasher safety based only on the appearance of the plastic or metal.
What Cleaning Mistakes Should You Avoid?
Most cleaning problems come from rushing, using the wrong tool, or treating every chopper as if it had the same construction. A few simple precautions help protect both the cutting mechanism and your hands.
- Waiting until food dries: Dried starch and vegetable fibers can be harder to remove than fresh residue.
- Using your fingers to clear the grid: Sharp intersecting edges can cut skin even when the chopper is not in use.
- Scraping with a knife: A slipping knife can cause injury or damage plastic components.
- Using harsh cleaners: Abrasive powders, aggressive chemicals, and unsuitable scouring pads may damage surfaces.
- Forcing parts apart: Broken clips or hinges can make the chopper unsafe to operate.
- Storing the chopper while wet: Trapped moisture can contribute to odors and may affect metal components.
- Assuming every part is dishwasher-safe: A lid or locking mechanism may have different care requirements from the container.
For general food-contact hygiene, the USDA Food Safety and Inspection Service provides food safety information about cleaning utensils and food-preparation surfaces.
Routine cleaning after chopping vegetables usually starts with thorough washing and rinsing. If your chopper needs sanitizing because of a particular contamination concern, use only a method suitable for its materials and permitted by its manufacturer.
How Can You Keep a Push Down Chopper Cleaner Between Uses?
A little attention during meal preparation makes the final wash easier. The goal is to prevent food from drying inside the grid and to avoid transferring scraps from one ingredient to another.
- Rinse between ingredients: Clear onion skins or tomato pulp before moving to another food when residue builds up.
- Prepare oversized pieces first: Cut vegetables to fit the grid instead of forcing large pieces through it.
- Use the supplied cleaner: Keep the cleaning accessory somewhere easy to reach.
- Wash after every use: Remove food residue before putting the chopper away.
- Inspect before storage: Check for trapped scraps, moisture, damaged clips, and loose parts.
I recommend treating the cleaning tool as part of the chopper rather than an accessory to put away and forget. Keeping it close to the sink makes it easier to clear the grid immediately after meal preparation.
For additional food-handling guidance, FoodSafety.gov provides general advice about cleaning food-preparation surfaces and utensils.
Which Vegetable Chopper Features Make Cleaning Easier?
If your current chopper traps food repeatedly, its design may be part of the problem. When comparing replacements, prioritize removable components, accessible blade grids, and clear care instructions over the number of attachments alone.
| Feature | Why it matters | What to check |
|---|---|---|
| Removable grid | Improves access to trapped food. | Whether removal is straightforward and safe. |
| Cleaning comb | Helps clear residue between blade openings. | Whether the tool fits the supplied grid. |
| Detachable container | Makes washing and drying easier. | Whether corners and seams are accessible. |
| Clear care instructions | Helps prevent damage from incorrect washing. | Separate guidance for the lid, grid, and container. |
| Fewer difficult crevices | Reduces places where residue can hide. | The design of hinges, grooves, and locking tabs. |
A dishwasher-safe label can be useful, but it doesn’t automatically make a product easier to maintain. A design that lets you remove stuck food safely may matter more when you prepare vegetables every day.
Product Recommendations: Choppers and Cleaning Tools
If you’re considering a replacement or a better cleaning accessory, I’d start with products that have identifiable parts and manufacturer care guidance. These options serve different needs, so confirm the exact model’s instructions before buying.
🏆 Best for straightforward maintenance
OXO Good Grips Vegetable Chopper
★★★★☆
This manual chopper has a collection container and a cutting mechanism designed for food preparation. Check the current model’s removable components and care instructions if easy cleaning is your main priority.
💰 Best for multiple cutting options
Mueller Pro-Series Vegetable Chopper
★★★★☆
This style combines a collection container with interchangeable cutting attachments. Compare the included accessories and cleaning instructions before choosing it for frequent vegetable preparation.
🧽 Best for cleaning assistance
Soft-Bristle Kitchen Cleaning Brush
★★★★☆
A small, soft-bristle brush can help remove residue from accessible grooves and removable parts. Choose one that’s easy to rinse and appropriate for your chopper’s materials.
These are practical starting points rather than hands-on test rankings. Prices, included accessories, availability, and model specifications can change, so check the current listing and official care instructions before purchasing.
Frequently Asked Questions
1. How do you clean a push down chopper without getting cut?
Remove the food container and detachable parts according to the manufacturer’s instructions. Rinse the grid carefully and use a supplied cleaning comb or suitable soft brush to remove trapped food, keeping your fingers away from the cutting edges throughout the process.
2. Can I soak a vegetable chopper in soapy water?
You can soak removable components if the manufacturer permits it. Avoid soaking lids with enclosed mechanisms, non-removable hinges, or parts with specific immersion restrictions. A short soak can loosen dried vegetable residue, but it should never replace careful brushing and rinsing.
3. How do I clean dried potato or onion from the blade grid?
Rinse the removable grid and soak it briefly in warm, soapy water if permitted. Use the supplied cleaning tool to loosen the residue, then rinse again. Never use your fingers, a knife tip, or force to remove food wedged between sharp blades.
4. Why does my vegetable chopper still smell after washing?
Odors can remain when food particles or moisture collect in the container, grooves, lid, or hinges. Separate the removable parts, wash accessible surfaces with mild dish soap, rinse thoroughly, and let everything dry completely before storing it.
5. How often should I clean my push down vegetable chopper?
Wash your chopper after every use, including when you prepare only a small amount of food. Clean it between ingredients when residue builds up, and pay particular attention to the cutting grid and container. Regular cleaning helps prevent food buildup and lingering odors.
Final Takeaway: Keep Your Chopper Clean and Ready to Use
Cleaning a push down chopper doesn’t need to be difficult. Empty it promptly, separate the approved removable components, rinse away loose food, and use the proper cleaning tool to clear the grid safely.
Finish with mild soap, a thorough rinse, and complete drying before storage. Most importantly, follow your model’s care instructions rather than assuming every chopper can be dismantled or placed in the dishwasher in the same way.
If your current chopper repeatedly traps food, consider a model with accessible removable parts and clear cleaning instructions. A few minutes of careful maintenance can make your next meal-preparation session simpler and safer.
Affiliate disclosure: This article contains affiliate links. If you purchase through these links, RecipesPalette may earn a commission at no additional cost to you.