Easy Fried Chicken Without Deep Frying – Healthier Crispy Method Explained
You want crispy, juicy fried chicken without hauling out a deep fryer or drowning food in oil. I’ll show simple ways to get that golden crunch using a pan, oven, or air fryer and a few smart tricks that cut fat and mess. You can make true “fried” chicken at home that’s crisp and flavorful without deep frying by using buttermilk or a light dredge, hot oil in a shallow pan or air fryer, and proper temperature control.
I’m Emma Reed, and I tested these methods so you don’t have to guess which works best. I’ll walk you through easy steps, key ingredients, and quick tips to avoid soggy breading and overcooked meat, so dinner comes out great every time.
Key Takeways
- Choose a simple coating and proper heat for crisp results without deep frying.
- Use pan-frying, oven-roasting, or air frying to cut oil and cleanup.
- Follow a few timing and seasoning tips to keep chicken juicy and crunchy.
Why Choose Easy Fried Chicken Without Deep Frying

I want crispy, flavorful chicken that fits my health goals, saves time, and keeps my kitchen tidy. The methods I use cut oil, lower cleanup, and still give me the crunch and juiciness I expect.
Health Benefits
I cut a lot of added fat by avoiding full deep frying. Pan-frying with a shallow layer of oil, baking, or using an air fryer can reduce oil absorption by 50% or more compared with deep frying. That means fewer calories per serving and less saturated fat on the plate.
I still get a crispy crust by using techniques like a buttermilk soak and a seasoned flour or breadcrumb coating. I can choose healthier oils with higher smoke points, such as avocado or refined canola oil, to keep oxidation and off-flavors low. For more on oil choices and safe frying temps, I consult USDA guidance on cooking oils and temperatures.
Kitchen Convenience
I avoid hauling a large pot of hot oil and a bulky deep fryer. I use a single heavy skillet, a rimmed baking sheet, or an air fryer basket that fits on my counter. These tools are easier to store and clean than a deep fryer.
Clean-up becomes simple: a quick wipe of the pan and a soak for the coating tools. If I use the oven, I line the pan with foil or a wire rack to catch drips and keep the oven cleaner. Using an air fryer or oven also cuts the risk of oil splatters and lowers the chance of burns.
Time-Saving Aspects
I save time on prep and recovery. I don’t have to wait for a very large volume of oil to heat to 350–375°F; instead I heat a skillet or preheat an air fryer for just a few minutes. Cooking times are predictable: thin boneless pieces take about 10–15 minutes; bone-in pieces take 25–35 minutes in the oven.
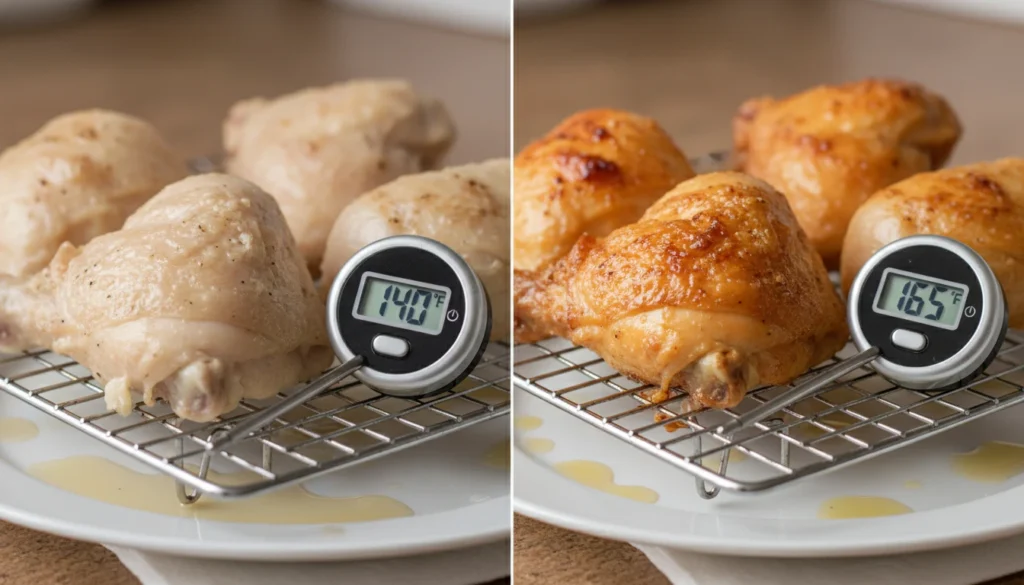
I also cut time on oil handling. There’s no long cool-down period before disposal or storage. If I plan ahead, I can use a simple dredge and refrigerate pieces briefly, then cook in batches quickly. For safe internal temperatures, I rely on a meat thermometer to confirm poultry reaches 165°F.
Essential Ingredients for Easy Fried Chicken
I focus on three things that make fried chicken crisp, juicy, and full of flavor: the right chicken pieces, a sturdy coating, and a smart seasoning mix. These items are easy to find and work well when you cook on the stove, in an oven, or in an air fryer.
Chicken Cuts Selection
I choose chicken pieces based on cooking time and how much meat I want. Bone-in thighs and drumsticks give more flavor and stay juicier during pan-frying or oven-baking. If I want faster, leaner pieces, boneless, skin-on chicken breasts or thighs cook quicker and still crisp well.
For even cooking, I pound thick breasts to an even thickness or cut them in half. I pat the chicken dry with paper towels to help the coating stick and to get a better crust. If I have time, I brine the pieces in saltwater or buttermilk for 1–4 hours to add moisture and tenderness.
Coatings and Breading
I build a coating that holds up without deep frying by using a three-step breading: flour, egg (or buttermilk), then seasoned flour or panko. All-purpose flour gives a classic crust. For extra crunch, I swap half the flour for panko or crushed cornflakes.
I season each layer, not just the outer flour. That means salt and pepper in the flour and a bit in the wet step. For pan-frying, I use a neutral oil with a high smoke point (canola, vegetable, or peanut oil). For oven or air-fryer methods, I spray the breaded pieces lightly with oil to promote browning. For technique tips, I refer to trusted cooking guides like USDA food safety pages for handling raw poultry safely.
Seasoning Blends
I keep one go-to seasoning blend: 1 tsp salt and 1/2 tsp black pepper per pound of chicken, plus 1 tsp paprika and 1/2 tsp garlic powder. For heat, I add 1/4–1/2 tsp cayenne. I mix these into the flour and taste a pinch to check balance.
For Southern-style flavor, I add onion powder and a pinch of dried thyme. For a herby twist, I use dried oregano and lemon zest. I also use seasoned salt or a pre-made poultry rub when I need to save time. For reliable spice ratios and food safety tips, I sometimes consult resources like Serious Eats or the Food Network for tested seasoning ideas.
Popular Cooking Methods Without Deep Frying
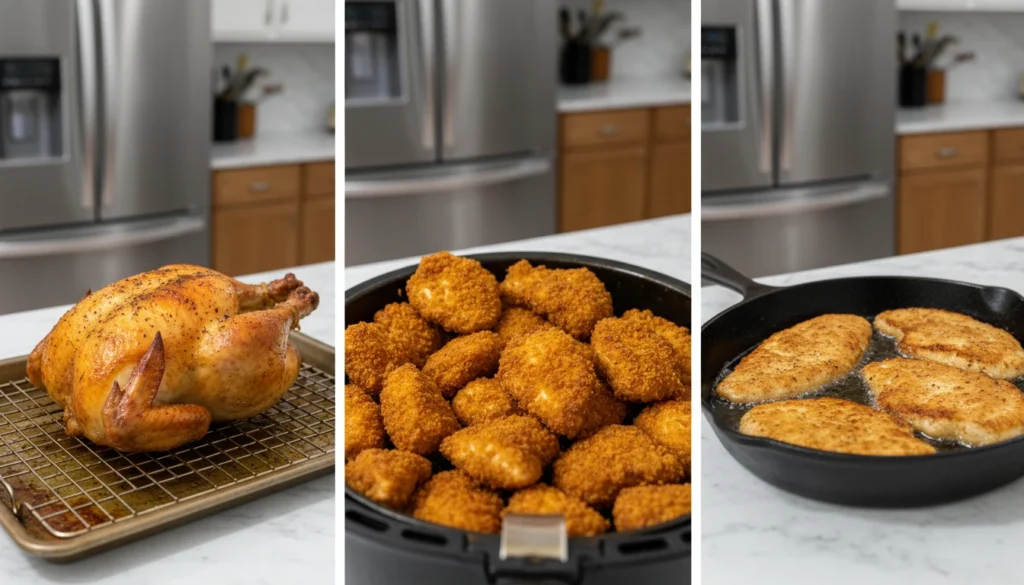
I’ll show practical ways to get crispy, juicy chicken using an oven, an air fryer, or a skillet. Each method explains temperature, timing, oil use, and simple tips to boost crunch and flavor.
Oven-Baked Technique
I preheat the oven to 425°F (220°C) for bone-in pieces or 400°F (205°C) for boneless. I pat the chicken dry, dredge it in a well-seasoned mix of flour, salt, pepper, and optional paprika or garlic powder, then spray or brush the pieces lightly with oil. I arrange pieces on a wire rack set over a rimmed baking sheet so hot air circulates and the coating crisps on all sides.
I bake bone-in chicken 35–45 minutes and boneless 20–30 minutes, turning once halfway for even browning. I use a meat thermometer to reach 165°F (74°C) in the thickest part. For extra crunch, I finish under the broiler 1–2 minutes, watching closely to avoid burning. For a reliable time/temperature chart, I consult USDA cooking guidelines.
Air Fryer Method
I set the air fryer to 375°F (190°C) for most pieces. I use the same seasoned dredge as the oven method but spray each piece well with oil to promote Maillard browning in the hot circulating air. I don’t overcrowd the basket; I leave at least ½ inch between pieces so air can move freely.
I cook boneless pieces 10–15 minutes and bone-in 18–25 minutes, flipping once halfway. I check internal temperature for 165°F (74°C). For a crispier crust, I increase heat to 400°F (205°C) for the final 2–3 minutes. The air fryer cuts oil use dramatically and often yields results similar to deep frying. For model-specific tips and safety, I reference the air fryer manual and manufacturer guidelines.
Pan Frying Approach
I use a heavy skillet (cast iron works best) and heat ½ to 1 inch of oil to 325–350°F (163–177°C). I heat the oil slowly, then test with a small scrap of bread: it should sizzle steadily. I lightly coat chicken so the oil still contacts the surface; this keeps crust formation quick and prevents sogginess.
I cook skin-side down first for even browning, 4–7 minutes per side for boneless and 8–12 minutes for bone-in, adjusting time by thickness. I maintain oil temperature by lowering heat after adding pieces and avoid overcrowding. I drain on a wire rack rather than paper towels to keep crispness. For safe frying practices, I follow basic kitchen safety advice from trusted sources like the National Restaurant Association.
Step-by-Step Recipe Instructions
I will guide you through prepping, coating, and cooking so the chicken turns out crispy on the outside and juicy inside. Follow the times, temperatures, and techniques for consistent results.
Preparation and Marination
I start with bone-in, skin-on pieces for flavor and moisture; use breasts, thighs, or drumsticks. Pat each piece dry with paper towels so the coating sticks. For a quick marinade, whisk 1 cup buttermilk (or 1 cup milk + 1 tbsp vinegar) with 1 tsp salt, 1/2 tsp black pepper, and 1 tsp hot sauce. Submerge the chicken and chill for 1–4 hours. Longer gives more tenderness, but don’t go past 12 hours.
If you prefer no buttermilk, I brine instead: dissolve 1/4 cup salt and 2 tbsp sugar in 4 cups water, add the chicken, and refrigerate 1–4 hours. Always bring chicken toward room temperature for 20–30 minutes before breading to ensure even cooking. Use food-safety rules: keep chicken under 40°F in the fridge until ready.
Breading Chicken Evenly
I set up a three-station breading line: flour mix, egg wash, and seasoned flour or panko. For the flour mix, combine 2 cups all-purpose flour, 1 tbsp paprika, 1 tsp garlic powder, 1 tsp onion powder, 1 tsp salt, and 1/2 tsp black pepper. Beat 2 large eggs with 2 tbsp milk for the egg wash. Dip each piece into flour, then egg, then the flour mix again, pressing firmly to form an even crust.
Let coated pieces rest on a wire rack for 10–15 minutes to set the crust. This step prevents the coating from falling off while cooking. Use a shallow pan or rimmed baking sheet to keep breaded pieces single-layered. For extra crisp, mix half panko and half flour in the final dredge. For more tips on safe handling and temps, I consult USDA food safety guidance.
Cooking Process and Timing
I prefer pan-frying in 1/4–1/2 inch oil or using an air fryer for less oil. For pan-frying, heat oil to 325–350°F; use a thermometer to keep it steady. Place chicken skin-side down, cook 6–8 minutes per side for thighs and drumsticks, 8–10 minutes per side for larger breasts, adjusting heat so the crust browns but doesn’t burn. Finish thicker pieces in a 350°F oven for 10–15 minutes if needed.
If using an air fryer, preheat to 375°F. Spray the basket lightly with oil, arrange pieces without crowding, and cook 18–25 minutes, turning once halfway. Check internal temperature with a meat thermometer: 165°F in the thickest part. Let chicken rest 5–7 minutes on a wire rack before serving to lock in juices. For oil selection and smoke points, I refer to resources like the American Heart Association.
Tips for Achieving Crispy Fried Chicken Without Deep Frying
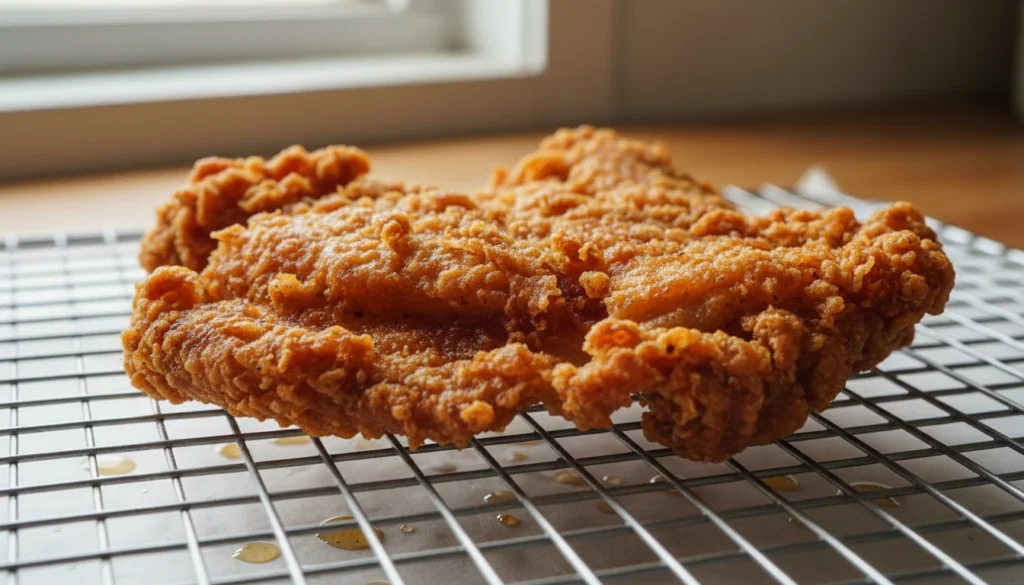
I focus on three things: dry, even coating; hot, steady heat; and a little oil where it counts. Small changes in prep and cooking make the biggest difference in crunch and juiciness.
Secrets to Maximum Crunch
I start with a dry surface. Pat chicken pieces thoroughly with paper towels before any brine or coating. Moisture on the skin or meat thins the dredge and creates steam that softens crusts.
I use a two-step coating: seasoned flour or panko first, then a light mist of oil or an egg wash if I need better adhesion. Panko and cornstarch both boost crunch. Mix equal parts flour and panko for texture and flavor.
Temperature matters. I preheat the oven to 425–450°F for oven “fried” pieces and set the air fryer to 375–400°F. Hot air seals the crust quickly and keeps the inside juicy. Arrange pieces so they don’t touch; air must flow around them.
I let coated pieces rest on a wire rack for 10–15 minutes before cooking. That helps the coating set and prevents it from falling off during cooking.
Avoiding Soggy Coating
I keep wet and dry elements separate until just before cooking. If I marinate in buttermilk, I shake off excess and dredge in dry mix immediately. Excess moisture makes a soggy crust.
I use a wire rack over a sheet pan while baking. The rack lifts chicken so air circulates below. Direct contact with a pan traps steam and softens the coating.
Don’t overcrowd the pan or basket. Overcrowding lowers air temperature and creates steam. Cook in batches if needed. I also flip pieces once halfway through to brown both sides evenly and release trapped steam.
If coating absorbs oil or looks greasy after cooking, I increase oven temp by 25°F next time or add a brief broil at the end to dry the surface for 1–2 minutes.
Using Cooking Sprays for Crispiness
I prefer a light, even oil mist to brushing heavy oil. Sprays reduce sogginess and give a uniform brown color. Use an oil with a high smoke point like avocado, sunflower, or refined canola.
Before cooking, I lightly spray both the rack and the chicken coating. In an air fryer, I spray between bursts of cooking to refresh surface oil and encourage Maillard browning. Aim for thin layers—too much oil pools and softens the crust.
If using a brush, I apply oil sparingly and focus on edges and thick parts where browning lags. For oven methods, a 1–2 minute blast under the broiler after spraying helps crisp the outer layer without overcooking the inside.
Flavor Variations and Creative Seasonings
I focus on bold, simple mixes that transform basic chicken into distinct styles. Use small swaps in the marinade and coating to change the whole flavor without extra steps.
Spicy and Classic Styles
I start with a basic buttermilk or brine soak to keep chicken juicy. For a classic southern taste, I mix flour + cornstarch, salt, black pepper, garlic powder, and a pinch of smoked paprika for color. I press the dry mix onto the wet chicken so the crust sticks well when baked or air-fried.
For heat, I add layers instead of one big dose. I mix cayenne into the flour (start with 1/2 tsp per cup) and blend hot sauce into the buttermilk. I also use chili powder or crushed red pepper flakes in the dredge for textured heat. To finish, I spray a little oil before cooking to get a crisp, browned crust and brush more hot sauce right after cooking for extra kick.
International Inspirations
I borrow a few global profiles that work with shallow methods like air-frying or oven-baking. For a Korean-style coating, I add gochugaru (Korean chili flakes), garlic powder, and a touch of sugar to the flour, and toss cooked pieces with a glaze of gochujang, soy sauce, honey, and rice vinegar.
For a Mediterranean take, I use lemon zest, oregano, and ground cumin in the dredge, and swap buttermilk for a yogurt-herb marinade with garlic and lemon juice. For an Indian-style option, I marinate in yogurt with turmeric, garam masala, and ginger, then coat with a mix of chickpea flour and panko for crispness.
Serving Suggestions and Side Dishes
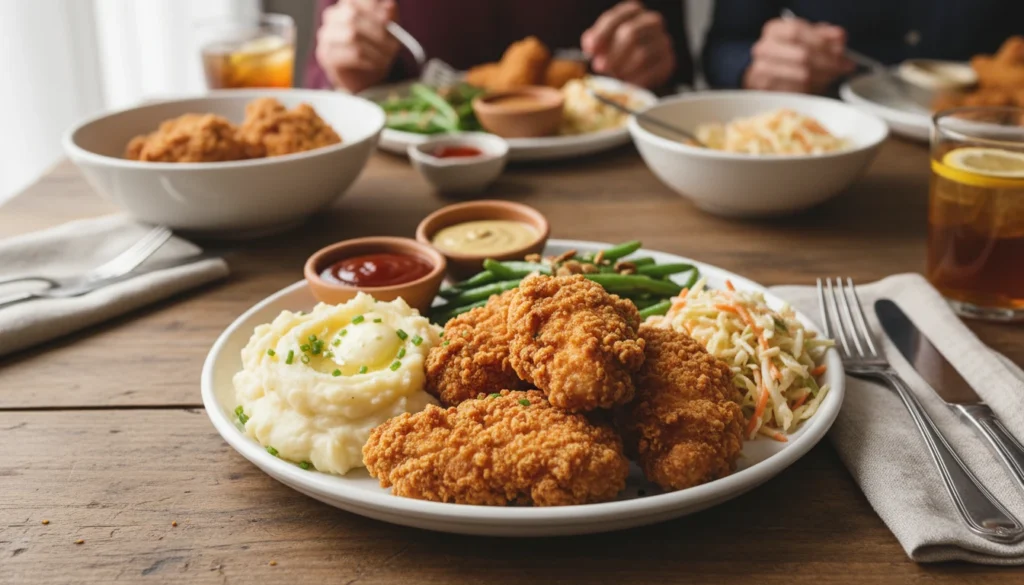
I pick sides that balance texture and flavor: something crisp or bright to cut the fried crust, and something creamy or starchy to make the meal comforting. I also choose simple sauces that take minutes to make.
Perfect Complementary Sides
I like a mix of vegetables, starches, and a light salad. For vegetables, roasted green beans or sautéed collard greens add color and a slight bite. They take 10–15 minutes and use olive oil, garlic, and a pinch of salt.
For starches, mashed potatoes or buttery corn on the cob work well. Mashed potatoes should be whipped with milk and butter for a smooth contrast to the chicken’s crunch. Corn on the cob can be boiled or grilled and finished with a little paprika.
I often add a refreshing side to cut grease. A quick cucumber-tomato salad with vinegar and dill brightens the plate. Or serve coleslaw made with a light yogurt or vinegar dressing instead of heavy mayo.
Dipping Sauces
I keep at least two sauces: one sweet and one tangy. A honey-mustard is my go-to sweet option — mix 2 parts honey with 1 part Dijon and 1 part mayo or Greek yogurt for creaminess.
For tangy heat, I make a simple hot sauce mayo: combine store-bought hot sauce with mayo or Greek yogurt, and add lemon juice to taste. It takes under five minutes and pairs nicely with crispy breading.
I also offer a chilled ranch or garlic-herb yogurt for guests who want a milder dip. Label the sauces so people know what they’re choosing.
Storing and Reheating Leftovers
I store cooled fried chicken in a single layer inside an airtight container or wrapped tightly in foil. This helps keep the crust intact and stops moisture from making it soggy. If pieces must stack, I separate layers with parchment paper.
For short-term storage, I refrigerate for up to 3–4 days. For longer storage, I freeze pieces on a tray until firm, then transfer them to a sealed freezer bag. I label bags with the date so I use older pieces first.
When reheating, I avoid the microwave alone because it can make the crust limp. Instead, I use the oven or an air fryer. I preheat the oven to 375°F (190°C), place chicken on a wire rack over a baking sheet, and heat 10–15 minutes until warm and crisp.
If I use an air fryer, I set it to 350–375°F (175–190°C) for 6–10 minutes. I check pieces halfway and flip if needed for even crisping. For frozen chicken, I add a few extra minutes and start from frozen only in the oven or air fryer.
Quick tips:
- Bring refrigerated chicken to room temperature for 10–15 minutes before reheating.
- Use a thermometer; the internal temperature should reach 165°F (74°C).
- Re-crisp with a light spray of oil if the crust looks dry.
Common Mistakes and Troubleshooting
I often see home cooks skip temperature checks, and that ruins the crust. If the oil or oven is too cool, the coating soaks up fat and turns soggy. Use a thermometer for pan oil (about 350°F / 175°C) or an oven set to 400°F (205°C) for baked methods.
I sometimes hear people crowd the pan or basket. Crowding drops the cooking temperature and causes uneven browning. Cook in batches and leave space around each piece.
I have fixed many dry chickens by adjusting cook time and thickness. Thick pieces need longer at lower heat; thin pieces finish fast. Use a probe thermometer and pull chicken at 160–165°F (71–74°C), then rest it.
I find skipping a brine or buttermilk step cuts flavor and moistness. A simple brine or buttermilk soak for 1–4 hours boosts juiciness and helps the coating stick. Pat chicken dry before dredging to get a crisper crust.
Common visual issues have quick fixes. If coating falls off, press it on and let it set in the fridge for 15–30 minutes. If the crust is pale, increase heat slightly or finish under a hot broiler for 1–2 minutes—watch closely.
Quick checklist:
- Check oil/oven temp with a thermometer.
- Avoid crowding; cook in batches.
- Brine or soak for juiciness.
- Use a probe thermometer for doneness.
- Rest meat before serving.
FAQs
Can I use an air fryer instead of pan-frying?
Yes. An air fryer gives crisp skin with much less oil. I lightly spray the breaded pieces and cook at high heat for a shorter time.
How do I know when the chicken is done?
I use an instant-read thermometer. The safe internal temperature for chicken is 165°F (74°C) in the thickest part. Visual cues help too: clear juices and no pink near the bone.
What oil should I use for pan-frying?
I pick oils with a high smoke point like peanut, canola, or vegetable oil. These give steady heat and a crisp crust without burning.
Can I bake instead of frying?
Yes. Baking yields a crisp result if you use a wire rack so air circulates and spray the breading with oil. It’s lower in fat but may be less crunchy than pan- or air-fried methods.
How do I keep the coating from falling off?
Pat chicken dry, coat in flour, dip in egg or buttermilk, then recoat. I press the coating gently so it sticks and let it rest 10–15 minutes before cooking.
Will this method work for wings, thighs, and breasts?
I use the same steps but adjust cooking time by size. Smaller pieces cook faster; bone-in pieces take longer.
Conclusion
I showed simple ways to get crispy, juicy chicken without a deep fryer. You can use a skillet, oven, or air fryer and still get great texture and flavor.
My tips focus on timing, coating, and temperature control. They help you avoid soggy breading and dry meat.
Try small tests with one method before cooking for guests. That lets you adjust seasoning and cook time to match your equipment.
I recommend keeping an instant-read thermometer and a wire rack nearby. They make a big difference in safety and crispiness.
If you want a quick reference, use this checklist:
- Brine or buttermilk for moisture.
- Dry coating thoroughly before cooking.
- Cook at consistent heat; finish in oven if needed.
- Rest chicken on a rack for a few minutes.
I believe these steps give you fried-chicken results with less oil and less fuss. Pick the method that fits your kitchen and taste, and keep practicing until it feels right.