How Do You Use a Dish Rack? Simple Step-by-Step Guide

Quick Answer
To use a dish rack, place it beside the sink with its drain tray or spout aimed toward the sink. Wash and rinse your dishes, then arrange them upright with enough open space for water to drain and air to circulate. The FDA’s safe food handling guidance also recommends keeping dishes, utensils, and kitchen surfaces clean with hot, soapy water.
Quick Steps
- Position the rack: Keep it close to the sink and direct drainage toward the basin.
- Wash thoroughly: Remove food and grease before anything reaches the rack.
- Load plates upright: Use the slots rather than stacking plates flat.
- Angle bowls and cups: Let water escape instead of collecting inside them.
- Separate utensils: Give forks, spoons, and tools enough room to dry.
- Unload when dry: Put everything away once moisture has disappeared.
One Important Tip
- Don’t overcrowd the rack. Airflow is what turns a pile of wet dishes into dry dishes.
A dish rack looks simple, but the way you load it makes a noticeable difference. Poor placement can leave water trapped inside bowls, create countertop puddles, or make dishes unstable.
I treat the rack as the final part of hand washing, not just a place to dump wet dishes. A few small habits keep the whole sink area cleaner and easier to manage.
What Is a Dish Rack and What Does It Do?
A dish rack is a kitchen organizer designed to hold washed dishes while excess water drains and the surfaces air-dry. Most models include plate slots, an open area for bowls or cups, and a separate utensil holder.
Definition: A dish rack is a raised drying structure that keeps washed kitchenware separated so water can drain and air can move around it.
The biggest advantage is separation. When wet plates and bowls sit directly on a counter or on top of each other, moisture becomes trapped between their surfaces.
- Plate slots keep dishes upright.
- Open sections hold bowls, mugs, and containers.
- Utensil cups keep smaller items contained.
- Drain boards collect or redirect dripping water.
- Side holders may support glasses, bottles, or cutting boards.
Some racks sit entirely on the countertop. Others fit over the sink or use a spout to return water directly to the basin.
How Do You Use a Dish Rack Step by Step?
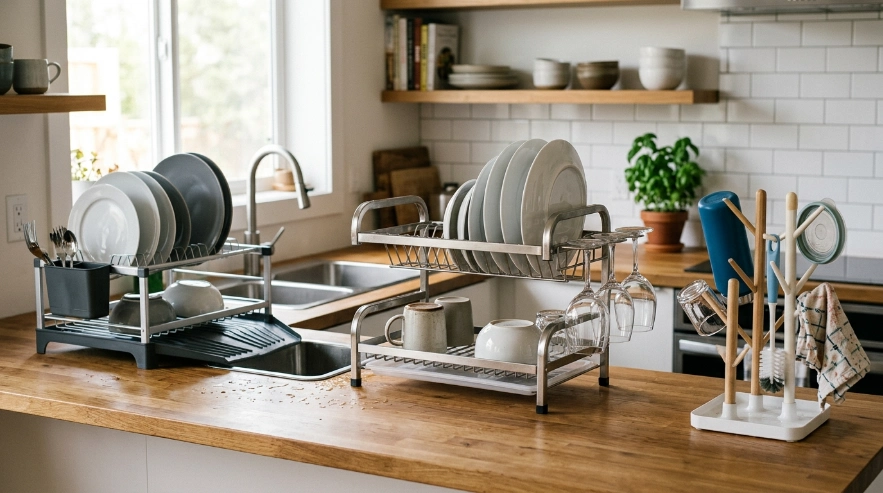
The basic method is simple: set up the rack correctly, wash the dishes, and load each item so water has an easy escape route. I usually load the largest pieces first because they determine how much usable space remains.
- Place the rack beside the sink. Keep it on a stable, clean surface.
- Point the drain toward the sink. Adjust the board or spout if your model has one.
- Wash and rinse each item. Remove soap, grease, and visible food residue first.
- Load plates vertically. Put one plate into each available divider.
- Angle bowls and cups. Position openings downward or at an angle so water cannot pool.
- Add utensils separately. Avoid packing the utensil holder into one solid bundle.
- Let everything air-dry. Put dishes away after their surfaces and crevices are dry.
1. Position the Rack Before You Start Washing
Start with the drainage system. A rack with a drain board should slope or empty toward the sink rather than toward the backsplash or edge of the counter.
I also check that the rack does not wobble. A stable base matters once you add heavy dinner plates, glass bowls, or cookware.
2. Wash and Rinse Before Loading
The rack is for clean dishes. It should not become a holding area for greasy pans or partly washed utensils.
The USDA recommends washing kitchen utensils and surfaces with warm, soapy water as part of good kitchen hygiene. You can review its washing and kitchen-cleaning guidance for more food-safety context.
3. Put Plates in the Slots First
Slide dinner plates, side plates, and similar flat pieces into separate slots. Keep them upright instead of laying several plates on top of each other.
This arrangement exposes both sides to air. It also reduces the chance of water remaining trapped between two plates.
4. Add Bowls, Cups, and Food Containers
Bowls need an angle that allows their lowest point to drain. A bowl sitting perfectly upright can hold a small pool of rinse water for much longer.
- Bowls: Place sideways or tilted downward.
- Mugs: Position opening-down on a safe rack section.
- Glasses: Use designated holders when available.
- Food containers: Separate lids from bases.
- Bottles: Use upright drying posts when your rack includes them.
5. Load Utensils Without Packing Them Together
Spoons often nest together, which traps water between them. Mix their positions so they remain separated.
Place sharp knives where their blades cannot surprise someone reaching into the utensil cup. I prefer drying larger knives separately on a stable, protected surface or purpose-built holder.
How Should You Arrange Different Dishes on the Rack?
Every piece does not need the same drying position. The best arrangement depends on its shape and where water naturally collects.
| Item | Best Position | Main Reason | Common Mistake |
|---|---|---|---|
| Dinner plates | One per vertical slot | Exposes both sides to air | Stacking plates flat |
| Bowls | Tilted downward | Lets trapped water escape | Leaving bowl upright |
| Cups and mugs | Opening down or angled | Drains the inside | Allowing water to pool |
| Spoons and forks | Loose in utensil section | Prevents nesting | Packing them tightly |
| Container lids | Vertical or angled | Dries rims and grooves | Laying them flat |
Think about gravity first. If water can run downward without hitting another dish, you are usually loading the item correctly.
Can You Put Pots and Pans on a Dish Rack?
Yes, many pans can dry on a sturdy dish rack, provided the rack can support their size and weight. Large cookware should not lean against fragile glasses or create an unstable stack.
Whether a pan should be hand washed in the first place depends on its material. This guide on whether a frying pan can go in the dishwasher explains why care instructions differ between stainless steel, nonstick, cast iron, and other surfaces.
- Stainless steel: Usually fine on a sturdy rack after washing.
- Nonstick cookware: Keep away from sharp metal edges that could scratch it.
- Glass cookware: Place only where it cannot slide or tip.
- Heavy pans: Use the strongest part of the rack or dry separately.
If you are unsure how aggressively a pan should be cleaned, see the guide covering when and how you should wash a frying pan. The washing method matters just as much as the drying method.
Should Cast Iron Air-Dry in a Dish Rack?
I would not leave cast iron sitting wet in a rack. Moisture remaining on unprotected iron can encourage rust.
Instead, follow a material-specific routine and dry it promptly. Our guide to cleaning a cast iron frying pan covers the extra care this cookware needs.
How Do You Keep a Dish Rack Clean?
A dish rack receives clean dishes, but it still collects water, soap residue, mineral deposits, and occasional food particles. Regular cleaning keeps that buildup from becoming part of your drying routine.
I give the drain tray the most attention because standing water tends to collect there first. A quick rinse is easier than dealing with dried residue later.
- After daily use: Empty obvious standing water and remove food particles.
- Regularly: Wash removable trays and utensil cups with warm, soapy water.
- Check corners: Look around feet, joints, drainage channels, and cup holders.
- Rinse well: Remove cleaner or soap residue.
- Dry the rack: Give the rack itself a chance to dry between heavy uses.
The CDC notes that routine cleaning with soap and water removes dirt and many germs from household surfaces. Its home cleaning guidance also recommends extra attention when kitchen surfaces become contaminated by raw meat or poultry juices.
Follow the manufacturer’s instructions for the rack itself. Coated steel, stainless steel, aluminum, bamboo, plastic, and silicone parts can have different cleaning restrictions.
What Are the Most Common Dish Rack Mistakes?
Most dish rack problems come from overcrowding rather than from the rack itself. When every surface touches another surface, air has fewer paths through the load.
- Stacking wet plates: Moisture becomes trapped between them.
- Leaving bowls upright: Water collects at the bottom.
- Blocking the drain: The tray fills instead of emptying.
- Overloading one side: The rack may become unstable.
- Nesting spoons together: Their inner surfaces stay wet.
- Ignoring the tray: Standing water and residue accumulate.
- Mixing knives carelessly: Someone may grab a blade unexpectedly.
Another mistake is placing freshly washed dishes onto a dirty rack. The CDC’s broader food-safety guidance emphasizes keeping utensils, cutting boards, countertops, and other kitchen surfaces clean.
Is a Dish Rack Better Than Towel-Drying?
For everyday dishes, I usually prefer air-drying because it requires less handling. A rack also keeps dishes organized while they dry.
| Method | Hands-On Work | Counter Space | Best Use |
|---|---|---|---|
| Dish rack | Low after loading | Moderate | Routine air-drying |
| Clean towel | Higher | Low | Items needed immediately |
| Dishwasher drying | Low | No rack space | Dishwasher-safe loads |
A dishwasher can also be efficient for compatible dishes. ENERGY STAR provides a current dishwasher efficiency guide comparing modern certified machines with hand washing.
A rack still earns its space for delicate glasses, cookware, knives, reusable bottles, and anything you prefer to wash by hand. That is why I keep one next to the sink even in a kitchen with a dishwasher.
How Long Should Dishes Stay in a Dish Rack?
Leave dishes in the rack until they are dry enough to store without trapping moisture. There is no single drying time because airflow, humidity, dish material, rack design, and how heavily you load it all matter.
Check the places that dry last. Cup rims, bowl bases, container grooves, and the undersides of utensils often hold small drops after broad flat surfaces feel dry.
- Look: Check for visible droplets.
- Touch: Feel rims, grooves, and bases.
- Reposition: Turn an item if one area remains wet.
- Store: Put it away once the remaining moisture is gone.
If drying seems unusually slow, remove a few pieces from the rack. More open space often improves airflow immediately.
Which Dish Rack Style Works Best?
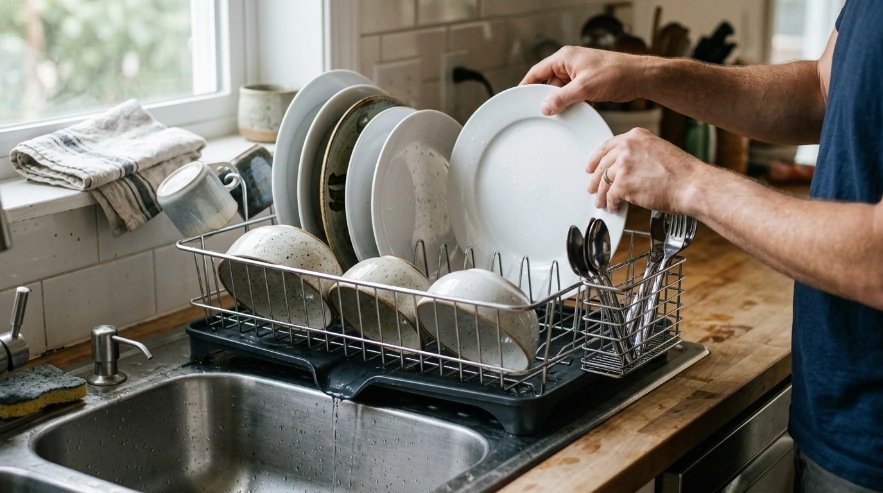
The best rack is the one that fits your normal washing load and directs water where you want it to go. In 2026, useful designs range from large countertop frames to compact racks for bottles and awkward kitchen pieces.
If you’re ready to pick one, here’s what I’d actually recommend:
🏆 Best Overall
OXO Good Grips Aluminum Dish Rack
★★★★☆ 4.8/5 — Daniel’s Rating
The aluminum-and-plastic rack measures 17.9 × 14.9 × 6.6 inches and includes an adjustable drain board, removable utensil cup, plate holders, and an open center. I like this layout for everyday mixed loads because it gives plates structure without making bowls difficult to place.
✨ Best Premium
simplehuman Steel Frame Dishrack
★★★★☆ 4.7/5 — Daniel’s Rating
This large-capacity rack uses a swivel drainage spout, an inner drainage tray, silicone-capped plate holders, and an integrated holder for up to four extra-large wine glasses. I would choose it when drainage control and organization matter more than keeping the purchase price low.
🥤 Best for Bottles
Full Circle Branch Out Upright Drying Rack
★★★★☆ 4.4/5 — Daniel’s Rating
At 14.1 × 6.7 × 6.7 inches, this compact rack uses seven rotating arms and a ribbed ceramic base for bottles, cloths, lids, and awkward pieces. I see it as a useful companion rack when tall items keep taking over your normal plate rack.
Frequently Asked Questions
Do you put wet dishes directly on a dish rack?
Yes. After washing and rinsing the dishes, place them directly into a clean dish rack while they are still wet. Arrange them so water can drain downward and air can reach the surfaces instead of stacking several wet items together.
Should plates face a certain way in a dish rack?
Keep plates upright in the rack’s dividers rather than flat against each other. If your drain board slopes in one direction, arranging them consistently can also help keep the load stable and make unloading easier.
Do cups go upside down on a dish rack?
Cups should usually face downward or sit at a downward angle so rinse water can escape. Make sure the rim rests on a clean, stable surface and that the cup is not sealed tightly against a flat tray where moisture could remain trapped.
Can you leave dishes in the drying rack overnight?
Yes, clean dishes can remain in the rack while they finish air-drying. Once they are dry, putting them away frees space for the next load and makes it easier to clean and dry the rack itself.
Do you need a drain board under a dish rack?
You need some way to manage dripping water. A built-in drain board, removable tray, absorbent drying mat, or over-the-sink design can all work, provided water does not remain pooled around the clean dishes.
Final Takeaway
So, how do you use a dish rack correctly? Wash and rinse your dishes, place the rack where it can drain safely, then load each piece in a position that lets gravity and airflow do the drying.
Keep plates upright, angle bowls and cups, separate utensils, and avoid overcrowding. Clean the rack itself regularly, and your hand-washing routine becomes much easier to manage.
The biggest improvement costs nothing. Give wet dishes enough space to drain, and let the rack do the rest.