
How to Make a Small Rack: A Compact DIY Dish Rack

Quick Answer
To make a small dish rack, cut two 12.5-inch hardwood rails, drill seven matching pairs of holes, and glue 3/8-inch dowels into them. Join the rails with two braces, place the finished rack over a drain tray, and test your available space against this dish rack size guide before cutting.
Quick building steps
- Measure first: Mark the exact counter area you can spare beside the sink.
- Cut two rails: Make matching 12.5 × 1.5 × 0.75-inch hardwood pieces.
- Mark seven positions: Start one inch from each end and use roughly 1.75-inch spacing.
- Drill the holes: Use a 3/8-inch brad-point bit with a depth stop.
- Add the dowels: Glue fourteen 5.5-inch hardwood pegs into the paired holes.
- Control drainage: Set the rack above a removable tray or ribbed drying mat.
Before you build
- Test the planned peg spacing with your thickest everyday plate before drilling all fourteen holes.
A small dish rack works best when it is designed around the dishes you actually wash. I prefer starting with the available counter space instead of copying a full-size rack and simply shrinking every measurement.
This 2026 design has a footprint of about 12.5 × 10 inches. It is meant for apartments, RV kitchens, coffee stations, or any sink area where a standard rack feels oversized.
What Is a Small Dish Rack?
A small dish rack is a ventilated holder that keeps washed plates, cups, or lids separated while water drains away. The important parts are support, airflow, stability, and a way to keep runoff off the counter.
This project uses two parallel hardwood rails with upright dowels. If you need more capacity, the site’s full-size DIY dish rack guide covers a larger 17-inch design.
- Finished footprint: About 12.5 × 10 inches
- Approximate height: 6.25 inches
- Plate slots: Six, depending on plate thickness
- Dowel diameter: 3/8 inch
- Recommended tray: At least 13.5 × 11 inches
- Skill level: Beginner with careful measuring
How Small Should You Make a Dish Rack?
Make the rack large enough to support your biggest everyday plate but small enough to leave usable counter space. For this design, 12.5 × 10 inches gives you a compact footprint without making the frame excessively narrow.
My rule is simple: tape the proposed footprint onto the counter before buying wood. Put your largest plate inside that outline and check the faucet, backsplash, cabinet, and sink clearance.
| Rack plan | Footprint | Counter area | Best fit |
|---|---|---|---|
| Mini build in this guide | 12.5 × 10 in | 125 sq in | Tiny counters, RVs, one person |
| Compact DIY benchmark | 16 × 12 in | 192 sq in | Apartments, everyday washing |
| Larger DIY benchmark | 17 × 12 in | 204 sq in | Higher daily capacity |
The 12.5 × 10-inch version uses about 35% less counter area than a 16 × 12-inch rack. That difference becomes noticeable when your drying zone shares space with food preparation.
What Materials Do You Need to Make a Small Rack?
Use straight, smooth hardwood without chemical treatment, old paint, or an unknown coating. Maple, beech, and white oak are practical choices for a rack that will be repeatedly exposed to damp dishes.
For another construction layout, compare the materials in this homemade dish rack guide. The smaller build below uses fewer pieces and keeps the design intentionally simple.
Cut list for a 12.5-inch dish rack
| Part | Quantity | Size | Job |
|---|---|---|---|
| Hardwood rails | 2 | 12.5 × 1.5 × 0.75 in | Support plates and pegs |
| Hardwood dowels | 14 | 3/8 in diameter × 5.5 in | Create six plate slots |
| Cross braces | 2 | 7 × 1 × 0.5 in | Hold rails parallel |
Tools and supplies
- Tape measure
- Sharp pencil
- Combination square
- Saw suitable for clean crosscuts
- Drill or drill press
- 3/8-inch brad-point drill bit
- Depth-stop collar or tape marker
- Two clamps
- Water-resistant wood glue
- 120- and 220-grit sandpaper
- Removable drain tray or silicone mat
- Protective finish suitable for the intended use
- Eye protection and appropriate dust protection
How Do You Make a Small Wooden Dish Rack Step by Step?
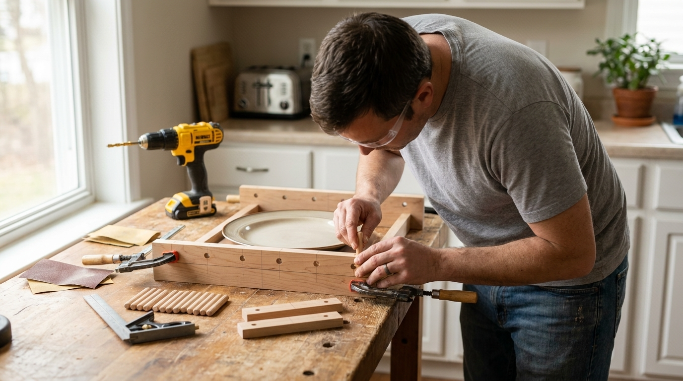
The easiest way to get a square rack is to prepare both rails together. Matching pieces reduce the chance of repeating a measurement differently on the second rail.
1. Cut the two base rails
Cut two hardwood rails to exactly 12.5 inches. Place them side by side and trim or sand the ends until both lengths match.
Do not round the corners heavily yet. Square edges make measuring and alignment easier during assembly.
2. Mark the seven peg positions
Draw a centerline along the top of each rail. Mark the first peg position one inch from the end.
- Mark the first center at 1 inch.
- Mark the next at 2.75 inches.
- Continue at 4.5, 6.25, 8, 9.75, and 11.5 inches.
- Transfer each mark across both rails with a square.
- Check the pattern before drilling.
This layout creates roughly 1.75 inches between neighboring peg centers. Test the spacing with your thickest plate because heavy stoneware may need more room.
3. Drill matching holes
Use a 3/8-inch brad-point bit and drill each socket about 3/8 to 1/2 inch deep. A depth stop prevents one hole from becoming much deeper than another.
Clamp each rail securely before drilling. OSHA’s woodworking safety guidance highlights the hazards associated with woodworking machines, so use the guards and safety procedures appropriate to your tools.
- Start slowly: Let the brad point settle directly on the pencil mark.
- Keep the bit vertical: Use a drill guide if you are drilling by hand.
- Clear chips: Lift the bit periodically instead of forcing packed material deeper.
- Test one hole: Check the dowel fit before drilling the remaining thirteen.
4. Cut and sand the dowels
Cut fourteen dowels to 5.5 inches. A simple stop block helps keep every peg the same length.
Sand the exposed ends smooth and soften the sharp rim slightly. Cutting and sanding create airborne particles, so review OSHA’s wood-dust guidance and control dust appropriately.
5. Dry-fit the rack
Push the dowels into the holes without glue and position the two rails seven inches apart on the inside. Place the two cross braces between them near the ends.
Now load your largest plate. This is the moment to change peg spacing, rail width, or height before the joints become permanent.
- Check that the plate cannot tip easily.
- Confirm the rim does not bind between pegs.
- Make sure the rack sits completely inside its drain tray.
- Check that the faucet and cabinet remain usable.
6. Glue and square the frame
Add a small amount of water-resistant wood glue inside each dowel socket. Insert the pegs and wipe away squeeze-out before it hardens.
Glue the cross braces between the rails and clamp the assembly lightly. Measure corner-to-corner in both directions; matching diagonal measurements indicate a square frame.
7. Sand and protect the wood
After the adhesive has cured according to its instructions, sand the frame through 120 and then 220 grit. Ease sharp corners without removing so much material that the joints become exposed.
Apply a finish whose manufacturer permits the intended kitchen and moisture exposure. Coat hidden surfaces too, then respect the product’s full cure time before placing wet dishes on the rack.
How Should a Small Dish Rack Drain?
A compact rack still needs enough space for water to escape. The wooden frame should not spend hours resting in a puddle after every load.
The FDA Food Code requires air-drying or adequate draining for cleaned and sanitized equipment in food-service environments. While a home kitchen is different, the air-drying principle is a useful reason to keep dishes separated and runoff controlled.
- Sloped drain tray: Best when the rack sits immediately beside the sink.
- Ribbed silicone mat: Good when you need something removable and easy to store.
- Stainless tray: Rigid and easy to wipe, but often heavier.
- Small silicone feet: Add clearance beneath the wooden rails for airflow.
Empty standing water after washing dishes. Let the tray and wooden rack dry separately whenever moisture remains underneath.
What Mistakes Make a Small Dish Rack Fail?
Compact dimensions leave less room for errors. A hole that is slightly crooked can become much more noticeable when the entire rack is only twelve inches long.
- Building before measuring: A rack can be small and still block the faucet.
- Spacing pegs by guesswork: Thick plates may jam between narrow supports.
- Drilling freehand too quickly: Leaning pegs make the slots inconsistent.
- Skipping the dry fit: Problems become harder to fix once glue is added.
- Ignoring drainage: Constant standing water shortens the useful life of the frame.
- Using damaged wood: Splits and loose grain become harder to clean.
- Loading too much: A six-slot mini rack is not designed for a family-sized washing load.
- Using the finish too early: Follow the full cure time, not only the dry-to-touch time.
How Do You Keep a Wooden Dish Rack Clean?
Keep cleaning simple and frequent. Remove dried dishes, empty the tray, and allow every part of the rack to dry rather than leaving moisture trapped underneath.
USDA FSIS publishes broader food-safety and handling guidance. For your wooden rack, also follow the cleaning limitations printed by the manufacturer of the finish you selected.
- After use: Empty standing water and separate the rack from the tray.
- Weekly: Wash the removable tray and inspect the peg joints.
- Regularly: Look for rough wood, cracks, discoloration, or loose components.
- Before refinishing: Let the rack dry completely and follow the coating instructions.
What If You Do Not Have Woodworking Tools?
You do not need to force a woodworking project into a kitchen that only needs a simple drying surface. A clean cooling rack over a rimmed tray, a roll-up sink rack, or a washable drying mat can handle small loads.
The guide to dish rack alternatives covers several options that require little or no construction. That route can make more sense in rentals or temporary kitchens.
Helpful Tools for Building a Small Dish Rack
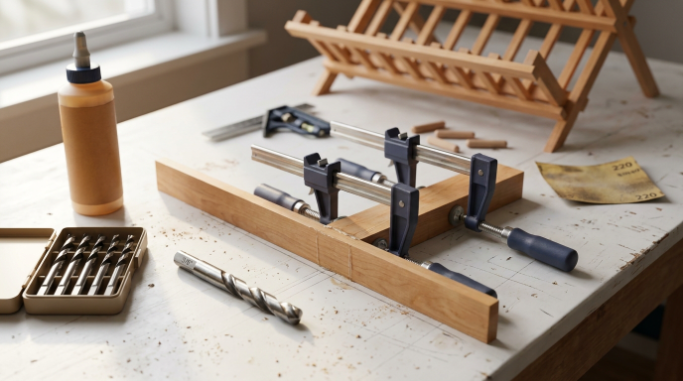
If you are starting with only basic tools, these are the three purchases I would prioritize for more consistent joints and cleaner assembly:
💧 Best for Wet Joints
Titebond III Ultimate Wood Glue
★★★★★ 4.9/5
Titebond III uses a waterproof Type I-rated formula and is sold for interior and exterior woodworking. I like it here because the small dowel joints are the part of the rack most exposed to repeated splashes.
🎯 Best for Clean Holes
DEWALT DW1720 Brad-Point Drill Bit Set
★★★★☆ 4.3/5
This six-piece wood-drilling set includes a 3/8-inch brad-point bit, which matches the dowels in this plan. I prefer a brad point for this job because its center spur makes repetitive hole placement easier to control.
🗜️ Best for Assembly
BESSEY GSCC2.506 6-Inch Bar Clamp
★★★★☆ 4.5/5
The compact clutch-style clamp has enough capacity for small rails, braces, and other light woodworking parts. I would use two so the rack can be held square while the cross braces set.
Frequently Asked Questions
How small can I make a dish rack?
A practical mini rack can be around 12 to 13 inches long and about 10 inches deep, provided your plates remain stable. Do not choose dimensions from the counter alone; test your largest plate and make sure its center of gravity stays safely inside the rack.
How far apart should the pegs be?
About 1.75 inches on center is a useful starting point for this compact design. Plate rims vary, so place two temporary pegs at your planned spacing and test the thickest plate you regularly wash before drilling the complete pattern.
Can I make a dish rack from scrap wood?
Use scrap only when you know what the material is and how it was previously treated. Avoid pressure-treated lumber, unidentified pallet wood, painted scraps with unknown coatings, and badly cracked pieces because a wet kitchen rack should remain smooth and easy to maintain.
Do I need a tray under the rack?
Yes, unless the rack sits completely over the sink or another designed drainage surface. A removable tray or silicone mat catches runoff, protects the counter, and lets you separate the wet components so the wooden frame can dry more completely.
How many plates will this small rack hold?
This layout creates approximately six plate slots between seven pairs of pegs. Actual capacity depends on plate thickness and shape, so treat six as a design target rather than a guaranteed capacity for every dinnerware set.
Build the Rack Around Your Kitchen
Learning how to make a small rack is mostly an exercise in careful sizing. A 12.5 × 10-inch dish rack can save substantial counter space while still holding a small everyday wash load.
Mock up the footprint first, test one real plate, and dry-fit every joint before adding glue. Those simple checks matter more than decorative details when the goal is a compact rack that fits naturally beside your sink.