How to Organize Dishes in a Dish Rack

Quick Answer
To organize dishes in a dish rack, place plates upright in individual slots, angle bowls so water drains out, and put cups upside down without nesting them. Keep utensils separated, leave space for airflow, and place bulky cookware where it cannot lean on fragile dishes. If large pans keep overwhelming your drying area, a dedicated frying pan storage rack can free valuable space.
Quick dish rack setup
- Start with plates: Put large plates upright in the main slots.
- Add bowls: Angle them downward and avoid nesting wet bowls.
- Place cups safely: Set cups upside down on dedicated holders or open rack space.
- Separate utensils: Spread forks, spoons, and cooking tools between compartments.
- Finish with cookware: Put heavy pots and pans in the most stable open area.
- Leave airflow: Keep small gaps between items so moisture can escape.
One rule that prevents most problems
- Never balance a heavy item where it can fall onto a glass, cup, or ceramic bowl.
A dish rack looks simple until dinner leaves you with plates, bowls, mugs, knives, and a frying pan competing for the same space. A poor arrangement leaves water trapped and dishes leaning against each other.
I use one simple rule: organize for drainage first and capacity second. Once water has an easy path downward and air can move between items, the whole rack works better.
What Is the Best Way to Organize Dishes in a Dish Rack?
The best method is to load dishes by shape and weight. Start with stable plates, add bowls and cups, organize utensils, then fit large cookware around them.
A dish rack is a raised holder designed to keep washed kitchenware separated while water drains and the items air-dry. Its slots, holders, and open spaces work best when you match each dish to the right area.
- Clear the rack first. Put away dishes that are already dry.
- Check the drain tray. Make sure water can flow toward the sink or collection tray.
- Load large plates. Use the vertical slots and keep each plate upright.
- Add smaller plates. Keep them together rather than scattering them around the rack.
- Angle bowls downward. Give each bowl enough space to drain.
- Place cups upside down. Keep their open ends facing downward.
- Sort utensils. Spread them through the utensil holder instead of packing everything tightly.
- Add bulky cookware last. Keep heavy pieces low and stable.
A typical dinner load might include four plates, four bowls, several glasses, and a handful of flatware. Loading those items by category takes only a little longer, but the rack stays noticeably easier to unload.
Where Should Plates, Bowls, Cups, and Utensils Go?
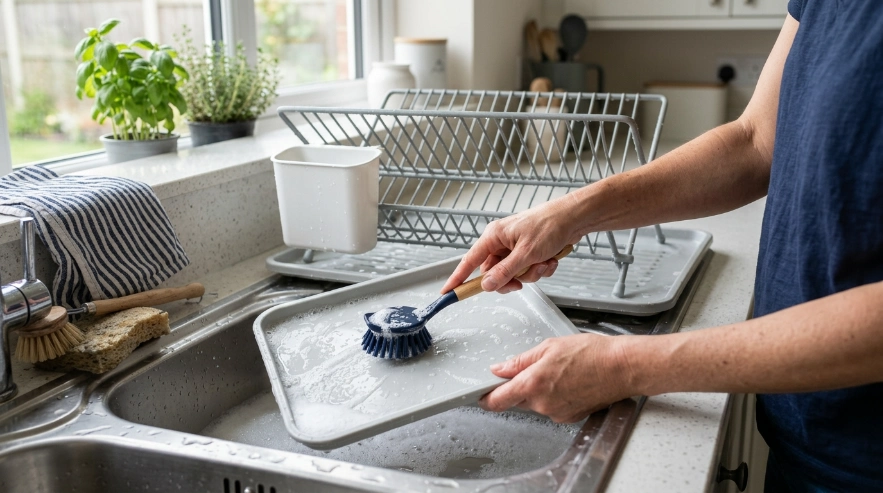
Each type of dish dries best in a slightly different position. The goal is to expose wet surfaces instead of trapping them against another item.
| Item | Best Position | Avoid | Reason |
|---|---|---|---|
| Dinner plates | Upright in slots | Stacking flat | Keeps both sides exposed |
| Bowls | Tilted downward | Nesting together | Lets pooled water escape |
| Mugs | Upside down or angled | Flat upright placement | Prevents water collecting inside |
| Glasses | Securely inverted | Touching heavy cookware | Reduces tipping and contact |
| Flatware | Loosely divided | Tight bundles | Improves separation and airflow |
| Pots and pans | Low, stable, and angled | Balancing over glasses | Keeps the rack stable |
How should you arrange plates?
Put plates vertically into the rack’s slots. Leave a small gap whenever your rack allows it.
I prefer putting dinner plates together and smaller side plates together. That arrangement also makes unloading faster because similar dishes return to the same cabinet.
How should bowls be placed in a dish rack?
Bowls should sit at an angle with their open sides facing downward or sideways. A bowl sitting perfectly upright can collect a puddle at the bottom.
Avoid placing one wet bowl inside another. Nesting blocks airflow and traps moisture between their surfaces.
Should cups and mugs be upside down?
Usually, yes. Cups and mugs should be inverted or sharply angled so rinse water can leave the inside.
If your rack has cup holders, use them before filling the main dish area. Keep mugs far enough apart that their rims do not lock together.
What is the safest way to organize utensils?
Utensils need separation rather than perfect alignment. Too many spoons pressed together can create wet contact points.
- Forks: Spread them through the compartment instead of bunching them.
- Spoons: Mix their direction so the bowls of the spoons do not nest.
- Chopsticks: Keep them in a compartment where they cannot fall through the rack.
- Cooking tools: Give long spatulas and ladles their own open area when possible.
- Sharp knives: Keep blades controlled and away from places where someone may reach blindly.
For general kitchen cleaning and food-safety practices, the USDA Food Safety and Inspection Service provides guidance on cleaning surfaces, utensils, and food-preparation areas.
How Do You Make Dishes Dry Faster in a Dish Rack?
Dishes dry faster when water can drain and air can reach both sides. Crowding is usually the biggest obstacle.
Loading more dishes into every available inch may look efficient. In practice, touching surfaces can hold water where air cannot reach it.
- Keep dishes apart: Avoid pressing plate faces together.
- Angle curved items: Tilt bowls, lids, and containers so water runs toward an edge.
- Keep the drain clear: Don’t let utensils or cookware block the tray’s drainage path.
- Empty dry dishes: Remove finished items instead of stacking new wet dishes around them.
- Give deep items room: Pots, mixing bowls, and food containers need more open space than flat plates.
Rack design matters too. OXO’s sinkware collection includes racks designed around drainage, raised surfaces, and flexible loading.
Simplehuman also builds direct drainage into several dish rack designs. These features can reduce standing water around the rack when the spout is positioned correctly.
How Should You Organize Pots, Pans, and Large Items?
Large cookware should go in the strongest, most open part of your drying area. Never let a heavy pan depend on a glass or plate for support.
Pots and frying pans can quickly consume the rack’s entire footprint. I usually decide before loading whether the pan belongs in the rack or needs a separate drying spot.
- Large frying pans: Lean them securely with the cooking surface angled downward.
- Pot lids: Use plate slots when the lids fit safely without forcing the dividers.
- Mixing bowls: Place them open-side down at an angle.
- Cutting boards: Stand them vertically when the rack can support their weight.
- Heavy cookware: Keep it low so it cannot tip onto lighter dishes.
If cookware regularly dominates your drying rack, heavy-duty pan organizers can separate long-term storage from everyday dish drying.
Cast iron deserves special attention because it should not sit wet for long periods. Our guide to preventing rust on cast iron skillets explains why thorough drying and sensible storage matter.
What Dish Rack Organization Mistakes Should You Avoid?
The most common mistakes come from trying to squeeze too much into the rack. A rack should support dishes without turning them into one unstable pile.
- Overloading the rack: Excess weight can make dishes lean and reduce airflow.
- Nesting wet bowls: Trapped water remains between their surfaces.
- Stacking plates flat: The touching faces stay wet longer.
- Blocking the drain: Water can collect in the tray instead of moving toward the sink.
- Mixing glassware with pans: Heavy cookware can shift into fragile items.
- Leaving dry dishes indefinitely: They take space needed for the next washing cycle.
- Ignoring the rack itself: The tray and corners still need regular cleaning.
I also avoid treating the rack like permanent dish storage unless the design is intended for that purpose. Putting dry dishes away keeps the washing area open and makes the next cleanup easier.
How Do You Organize a Dish Rack in a Small Kitchen?
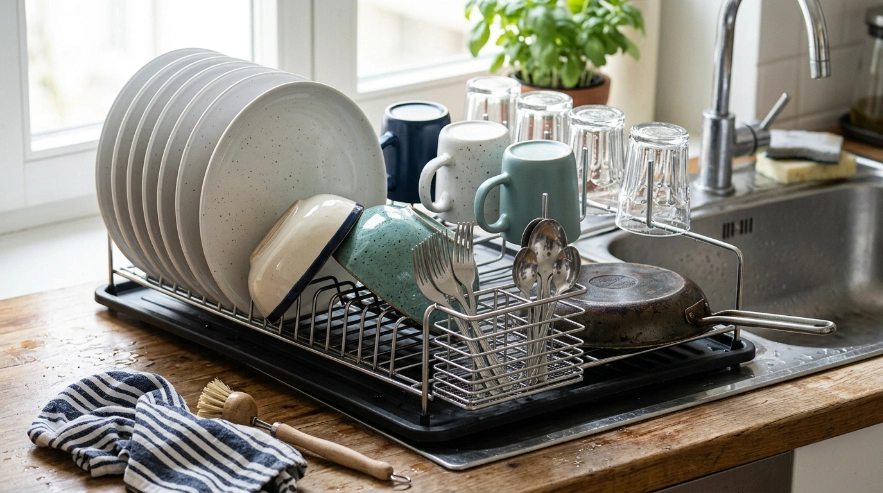
In a small kitchen, prioritize vertical space and equipment that can disappear after use. A smaller rack loaded correctly often works better than an oversized rack covering the counter.
As of 2026, folding and compact drying racks are widely available. They are especially useful when food preparation and dish drying share the same limited counter.
Use a rack that folds or collapses
A foldable rack can be stored after the dishes are dry. OXO’s Fold Flat Dish Rack, for example, is designed to collapse for compact storage.
Use the area over the sink
An over-sink rack or roll-up drying platform moves some drying activity away from the counter. Measure your sink carefully before choosing one.
Wash large cookware separately
Dry your normal plates and glasses first. Then use the empty rack or a separate open area for pans, baking sheets, and large bowls.
Unload whenever a group becomes dry
You do not need to wait for every item to finish drying. Moving dry plates to the cabinet creates space for slower-drying containers and cookware.
Independent testing by Serious Eats has also highlighted stability, drainage, capacity, and versatility as practical differences among dish rack designs.
How Often Should You Empty and Clean a Dish Rack?
Put away dishes once they are dry instead of allowing clean cookware to accumulate for days. The rack itself should also be cleaned whenever you notice residue, standing water, or buildup.
Cleaning frequency depends on how often you hand-wash dishes. A heavily used rack needs attention sooner than one used only for occasional mugs.
- Remove all dishes and detachable accessories.
- Empty any standing water from the drain tray.
- Wash accessible rack surfaces with warm water and appropriate dish soap.
- Pay extra attention to corners, joints, and utensil cups.
- Rinse away cleaner and loosened residue.
- Allow the rack and tray to dry before reloading them.
Always follow the manufacturer’s cleaning instructions for your specific rack. Materials, coatings, wooden components, and dishwasher-safe parts vary by model.
Dish Rack Organization Setup I Recommend
You don’t need a complicated system. I recommend dividing the rack into predictable zones every time you wash dishes.
- Center slots: Dinner plates and side plates.
- Open rack area: Bowls and food containers.
- Side holders: Cups, mugs, and glasses.
- Utensil cup: Forks, spoons, and small kitchen tools.
- Stable outer edge: Larger cookware only when safely supported.
This system removes much of the guesswork. After a few washing sessions, you automatically know where each item belongs.
If you’re ready to improve the setup itself, these are the dish rack styles I’d consider first:
🏆 Best Overall
Simplehuman Steel Frame Dishrack
★★★★☆ 4.8/5 Editor Rating
The rack combines a steel frame, integrated drainage, swivel spout, utensil storage, and space for glassware. I like this style for households that hand-wash several types of dishes in one batch.
📦 Best Foldaway
OXO Good Grips Foldaway Dish Rack
★★★★☆ 4.6/5 Editor Rating
Its plate rack folds down when you need room for cookware, while the cup area and drainage spout help organize mixed loads. I’d choose it when flexibility matters more than leaving a fixed rack permanently on display.
🏠 Best for Small Kitchens
OXO Good Grips Aluminum Fold Flat Dish Rack
★★★★☆ 4.7/5 Editor Rating
The aluminum frame folds flat and includes raised surfaces plus a movable utensil cup. I prefer this format for apartments where reclaiming counter space after washing matters.
Frequently Asked Questions
Should plates face the same direction in a dish rack?
Yes. Keeping plates upright and facing the same direction makes the rack more stable and easier to unload. More importantly, avoid pressing plate surfaces tightly together because small gaps allow water to drain and air to circulate.
Is it okay to stack dishes while they are still wet?
It is better not to stack wet dishes tightly. Stacking can trap water between plates, bowls, or containers, slowing the drying process and forcing you to separate them again before putting them away.
Should utensils point up or down in a dish rack?
Follow the design of your utensil holder and prioritize safe handling. Sharp knife blades should never be positioned where someone could accidentally grab them, while spoons and forks should be spread apart enough to avoid nesting together.
Can I put pots and pans in a dish rack?
Yes, if the rack is strong and large enough to hold them securely. Place heavy cookware low and stable, angle it for drainage, and never balance a pan where it could fall onto plates, glasses, or mugs.
Why are my dishes still wet after sitting in the rack?
Crowding, nesting, poor drainage, or flat positioning can leave water trapped. Rearrange bowls and cups at steeper angles, create gaps between plates, empty standing water, and avoid blocking airflow with oversized cookware.
Final Takeaway
Learning how to organize dishes in a dish rack comes down to three things: drainage, airflow, and stability. Put plates upright, angle bowls and cups downward, spread utensils apart, and keep heavy cookware away from fragile items.
Don’t treat maximum capacity as the goal. A slightly less crowded rack is easier to unload, safer for your dishes, and much better at doing the job it was designed to do.
